Deleting Facebook photos on your iPhone is a straightforward process that helps maintain your online presence and privacy, especially for photography enthusiasts. At dfphoto.net, we understand the importance of managing your digital footprint while sharing your photographic journey. This guide offers several methods to remove images from Facebook using your iPhone, ensuring your profile reflects your current preferences. These methods include removing single photos, entire albums and managing photo permissions. This article also covers tips for photographers looking to protect their work and ensure their images are used appropriately online. Learn the latest methods for deleting images, managing privacy settings, and safeguarding your photography on Facebook.
1. Why Delete Facebook Photos on Your iPhone?
There are several reasons why you might want to delete Facebook photos from your iPhone:
- Privacy Concerns: You may want to remove photos you no longer wish to share publicly due to privacy concerns. According to a study by the Pew Research Center in 2019, 74% of Facebook users adjusted their privacy settings, highlighting the importance of controlling your online information.
- Changing Preferences: Your tastes and preferences evolve over time. Photos that once seemed appealing might no longer align with your current aesthetic or personal brand.
- Removing Embarrassing Photos: We all have photos we regret posting. Deleting them can help you curate a more polished and professional online image.
- Copyright Issues: If you accidentally uploaded a photo without the proper permissions, deleting it is essential to avoid copyright infringement. It is important to ensure that every image uploaded to Facebook is either taken by you, or you have permission to share the photo.
- Irrelevant content: Old images or outdated content can be irrelevant to your current photography portfolio or personal brand.
2. How to Delete a Single Facebook Photo on iPhone
Deleting a single photo from Facebook on your iPhone is simple. Here’s how to do it:
- Open the Facebook App: Launch the Facebook app on your iPhone.
- Navigate to Your Profile: Tap the three horizontal lines (Menu) in the bottom right corner, then tap on your name to go to your profile.
- Find the Photo: Scroll down to the “Posts” section or go to the “Photos” tab and locate the photo you want to delete.
- Open the Photo: Tap on the photo to open it.
- Tap the Three Dots: In the top right corner of the photo, tap the three horizontal dots (More options).
- Select “Delete Photo”: A menu will appear. Scroll down and tap “Delete Photo.”
- Confirm Deletion: A confirmation prompt will appear. Tap “Delete” to confirm.
 Delete Photo Option Facebook iOS
3. How to Delete Multiple Facebook Photos on iPhone
While Facebook doesn’t offer a direct “select all” option for deleting multiple photos, you can still manage this efficiently through the Activity Log or by deleting entire albums, which is covered later. The Activity Log allows you to review and remove posts and photos in bulk.
3.1. Using Activity Log to Delete Multiple Photos
- Access Your Activity Log:
- Go to your Facebook profile.
- Tap the three horizontal lines (Menu) in the bottom right corner.
- Scroll down and tap “Settings & Privacy,” then tap “Activity Log.”
- Filter Your Activity:
- Tap “Filters” at the top of the Activity Log.
- Select “Categories” and then choose “Photos and Videos.”
- Select Photos to Delete:
- A list of your photos and videos will appear.
- Tap the checkbox next to each photo you want to delete.
- Remove Selected Photos:
- After selecting the photos, tap “Remove” at the bottom of the screen.
- Confirm the deletion when prompted.
:max_bytes(150000):strip_icc()/002-how-to-delete-facebook-activity-5b70575bc9e77c005771b793.jpg)
3.2. Tips for Deleting Multiple Photos
- Regular Maintenance: Periodically review your photos and delete any that are no longer relevant.
- Use Filters: Utilize the Activity Log filters to sort photos by date or album to make the process more manageable.
4. How to Delete a Facebook Photo Album on iPhone
Deleting an entire album can be quicker if you want to remove a large collection of photos at once. Here’s how:
- Go to Your Profile: Open the Facebook app and go to your profile.
- Navigate to Photos: Tap on the “Photos” tab.
- Select Albums: Tap on “Albums” to see a list of your photo albums.
- Open the Album: Tap the album you want to delete.
- Tap the Three Dots: In the top right corner of the album, tap the three horizontal dots (More options).
- Select “Delete Album”: A menu will appear. Tap “Delete Album.”
- Confirm Deletion: A confirmation prompt will appear. Tap “Delete Album” to confirm.
4.1. Important Considerations Before Deleting Albums
- Backup Important Photos: Before deleting an album, ensure you have backed up any photos you want to keep. Consider using cloud storage services like Google Photos or iCloud.
- Irreversible Action: Deleting an album is permanent. Once deleted, the photos are removed from Facebook and cannot be recovered.
5. Managing Photo Privacy on Facebook
Besides deleting photos, managing the privacy of your existing and future uploads is crucial. Facebook offers several privacy settings to control who can see your photos:
5.1. Adjusting Privacy Settings for Individual Photos
- Open the Photo: Navigate to the photo you want to adjust.
- Tap the Audience Selector: Below your name and the photo’s timestamp, you’ll see an icon indicating the current audience (e.g., “Public,” “Friends,” “Only Me”).
- Choose Your Audience: Tap the audience selector and choose who can see the photo:
- Public: Anyone on or off Facebook.
- Friends: Only your Facebook friends.
- Friends Except…: Allows you to exclude specific friends from seeing the photo.
- Specific Friends: Only selected friends can see the photo.
- Only Me: Only you can see the photo.
5.2. Adjusting Privacy Settings for Albums
- Go to Your Profile: Open the Facebook app and go to your profile.
- Navigate to Photos: Tap on the “Photos” tab.
- Select Albums: Tap on “Albums” to see a list of your photo albums.
- Open the Album: Tap the album you want to adjust.
- Edit the Album:
- Tap the three horizontal dots (More options).
- Select “Edit Album.”
- Adjust Privacy Settings:
- Use the audience selector to choose who can see the album.
- Save your changes.
5.3. Adjusting Default Privacy Settings for Future Posts
- Go to Settings & Privacy:
- Tap the three horizontal lines (Menu) in the bottom right corner.
- Scroll down and tap “Settings & Privacy,” then tap “Settings.”
- Privacy Settings:
- Scroll down to the “Privacy” section.
- Tap “Who can see your future posts?”
- Choose Your Audience:
- Select your preferred audience (Public, Friends, Only Me).
- This setting will apply to all future posts unless you change it for individual posts.
6. Additional Tips for Managing Facebook Photos
Here are some additional tips to help you effectively manage your photos on Facebook:
6.1. Tag Review
Enable tag review to approve or reject tags before they appear on your profile. This gives you control over what photos others can associate with you.
- Go to Settings & Privacy:
- Tap the three horizontal lines (Menu) in the bottom right corner.
- Scroll down and tap “Settings & Privacy,” then tap “Settings.”
- Profile and Tagging:
- Scroll down to the “Audience and Visibility” section and tap “Profile and Tagging.”
- Review Tags:
- Turn on “Review tags that people add to your posts before the tags appear on Facebook?”
6.2. Limit the Audience for Past Posts
You can limit the audience for posts you’ve shared in the past, making them visible only to friends.
- Go to Settings & Privacy:
- Tap the three horizontal lines (Menu) in the bottom right corner.
- Scroll down and tap “Settings & Privacy,” then tap “Settings.”
- Privacy Settings:
- Scroll down to the “Privacy” section.
- Tap “Limit the audience for posts you’ve shared with friends of friends or Public?”
- Limit Past Posts:
- Tap “Limit Past Posts” and confirm.
6.3. Use Facebook’s Photo Transfer Tool
Facebook allows you to transfer your photos and videos to other services like Google Photos, Dropbox, or Koofr. This is useful for backing up your media before deleting them from Facebook.
- Go to Settings & Privacy:
- Tap the three horizontal lines (Menu) in the bottom right corner.
- Scroll down and tap “Settings & Privacy,” then tap “Settings.”
- Your Facebook Information:
- Scroll down to “Your Facebook Information” and tap “Transfer a Copy of Your Photos or Videos.”
- Choose Destination:
- Select the destination service and follow the prompts to transfer your media.
7. Best Practices for Photographers on Facebook
For photographers, managing your presence on Facebook involves more than just deleting unwanted photos. Here are some best practices:
7.1. Watermarking Your Photos
Adding a watermark to your photos can help protect your work from unauthorized use. A watermark is a semi-transparent logo or text overlaid on your image.
- Choose a Watermark: Create a watermark with your logo or name using photo editing software like Adobe Photoshop or free online tools.
- Apply Watermarks: Before uploading to Facebook, apply the watermark to your photos.
- Position Watermarks Strategically: Place watermarks in areas that are difficult to remove without cropping or significantly altering the image.
7.2. Copyright Notices
Include a copyright notice in the description of your photos or albums. This informs viewers that the images are protected by copyright law.
- Example: © [Your Name] All rights reserved. Unauthorized use prohibited.
7.3. Monitoring Your Photos
Regularly monitor your photos on Facebook to ensure they are not being used without your permission. Use tools like Google Image Search to find instances of your photos being used elsewhere on the web.
7.4. Setting Clear Usage Guidelines
In your photo descriptions or album information, clearly state how your photos can be used. For example, specify whether they can be shared, downloaded, or used for commercial purposes.
8. Addressing Common Issues When Deleting Photos
Sometimes, you might encounter issues when trying to delete photos on Facebook. Here are some common problems and how to resolve them:
8.1. Photos Not Deleting
- Check Internet Connection: Ensure you have a stable internet connection. A weak connection can interrupt the deletion process.
- Clear Cache: Clear the Facebook app’s cache to remove temporary files that may be causing issues.
- Go to your iPhone’s Settings.
- Scroll down and tap “General.”
- Tap “iPhone Storage.”
- Find “Facebook” in the list and tap it.
- Tap “Offload App” to clear the cache.
- Update the App: Make sure you are using the latest version of the Facebook app. Outdated versions may have bugs that prevent photos from being deleted.
- Restart the App: Close the Facebook app completely and reopen it.
- Restart Your iPhone: Sometimes, restarting your iPhone can resolve temporary software glitches.
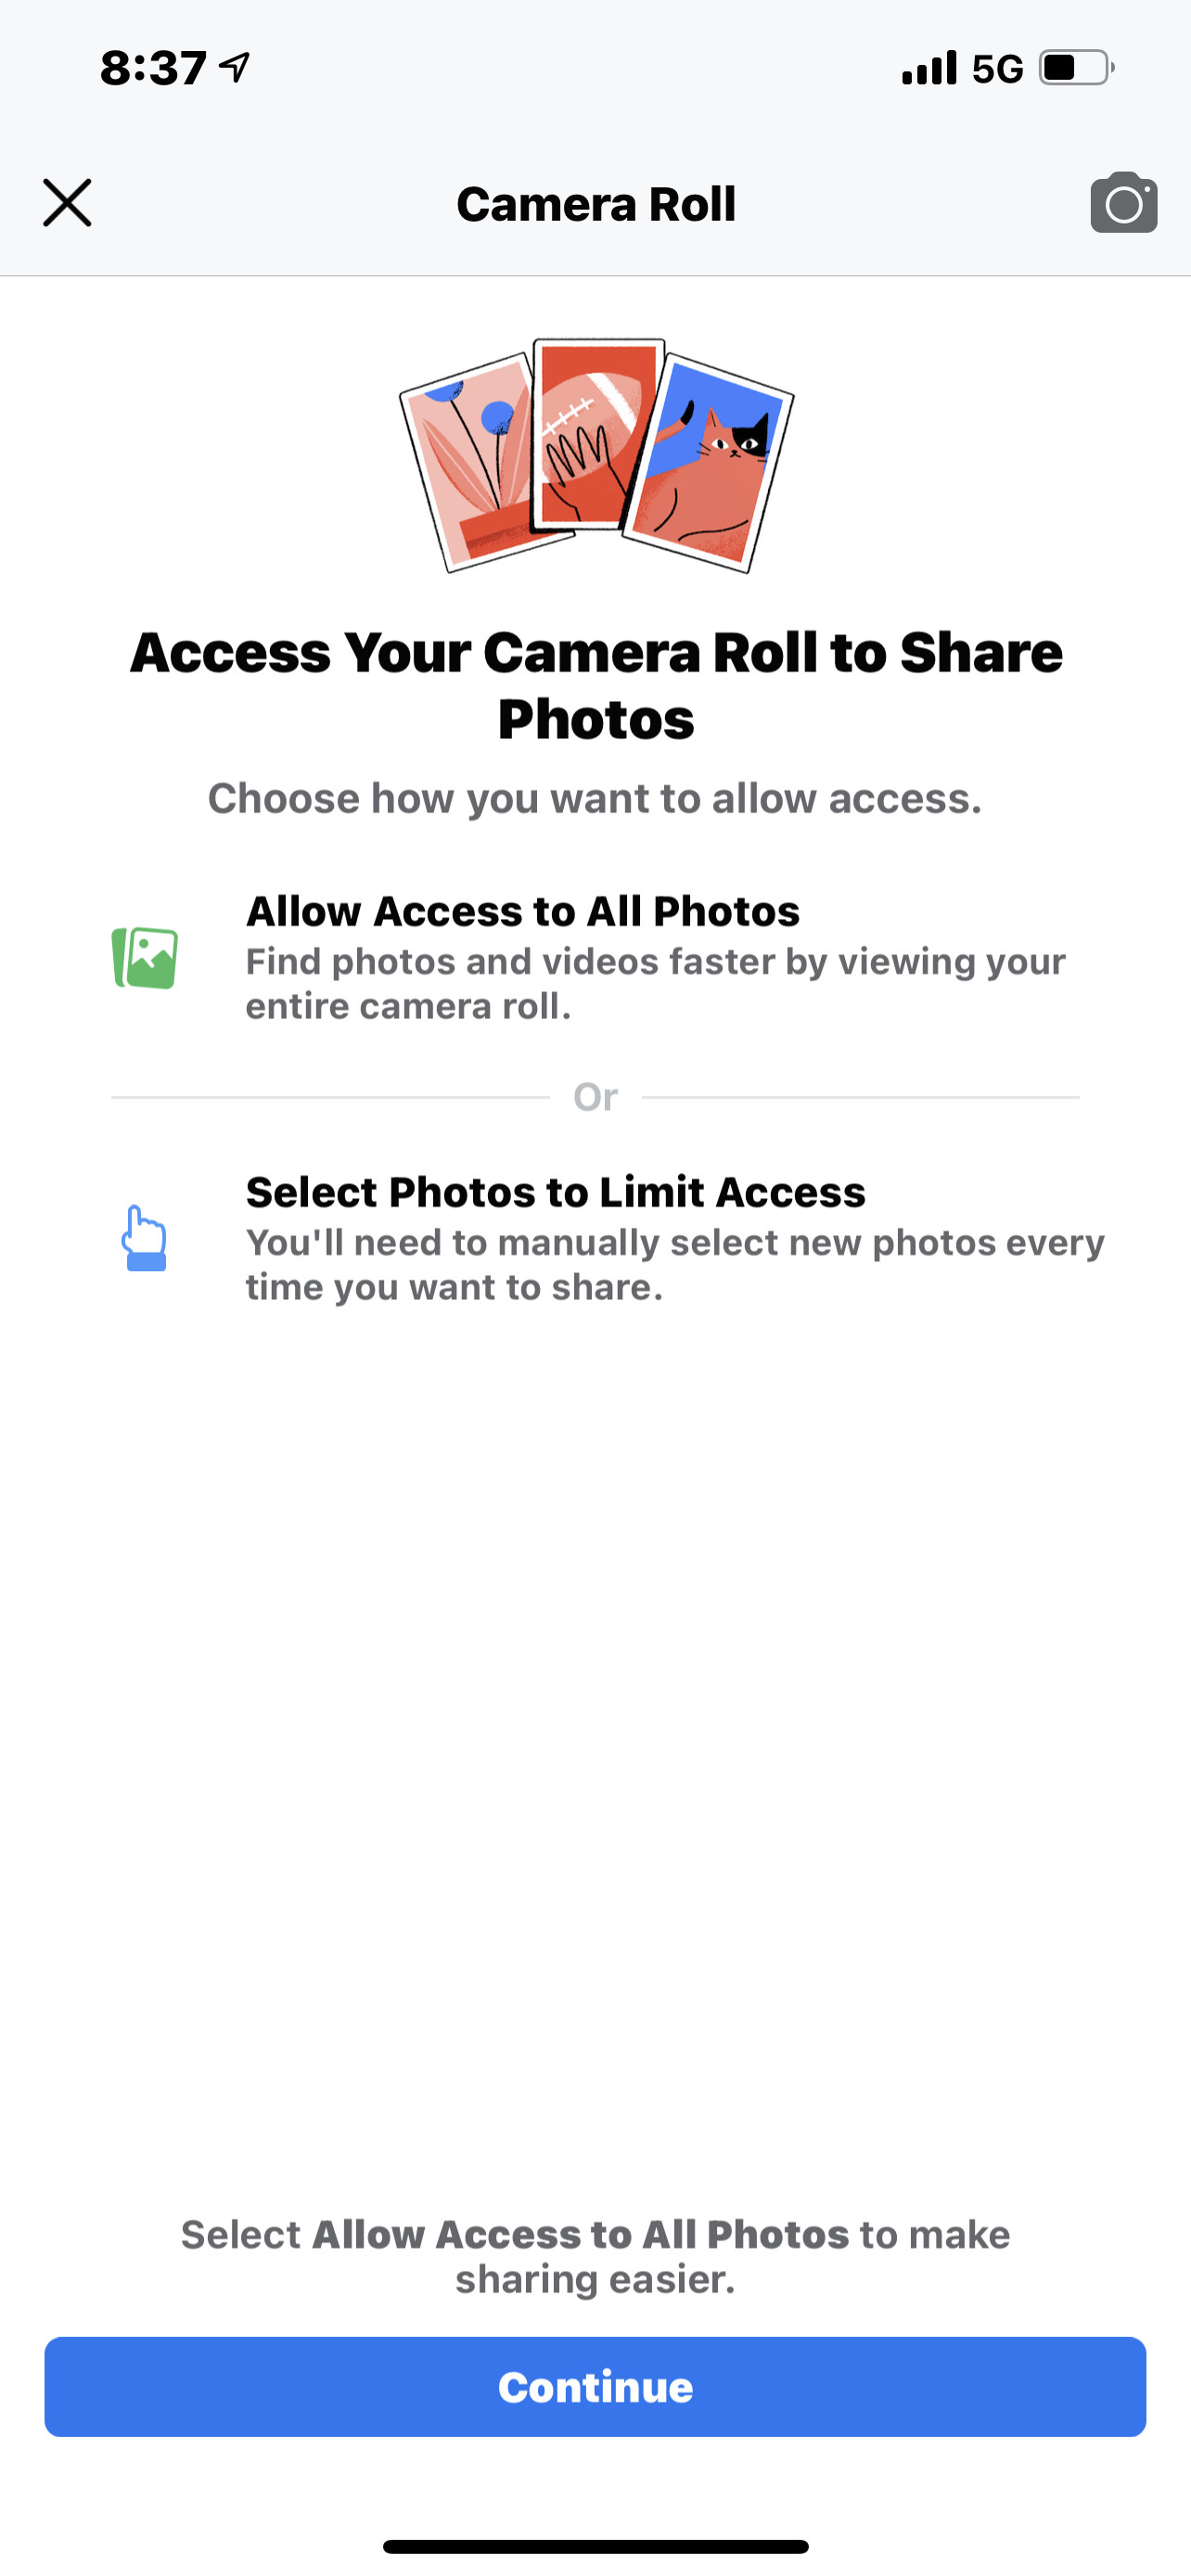
8.2. Unable to Access Photos
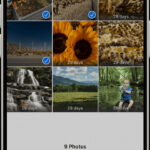
- Check Permissions: Ensure Facebook has permission to access your photos in your iPhone’s settings.
- Go to your iPhone’s Settings.
- Scroll down and tap “Privacy.”
- Tap “Photos.”
- Find “Facebook” in the list and make sure it has access to “All Photos.”
- Check Storage: Ensure your iPhone has enough storage space. If your storage is full, it may prevent you from accessing or deleting photos.
8.3. Error Messages
- Note the Error: Write down the exact error message you are receiving.
- Search for Solutions: Search online for solutions to the specific error message. Facebook’s Help Center or community forums may have relevant information.
- Contact Support: If you cannot resolve the issue, contact Facebook’s support team for assistance.
9. How to download Facebook photos on iPhone
Downloading your Facebook photos on your iPhone is a great way to back them up before deleting them from the platform, or simply to have them readily available on your device. Here’s how you can do it:
9.1. Downloading Individual Photos
- Open the Facebook App: Launch the Facebook app on your iPhone.
- Navigate to the Photo: Find the photo you want to download. You can find it in your profile, albums, or timeline.
- Open the Photo: Tap on the photo to open it.
- Tap the Three Dots: In the top right corner of the photo, tap the three horizontal dots (More options).
- Select “Save to Phone”: A menu will appear. Tap “Save to Phone”.
- Check Your Photos App: The photo will be saved to your iPhone’s Photos app.
9.2. Downloading a Facebook Album
Downloading an entire album can be a bit more involved, as Facebook doesn’t directly offer a “download album” option on the mobile app. However, you can request a copy of your Facebook data, which includes your albums, from the desktop site and then transfer them to your iPhone.
- Request Your Facebook Data (via Desktop):
- Go to Facebook on a computer browser.
- Click the downward-facing arrow in the top right corner and select “Settings & Privacy” > “Settings.”
- In the left column, click “Privacy,” then “Your Facebook Information.”
- Click “Download Your Information.”
- You can choose a date range, select or deselect specific types of information (like posts, messages, etc.), and choose the format (HTML or JSON) and media quality.
- Click “Request a download.”
- Wait for Facebook to Prepare Your Data:
- Facebook will compile your data, which may take some time depending on the amount of information.
- You’ll receive an email when your data is ready to download.
- Download the Data:
- Click the link in the email to return to the “Download Your Information” tool.
- Download the .zip file containing your data.
- Extract the Album:
- On your computer, extract the .zip file.
- Navigate to the “Photos” folder, where you’ll find your albums organized into folders.
- Transfer to Your iPhone:
- Connect your iPhone to your computer using a USB cable.
- If prompted, trust the computer on your iPhone.
- Open iTunes or Finder (depending on your macOS version).
- Select your iPhone.
- Go to the “Photos” tab and select the folder(s) containing your Facebook albums.
- Sync your iPhone to transfer the photos.
9.3. Using Third-Party Apps
There are also third-party apps available that claim to download Facebook albums directly to your iPhone. However, exercise caution when using these apps, as they may pose privacy or security risks. Always read reviews and check the app’s permissions before granting access to your Facebook account.
10. How Can dfphoto.net Help You?
At dfphoto.net, we are committed to providing resources and inspiration for photographers of all levels. Whether you’re looking to improve your skills, find new gear, or protect your work, we’ve got you covered.
10.1. Educational Resources
We offer a wide range of articles, tutorials, and guides on various photography topics. Learn about:
- Photography Techniques: Master exposure, composition, lighting, and more.
- Editing Software: Get the most out of Adobe Photoshop, Lightroom, and other editing tools.
- Gear Reviews: Stay up-to-date with the latest cameras, lenses, and accessories.
10.2. Inspiration and Community
Connect with a vibrant community of photographers, share your work, and find inspiration for your next project.
- Photo Galleries: Explore stunning photo galleries showcasing the work of talented photographers from around the world.
- Forums: Participate in discussions, ask questions, and get feedback on your photos.
- Featured Photographers: Discover inspiring stories and tips from successful photographers.
10.3. Protecting Your Work
We provide resources and advice on how to protect your photos from copyright infringement. Learn about:
- Watermarking: How to create and apply effective watermarks.
- Copyright Law: Understanding your rights as a photographer.
- Monitoring Tools: Tools and techniques for tracking unauthorized use of your photos.
FAQ: Deleting Facebook Photos on iPhone
- Can I recover deleted photos from Facebook?
- No, once a photo is deleted from Facebook, it is permanently removed and cannot be recovered.
- Will deleting a photo from Facebook delete it from my iPhone?
- No, deleting a photo from Facebook only removes it from the platform. The photo will still be on your iPhone unless you delete it separately.
- How do I stop Facebook from automatically uploading photos from my iPhone?
- Go to your Facebook app settings and disable the “Automatic Photo Upload” feature.
- Can I delete photos that others have posted of me?
- You cannot delete photos that others have posted. However, you can remove the tag from your profile or ask the person who posted the photo to remove it.
- How do I report a photo on Facebook that infringes on my copyright?
- Open the photo, tap the three dots, and select “Report Photo.” Follow the prompts to report the copyright infringement.
- What happens to photos I delete from Facebook?
- Deleted photos are removed from Facebook’s servers and are no longer visible to anyone.
- How can I backup my Facebook photos before deleting them?
- Use Facebook’s photo transfer tool to transfer your photos to another service like Google Photos or download your Facebook data.
- Why can’t I delete certain photos on Facebook?
- You can only delete photos that you have uploaded. If someone else uploaded the photo, you can only remove the tag.
- Is it possible to delete multiple photos at once on the Facebook app?
- While there isn’t a direct “select all” option, you can use the Activity Log to select and remove multiple photos.
- How do I clear the cache for the Facebook app on my iPhone?
- Go to your iPhone’s Settings > General > iPhone Storage > Facebook > Offload App.
Managing your photos on Facebook is essential for maintaining your online presence and protecting your work. Whether you’re deleting unwanted photos, adjusting privacy settings, or safeguarding your copyrights, these tips and best practices will help you stay in control. Explore dfphoto.net for more resources, inspiration, and community support to enhance your photography journey.
By following these detailed steps and utilizing the resources available at dfphoto.net, you can effectively manage your photos on Facebook, ensuring your profile reflects your best work and protects your privacy. Join our community today and take your photography to the next level!
Address: 1600 St Michael’s Dr, Santa Fe, NM 87505, United States.
Phone: +1 (505) 471-6001
Website: dfphoto.net