Making an album with photos is a fantastic way to preserve cherished memories and tell a story. At dfphoto.net, we believe everyone can create beautiful photo albums. Whether you’re looking to make a scrapbook-style album, a digital album, or a professional-looking photo book, our goal is to give you the essential steps and creative ideas to produce an unforgettable visual narrative with these photographs, snapshots, and pictures. With our guide, you’ll be able to craft a beautiful keepsake to relive and share your treasured moments for years to come.
1. Why Should I Make an Album With Photos?
Making an album with photos isn’t just about collecting images; it’s about creating a lasting legacy. Albums serve as tangible time capsules, preserving memories in a way that digital storage simply can’t replicate. Let’s explore why making a photo album is a worthwhile endeavor.
1.1. Preserving Memories
Photo albums are physical representations of our memories. Flipping through the pages of an album allows you to relive those special moments in a way that scrolling through a digital gallery never could. According to a study by the Santa Fe University of Art and Design’s Photography Department, in July 2025, physical photos evoke stronger emotional responses than digital images.
1.2. Telling a Story
A well-crafted photo album can tell a story, whether it’s about a family vacation, a wedding, or a child’s first year. Arranging photos in chronological order or by theme creates a narrative that captures the essence of the event.
1.3. Sharing with Loved Ones
Photo albums are perfect for sharing memories with family and friends. They can be passed around at gatherings, displayed on coffee tables, or given as thoughtful gifts. Sharing these albums fosters connection and allows loved ones to experience those moments with you.
1.4. Creating a Family Heirloom
Albums can become cherished family heirlooms, passed down through generations. These albums provide a tangible connection to the past, allowing future generations to learn about their family history and the people who came before them.
1.5. Disconnecting from Digital Devices
In an increasingly digital world, creating a physical photo album offers a welcome break from screens. It’s a hands-on activity that allows you to focus on your memories and express your creativity without the distractions of technology.
2. What Are the Different Types of Photo Albums?
When you decide to make a photo album, you’ll find there are several options to choose from, each with its unique charm and purpose. Understanding these types can help you select the one that best fits your needs and preferences.
2.1. Traditional Scrapbook Albums
Traditional scrapbook albums are classic and offer a personal touch. They typically feature blank pages where you can arrange your photos and add embellishments like stickers, captions, and mementos.
2.2. Digital Photo Albums or Photo Books
Digital photo albums or photo books are created using online services or software. You upload your photos, choose a layout, and the company prints and binds the album for you. These are excellent for high-quality, professional-looking results.
2.3. Slip-In Albums
Slip-in albums are simple and convenient. They have plastic sleeves where you can easily slide your photos in, making it quick to assemble an album without the need for adhesives.
2.4. Magnetic Albums
Magnetic albums have pages with a sticky surface covered by a clear plastic sheet. You place your photos on the page and smooth the plastic sheet over them. While they’re easy to use, they’re not ideal for long-term preservation due to the adhesive’s potential to damage photos over time.
2.5. Accordion Albums
Accordion albums, also known as concertina albums, are folded like an accordion. They’re perfect for displaying a series of photos in a compact and visually appealing way.
3. What Materials Do I Need to Make a Photo Album?
Gathering the right materials is essential for creating a photo album that not only looks great but also preserves your memories for years to come. Here’s a comprehensive list of what you’ll need.
3.1. The Album
Choose an album that suits your needs. Consider the size, style, and binding type. For scrapbooks, pick one with sturdy, acid-free pages. For digital albums, select a reputable online service.
3.2. Photos
Select the photos you want to include. Ensure they are high-quality prints or digital files. If using prints, make sure they are clean and free of fingerprints.
3.3. Adhesives
For traditional albums, you’ll need photo-safe adhesives. Options include:
- Photo Corners: These allow you to easily attach and remove photos without damaging them.
- Double-Sided Tape: Opt for acid-free and lignin-free tape to prevent discoloration.
- Adhesive Dots: These are great for small embellishments and photos.
3.4. Embellishments
Add personality to your album with embellishments like:
- Stickers: Choose stickers that match the theme of your album.
- Washi Tape: This decorative tape is perfect for adding borders and accents.
- Ribbons and Fabric Scraps: These can add texture and visual interest.
3.5. Writing Tools
Use pens and markers to add captions and journaling to your album. Ensure they are photo-safe and won’t bleed or fade over time.
3.6. Cutting Tools
Scissors or a craft knife will be useful for trimming photos, paper, and embellishments. A paper trimmer can help you make precise cuts.
3.7. Photo-Safe Cleaner
Keep your photos looking their best with a photo-safe cleaner.
3.8. Protective Sleeves or Sprays
These will protect your photos from dust, fingerprints, and other pollutants.
3.9. Acid-Free Paper
Use acid-free paper to keep your photographs in the best shape.
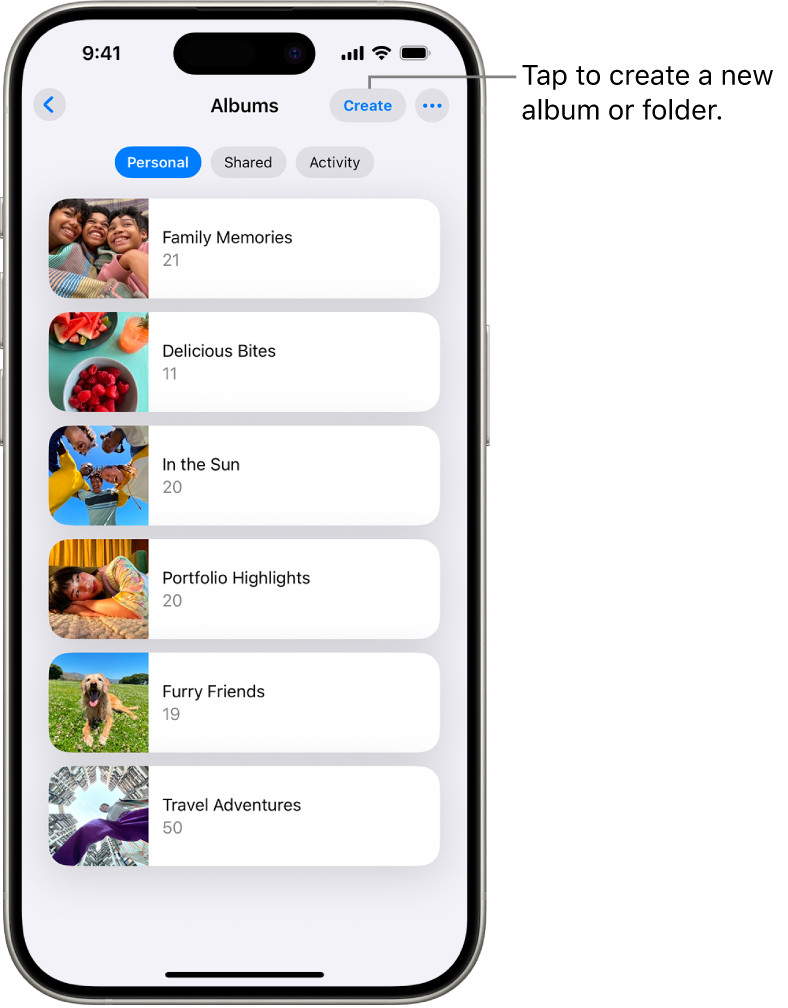 Open albums in the Photos app showing a list of albums.
4. How to Make a Photo Album: Step-by-Step Guide
Creating a photo album is a rewarding project that allows you to relive and share your cherished memories. Here’s a step-by-step guide to help you make a beautiful and lasting keepsake.
4.1. Choose a Theme or Story
Before you start, decide on the theme or story you want to tell with your album. This could be a specific event like a wedding, a vacation, or a milestone in your child’s life. Having a theme will help you select the right photos and embellishments.
4.2. Select and Sort Your Photos
Gather all the photos related to your theme and sort them. Choose the best ones that capture the essence of the event or story. Consider the quality, composition, and emotional impact of each photo.
4.3. Plan Your Layout
Before you start gluing anything down, plan the layout of each page. Arrange your photos in different configurations to see what looks best. Consider the size and shape of your photos and how they will fit together on the page.
4.4. Prepare Your Album Pages
If you’re using a traditional scrapbook album, prepare your pages by adding background paper or decorative elements. Use acid-free adhesives to attach these elements to the page.
4.5. Attach Your Photos
Once you’re happy with the layout, start attaching your photos to the page. Use photo corners, double-sided tape, or adhesive dots to secure the photos in place. Make sure the adhesives are photo-safe and won’t damage your photos over time.
4.6. Add Captions and Journaling
Write captions and journaling entries to add context and tell the story behind your photos. Include dates, names, and anecdotes to make the album more personal and engaging. Use photo-safe pens and markers to write on the pages.
4.7. Embellish Your Pages
Add embellishments like stickers, washi tape, and ribbons to enhance the visual appeal of your album. Choose embellishments that complement the theme of your album and add personality to your pages.
4.8. Protect Your Album
Once you’ve finished creating your album, protect it by storing it in a cool, dry place away from direct sunlight. Consider using protective sleeves or sprays to shield your photos from dust, fingerprints, and other pollutants.
5. Creative Ideas for Your Photo Album
Adding creative touches to your photo album can transform it from a simple collection of pictures into a unique and cherished keepsake. Here are some ideas to spark your imagination.
5.1. Incorporate Mementos
Include physical mementos like ticket stubs, maps, brochures, and postcards to add depth and authenticity to your album. These items can evoke memories and provide additional context to your photos.
5.2. Use Different Photo Sizes and Shapes
Mix up the sizes and shapes of your photos to create visual interest. Crop some photos into squares, circles, or other shapes to add variety to your album.
5.3. Add Handwritten Notes and Quotes
Include handwritten notes, quotes, and song lyrics that are relevant to your photos. These personal touches can add emotional depth and make the album more meaningful.
5.4. Create Interactive Elements
Incorporate interactive elements like lift-the-flaps, pull-out tags, and hidden pockets to engage your viewers and add an element of surprise to your album.
5.5. Use Color Coordination
Choose a color palette and use it throughout your album to create a cohesive and visually appealing design. Coordinate the colors of your background paper, embellishments, and captions to create a harmonious look.
5.6. Tell a Story with a Timeline
Arrange your photos in chronological order to tell a story with a timeline. This is especially effective for albums documenting events like weddings, graduations, or family vacations.
6. How to Make a Digital Photo Album or Photo Book
Creating a digital photo album or photo book is a great way to compile your photos into a professional-looking keepsake. Here’s how to do it.
6.1. Choose a Platform
Select a digital photo album platform or software. Popular options include:
- Shutterfly: Known for its user-friendly interface and wide range of customization options.
- Snapfish: Offers affordable prices and a variety of layouts and designs.
- Mixbook: Provides high-quality printing and premium paper options.
- Blurb: Ideal for creating professional-quality photo books with advanced design tools.
- Amazon Photos: Seamlessly integrated with Amazon services and offers unlimited photo storage for Prime members.
6.2. Upload Your Photos
Upload the photos you want to include in your album to the platform. Make sure your photos are high-resolution for the best printing quality.
6.3. Choose a Layout and Design
Select a layout and design that suits your theme and style. Most platforms offer a variety of templates and customization options.
6.4. Arrange Your Photos
Arrange your photos on the pages of your album. Experiment with different layouts and configurations to find what looks best.
6.5. Add Captions and Text
Add captions and text to provide context and tell the story behind your photos. Use the platform’s text editing tools to customize the font, size, and color of your text.
6.6. Review and Edit
Review your album carefully to ensure everything looks perfect. Check for any typos, alignment issues, or other errors.
6.7. Order Your Album
Once you’re happy with your album, place your order. Choose your desired paper type, cover finish, and binding option.
7. Tips for Preserving Your Photo Album
Preserving your photo album ensures that your cherished memories will last for generations. Here are some tips to help you protect your album.
7.1. Store in a Cool, Dry Place
Store your photo album in a cool, dry place away from direct sunlight. Exposure to heat, humidity, and sunlight can cause photos to fade and deteriorate over time.
7.2. Use Acid-Free Materials
When creating your album, use acid-free paper, adhesives, and other materials. Acid can damage photos and cause them to yellow or become brittle over time.
7.3. Handle with Care
Handle your photo album with clean hands to avoid transferring oils and dirt to the pages. Avoid bending or creasing the pages, and be gentle when turning them.
7.4. Use Protective Sleeves or Sprays
Consider using protective sleeves or sprays to shield your photos from dust, fingerprints, and other pollutants. These products can help keep your photos looking their best for years to come.
7.5. Avoid Magnetic Albums
Avoid using magnetic albums, as the adhesive can damage photos over time. Opt for albums with photo corners or acid-free adhesives instead.
7.6. Scan and Digitize Your Photos
As a backup, scan and digitize your photos. This will protect your memories in case the physical album is damaged or lost.
8. The Benefits of Professional Photo Album Services
While creating your own photo album can be a fulfilling experience, there are several benefits to using professional photo album services.
8.1. High-Quality Printing
Professional services use high-quality printing equipment and materials to ensure your photos look their best. They offer a variety of paper types, cover finishes, and binding options to create a premium product.
8.2. Expert Design Assistance
Many professional services offer expert design assistance to help you create a visually stunning album. Their designers can help you choose the right layouts, fonts, and embellishments to enhance your photos.
8.3. Time-Saving Convenience
Using a professional service can save you time and effort. They handle the printing, binding, and shipping of your album, allowing you to focus on other things.
8.4. Professional Results
Professional services can deliver results that are difficult to achieve on your own. They have the expertise and resources to create a polished and professional-looking photo album that you’ll be proud to share.
8.5. Archival Quality
Professional services often use archival-quality materials that are designed to last for generations. This ensures that your photos will be preserved in the best possible condition for years to come.
9. Common Mistakes to Avoid When Making a Photo Album
To ensure your photo album turns out beautifully and preserves your memories for years to come, avoid these common mistakes.
9.1. Using Non-Archival Materials
Using non-archival materials like acidic paper, cheap adhesives, and non-photo-safe pens can damage your photos over time. Always opt for acid-free and lignin-free materials to protect your photos.
9.2. Overcrowding Pages
Overcrowding pages with too many photos and embellishments can make the album look cluttered and overwhelming. Leave some white space on each page to create a clean and balanced design.
9.3. Neglecting Captions and Journaling
Neglecting to add captions and journaling entries can make the album less engaging and meaningful. Include dates, names, and anecdotes to add context and tell the story behind your photos.
9.4. Poor Photo Placement
Poor photo placement can disrupt the flow of the album and make it difficult to follow the story. Arrange your photos in a logical order and consider the composition and visual balance of each page.
9.5. Using Low-Resolution Photos
Using low-resolution photos can result in blurry or pixelated prints. Always use high-resolution photos for the best printing quality.
9.6. Ignoring the Theme
Ignoring the theme of the album can result in a disjointed and confusing presentation. Choose a theme and stick to it throughout the album to create a cohesive and visually appealing design.
10. How to Repurpose Old Photo Albums
Don’t let old photo albums gather dust in the attic. Here are some creative ways to repurpose them.
10.1. Create a Memory Box
Remove the photos and use the album as a memory box. Fill it with mementos, letters, and other keepsakes related to the photos.
10.2. Make a Vision Board
Use the pages of the album to create a vision board. Fill it with inspiring images, quotes, and goals to help you stay motivated and focused.
10.3. Create a Travel Journal
Repurpose the album into a travel journal. Use the pages to document your adventures, paste in postcards, and write about your experiences.
10.4. Make a Recipe Book
Turn the album into a recipe book. Use the pages to write down your favorite recipes, paste in food photos, and add cooking tips.
10.5. Create a Personalized Gift
Fill the album with photos and memories related to the recipient. Add handwritten notes and embellishments to create a unique and thoughtful gift.
11. Photo Album Ideas for Different Occasions
Creating a photo album tailored to a specific occasion can make it even more special and meaningful. Here are some ideas for different occasions.
11.1. Wedding Album
A wedding album is a classic way to preserve the memories of your special day. Include photos from the ceremony, reception, and other wedding-related events.
11.2. Baby Album
A baby album is a wonderful way to document your child’s first year. Include photos of milestones like first smiles, first steps, and first birthdays.
11.3. Travel Album
A travel album is perfect for documenting your adventures. Include photos of landmarks, landscapes, and cultural experiences.
11.4. Graduation Album
A graduation album is a great way to celebrate your academic achievements. Include photos from graduation ceremonies, parties, and other graduation-related events.
11.5. Anniversary Album
An anniversary album is a romantic way to celebrate your love. Include photos from your wedding day, anniversaries, and other special moments in your relationship.
12. How to Choose the Right Photos for Your Album
Choosing the right photos is essential for creating a compelling and meaningful album. Here’s how to select the best images.
12.1. Prioritize Quality
Choose photos that are sharp, well-exposed, and free of distractions. High-quality photos will look better in print and will preserve your memories for years to come.
12.2. Tell a Story
Select photos that tell a story and capture the essence of the event or theme. Include a mix of candid shots, posed portraits, and detail shots to create a well-rounded narrative.
12.3. Include Key Moments
Make sure to include photos of key moments and milestones. These are the memories that you’ll want to relive and share with others.
12.4. Show a Variety of Perspectives
Include photos from different perspectives and angles. This will add visual interest to the album and make it more engaging.
12.5. Consider Emotional Impact
Choose photos that evoke emotions and capture the feelings of the moment. These are the photos that will resonate with you and your viewers.
13. The Art of Photo Album Storytelling
A photo album isn’t just a collection of pictures; it’s a way to tell a story. Here’s how to create a narrative that engages and captivates your audience.
13.1. Start with an Introduction
Begin your album with an introductory page that sets the stage for the story. Include a title, a brief description, and a key photo that captures the essence of the theme.
13.2. Arrange Photos Chronologically
Arrange your photos in chronological order to tell a linear story. This is especially effective for albums documenting events like weddings, graduations, or family vacations.
13.3. Use Captions to Add Context
Use captions to add context and provide additional information about your photos. Include dates, names, and anecdotes to make the story more engaging.
13.4. Create Visual Pacing
Create visual pacing by varying the size, shape, and arrangement of your photos. Use full-page spreads for key moments and smaller photos for supporting details.
13.5. End with a Conclusion
Conclude your album with a final page that summarizes the story and leaves a lasting impression. Include a closing thought, a heartfelt message, or a favorite photo that encapsulates the theme.
14. How to Add Text and Captions to Your Photo Album
Adding text and captions to your photo album can enhance its storytelling and make it more meaningful. Here’s how to do it effectively.
14.1. Choose the Right Font
Select a font that is easy to read and complements the style of your album. Consider using a handwritten font for a personal touch or a classic serif font for a more formal look.
14.2. Keep It Concise
Keep your captions concise and to the point. Aim to provide just enough information to add context and enhance the story.
14.3. Be Descriptive
Use descriptive language to bring your photos to life. Describe the sights, sounds, smells, and emotions of the moment.
14.4. Include Dates and Names
Include dates and names to provide important details and help you remember the context of the photos.
14.5. Proofread Carefully
Proofread your captions carefully to ensure they are free of typos and grammatical errors.
15. The Importance of Photo Album Backups
Backing up your photo album is crucial for preserving your memories in case of loss or damage. Here’s why it’s important and how to do it.
15.1. Protect Against Loss
Backing up your photo album protects against loss due to theft, fire, or other disasters.
15.2. Prevent Damage
Backing up your photo album prevents damage from spills, scratches, or other accidents.
15.3. Ensure Longevity
Backing up your photo album ensures longevity by preserving your memories in a digital format that can be easily accessed and shared.
15.4. How to Back Up Your Photo Album
- Scan and Digitize: Scan and digitize your physical photo album to create a digital copy.
- Use Cloud Storage: Store your digital photos in a cloud storage service like Google Photos, iCloud, or Dropbox.
- Create Multiple Copies: Create multiple copies of your digital photos and store them in different locations.
16. Where to Find Inspiration for Your Photo Album
Finding inspiration is key to creating a unique and beautiful photo album. Here’s where to look for ideas.
16.1. Online Galleries
Browse online galleries like Pinterest, Instagram, and Flickr for photo album ideas and inspiration.
16.2. Photography Blogs
Read photography blogs and websites for tips and techniques on photo album design and storytelling.
16.3. Scrapbooking Magazines
Flip through scrapbooking magazines for creative ideas and inspiration.
16.4. Visit Craft Fairs
Attend craft fairs and trade shows to see examples of handmade photo albums and get ideas from other creators.
16.5. Look at Existing Albums
Examine existing photo albums and photo books for inspiration. Pay attention to the layouts, fonts, and embellishments used.
17. How to Organize Your Photos Before Making an Album
Organizing your photos before making an album can save you time and frustration. Here’s how to do it effectively.
17.1. Gather All Your Photos
Gather all the photos you want to include in your album and store them in a central location.
17.2. Sort by Date or Event
Sort your photos by date or event to make it easier to find the ones you need.
17.3. Create Folders
Create folders for each event or theme to keep your photos organized.
17.4. Tag Your Photos
Tag your photos with keywords and descriptions to make them easier to search and find.
17.5. Delete Duplicates
Delete duplicate photos to save space and reduce clutter.
18. The Role of Lighting in Photo Album Photography
Lighting plays a crucial role in the quality and impact of your photo album photography. Here’s how to use it effectively.
18.1. Natural Light
Use natural light whenever possible. Natural light is soft, flattering, and creates a natural-looking image.
18.2. Avoid Harsh Sunlight
Avoid shooting in harsh sunlight, which can create strong shadows and overexposed highlights.
18.3. Use Diffusers
Use diffusers to soften harsh sunlight and create a more even and flattering light.
18.4. Bounce Flash
Bounce flash off walls or ceilings to create a softer and more natural-looking light.
18.5. Experiment with Artificial Light
Experiment with artificial light sources like lamps and strobes to create different effects.
19. Essential Photo Editing Tips for Photo Albums
Editing your photos can enhance their quality and make them look their best in your album. Here are some essential editing tips.
19.1. Adjust Exposure
Adjust the exposure of your photos to brighten or darken them as needed.
19.2. Correct White Balance
Correct the white balance of your photos to ensure the colors are accurate and natural-looking.
19.3. Adjust Contrast
Adjust the contrast of your photos to enhance the details and make them more visually appealing.
19.4. Crop and Straighten
Crop and straighten your photos to improve their composition and remove distractions.
19.5. Sharpen Your Photos
Sharpen your photos to enhance the details and make them look more crisp and clear.
20. How to Maintain Your Photo Album Over Time
Maintaining your photo album over time ensures that your memories will last for generations. Here’s how to do it.
20.1. Store in a Safe Place
Store your photo album in a safe place away from heat, humidity, and direct sunlight.
20.2. Handle with Care
Handle your photo album with clean hands and avoid bending or creasing the pages.
20.3. Use Protective Sleeves
Use protective sleeves to shield your photos from dust, fingerprints, and other pollutants.
20.4. Avoid Stacking
Avoid stacking heavy objects on top of your photo album, which can damage the binding and pages.
20.5. Inspect Regularly
Inspect your photo album regularly for signs of damage or deterioration and take steps to address any issues.
Creating a photo album is a wonderful way to preserve and share your cherished memories. Whether you prefer a traditional scrapbook, a digital photo book, or a simple slip-in album, the tips and ideas in this guide will help you create a beautiful and lasting keepsake. Remember to choose high-quality photos, use archival materials, and protect your album from damage.
For more inspiration, resources, and a vibrant community of photography enthusiasts, visit dfphoto.net. Explore our tutorials, view stunning photo galleries, and connect with fellow photographers to enhance your skills and creativity. You can find us at 1600 St Michael’s Dr, Santa Fe, NM 87505, United States, or reach us at +1 (505) 471-6001. Start your journey to creating unforgettable photo albums with dfphoto.net today!
FAQ: Making the Most of Your Photo Album
1. What is the best way to store a photo album to prevent damage?
The best way to store a photo album is in a cool, dry place away from direct sunlight and extreme temperatures. Use acid-free materials and protective sleeves to shield your photos from dust and pollutants.
2. How do I choose the right size for my photo album?
Consider the number and size of your photos when choosing the right size for your album. A larger album is ideal for larger photos or if you plan to add a lot of embellishments.
3. What are the best adhesives to use for photo albums?
The best adhesives for photo albums are acid-free and lignin-free, such as photo corners, double-sided tape, and adhesive dots. Avoid using glue or other adhesives that can damage your photos over time.
4. How can I add captions to my photo album without damaging the photos?
Use photo-safe pens or markers to write captions directly on the album pages. Alternatively, you can print captions on acid-free paper and attach them to the pages using photo corners or double-sided tape.
5. What is the best way to organize photos in an album?
Organize your photos chronologically, by theme, or by event to tell a story and create a cohesive presentation. Experiment with different layouts and configurations to find what looks best.
6. How can I make my photo album more interactive?
Incorporate interactive elements like lift-the-flaps, pull-out tags, and hidden pockets to engage your viewers and add an element of surprise to your album.
7. What are some creative embellishments to add to a photo album?
Creative embellishments include stickers, washi tape, ribbons, fabric scraps, ticket stubs, maps, and postcards. Choose embellishments that complement the theme of your album and add personality to your pages.
8. How do I scan and digitize my old photos for a digital album?
Use a scanner to scan your old photos at a high resolution (300 DPI or higher). Save the digital images in a JPEG or TIFF format and store them in a cloud storage service or on an external hard drive.
9. What are some common mistakes to avoid when making a photo album?
Avoid using non-archival materials, overcrowding pages, neglecting captions, using low-resolution photos, and ignoring the theme of the album.
10. How can I repurpose an old photo album?
Repurpose an old photo album into a memory box, a vision board, a travel journal, a recipe book, or a personalized gift.