Mastering the art of inserting photos in Photoshop is a foundational skill for anyone venturing into photo editing or graphic design. Whether you’re looking to create stunning photo manipulations, design compelling marketing materials, or simply enhance your images, knowing how to seamlessly integrate one photo into another is crucial.
This step-by-step guide will walk you through the process of inserting an image into Photoshop, ensuring you understand each step for a smooth and efficient workflow.
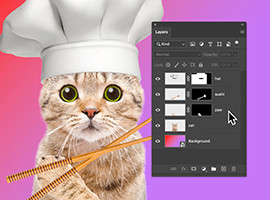 Adobe Photoshop interface showcasing layers panel for image editing.
Step-by-Step Guide to Inserting Images in Photoshop
Step 1: Selecting Your Source and Destination Images
The journey to a perfect image composite begins even before you open Photoshop. Choosing the right images is paramount, especially if you aim for a realistic blend. Consider the visual harmony between your images. Do they share similar lighting conditions, color tones, and perspectives?
For instance, inserting a photo bathed in warm sunlight into a cool, blue-toned nighttime scene might present challenges in achieving a natural look. Take your time to curate images that are visually compatible. This pre-selection process significantly streamlines your editing and enhances the final outcome.
Don’t be overly concerned about image size at this stage. As long as the images are of good quality, Photoshop allows for non-destructive resizing once they are incorporated into your project.
Step 2: Opening Your Background Image in Photoshop
Think of your background image as the canvas upon which you’ll build your composite. Start by opening this image as a new document in Photoshop. This sets the stage for adding more images as layers on top.
Navigate to File > Open from the top menu bar. Locate and select the image you wish to use as your background and click ‘Open’.
Opening the background first is a strategic move. It’s generally easier to adjust subsequently inserted images to fit the background’s dimensions and perspective, rather than trying to fit the background around a foreground subject later on.
Step 3: Inserting the New Image as a Layer
Now, it’s time to bring in the image you want to insert. Photoshop offers a couple of straightforward methods to do this, each with its own nuance.
One method is drag and drop. Simply locate the image file on your computer and drag it directly into your open Photoshop document window. Photoshop will intelligently place it as a new layer on top of your background.
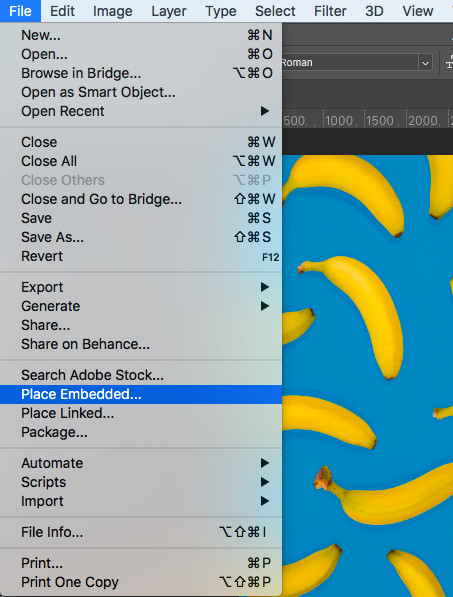
Alternatively, for more control during placement, use the Place Embedded command. Go to File > Place Embedded. This option opens a file explorer window, allowing you to select your image. “Place Embedded” is generally preferred as it imports the image as a Smart Object, which we will discuss in the next step.
 Inserting a new image layer in Photoshop for photo editing workflow.
Regardless of the method you choose, the inserted image will appear as a new layer in the Layers Panel, stacked above your background layer.
A good practice for organized editing is to rename your layers in the Layers Panel. Double-click on the default layer name (e.g., “Layer 1”) and type in a descriptive name (e.g., “Foreground Image”). This simple step can save you time and confusion, especially when working with complex projects involving multiple layers.
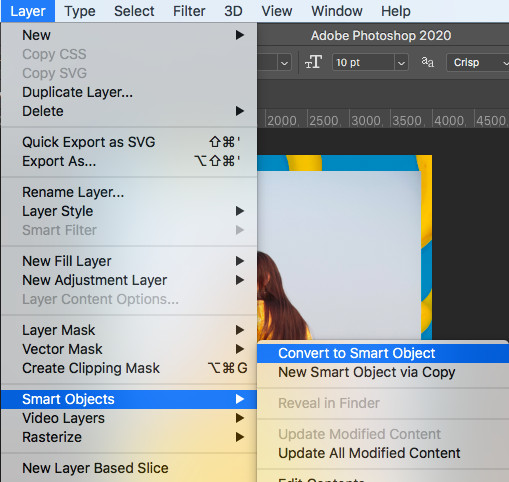
Step 4: Converting the Inserted Image to a Smart Object
To ensure the longevity and flexibility of your edits, converting the newly inserted image layer into a Smart Object is highly recommended. Smart Objects are containers that preserve an image’s original data. This means you can resize, rotate, and transform the layer multiple times without degrading its quality.
To convert to a Smart Object, go to Layer > Smart Objects in the top menu bar and select Convert to Smart Object from the dropdown menu.
 File menu dropdown in Photoshop showing 'Place Embedded' option to insert images.
You can quickly verify if your layer is a Smart Object by looking at the Layers Panel. A small icon, resembling a file, will appear in the bottom right corner of the layer thumbnail, indicating it’s a Smart Object. This step is crucial for maintaining image quality throughout your editing process, particularly if you anticipate making size adjustments.
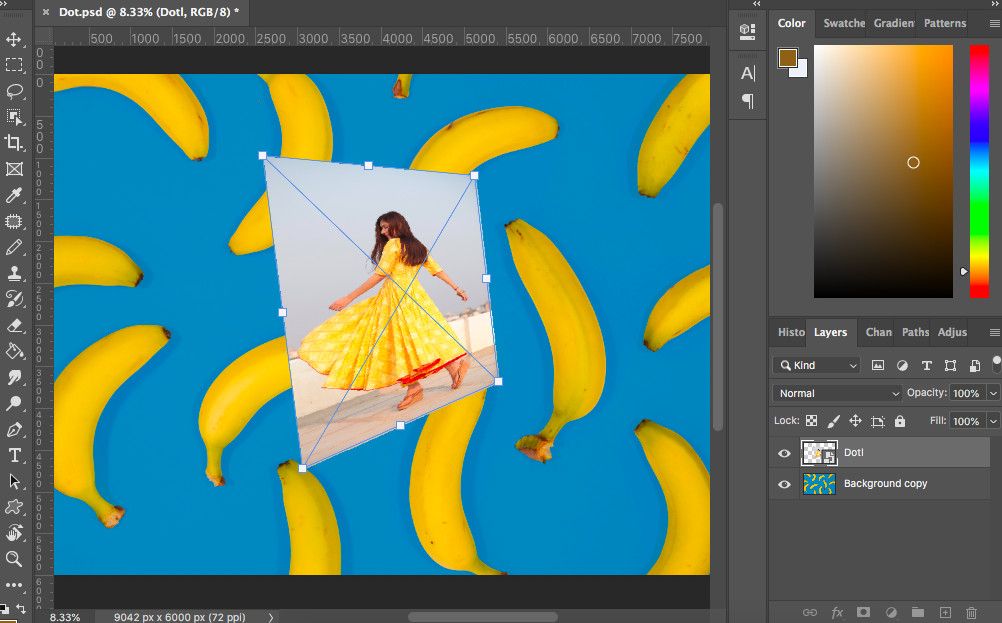
Step 5: Resizing, Rotating, and Positioning Your Inserted Image
Chances are, the image you’ve inserted isn’t perfectly sized or positioned right away. Photoshop provides intuitive tools to adjust these aspects to your liking.
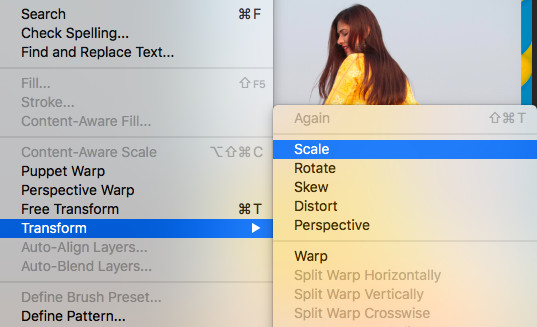
To resize and rotate, activate the Free Transform tool by going to Edit > Transform > Scale in the top menu, or by using the keyboard shortcut Ctrl+T (Windows) or Cmd+T (Mac).
Bounding box handles will appear around your inserted image. Drag these handles to resize. Hold down the Shift key while dragging a corner handle to maintain the image’s aspect ratio, preventing unwanted distortion.
 Using the Shift key while resizing in Photoshop to maintain image aspect ratio.
As you resize, a dialog box might display the width and height dimensions, offering precise control if you have specific size requirements.
Once you’re satisfied with the size, you can rotate the image by hovering your cursor just outside the bounding box corners until it changes to a curved double arrow. Click and drag to rotate.
After resizing and rotating, use the Move Tool (V) to click and drag the image to its desired position within your composition.
 Example of inserted image resized and positioned within a Photoshop document.
Congratulations! You’ve successfully inserted, resized, and positioned an image in Photoshop. You can repeat these steps to add as many images as needed, layering them to create intricate and compelling visuals.
Bonus Tip: Refining Your Composites with Cutting and Masking
Simply inserting images is just the beginning. To truly master image manipulation, explore techniques like cutting and masking to seamlessly blend your inserted images. Cutting allows you to remove unwanted portions of an image, while masking offers a non-destructive way to hide and reveal parts of a layer, providing greater flexibility and control in your edits. These techniques, combined with the basic image insertion skills you’ve learned, will unlock a world of creative possibilities in Photoshop.