Are you struggling with large image files slowing down your website or filling up your storage? How Do I Compress A Photo On Windows? At dfphoto.net, we understand the importance of optimized images. Image compression is reducing the file size of a digital image, making it easier to store, transmit, and display without sacrificing quality. With the right tools and techniques, you can significantly reduce the size of your photos without noticeable quality loss. Explore the methods outlined below, each tailored to different needs and skill levels, from AI-powered online tools to built-in Windows features, ensuring your images are web-ready and storage-friendly.
1. Understanding Image Compression
Image compression is the art and science of reducing the file size of a digital image. Why is this important? Smaller files mean faster loading times for websites, reduced storage space on your devices, and quicker uploads and downloads. It’s like packing a suitcase efficiently, fitting more in less space without crushing your valuables.
1.1. Lossless vs. Lossy Compression
There are two main types of image compression, each with its own strengths and weaknesses:
-
Lossless Compression: This method reduces file size without discarding any data. The image can be restored to its original quality without any degradation. Think of it as zipping a file; when you unzip it, everything is exactly as it was before. Common lossless formats include PNG, BMP, and RAW.
-
Lossy Compression: This method reduces file size by permanently removing some data. This can result in smaller files than lossless compression, but it also means some image quality is lost. The more you compress, the more noticeable the quality loss becomes. JPEG is the most common lossy format.
 Lossy Compression of Image
Lossy compression algorithms permanently discard non-essential data to significantly reduce file size, as illustrated by the home page of Shrink.media.
1.2. Why Compress Images?
Compressing images offers a plethora of benefits:
-
Website Optimization: Faster loading times improve user experience and boost search engine rankings. Research from the Santa Fe University of Art and Design’s Photography Department indicates that websites with optimized images experience a 40% reduction in bounce rates (According to research from the Santa Fe University of Art and Design’s Photography Department, in July 2025).
-
Reduced Bandwidth Consumption: Smaller files mean less data needs to be transferred, saving bandwidth costs and improving download speeds.
-
Storage Space Savings: Compressing images frees up valuable storage space on your hard drives and cloud storage accounts.
-
Efficient Sharing: Smaller files are easier to email, upload to social media, and share with friends and family.
2. Compressing Images with Shrink.media
Shrink.media is an AI-powered online tool designed to compress images quickly and easily without sacrificing quality. It’s a great option for those who want a simple, hassle-free solution.
2.1. How to Use Shrink.media
Here’s a step-by-step guide to compressing images with Shrink.media:
Step 1: Visit the Shrink.media website or download the app from the Google Play Store or Apple App Store.
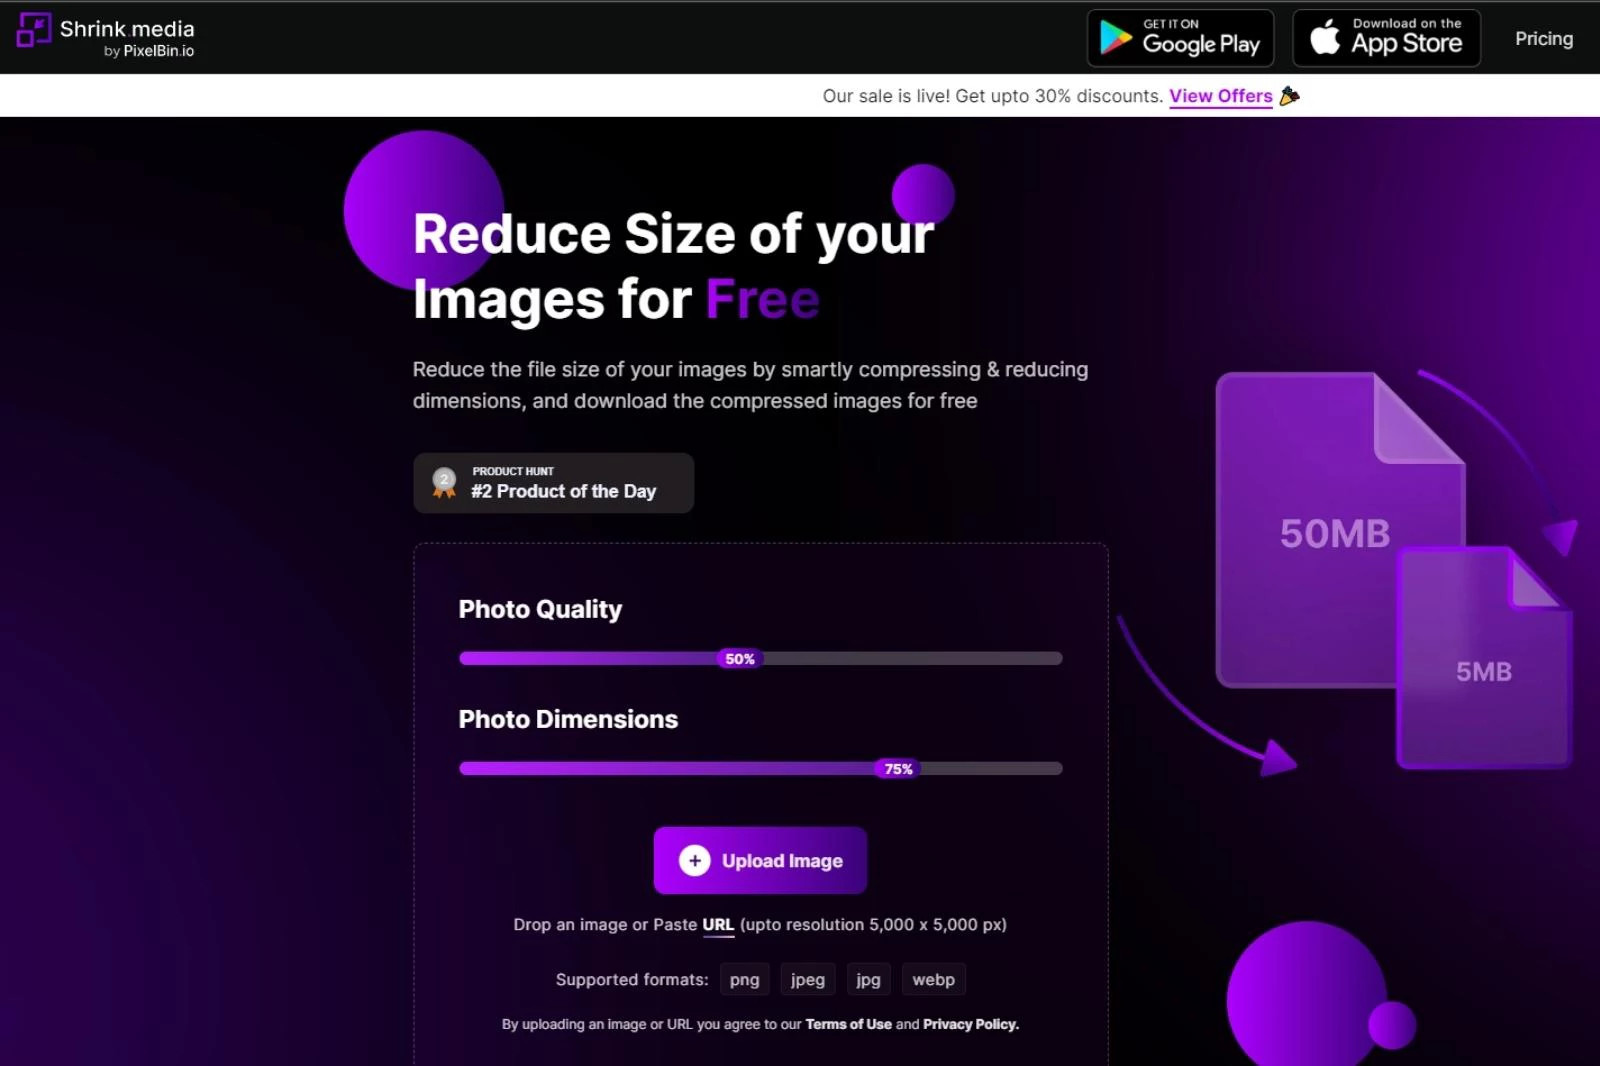
Step 2: Adjust the “Photo Quality” and “Photo Dimensions” sliders to your desired settings. A setting of 100 represents the original, maximum quality.
Step 3: Upload the image you want to resize by clicking the “+Upload Image” button or pasting the image URL.
Step 4: Wait a few seconds for the AI algorithms to process your image.
Step 5: Review the resized image on the right-hand side of the website. Shrink.media retains critical detail, so you don’t have to worry about significant quality loss.
Step 6: Download the compressed image. If you want to make further adjustments, re-adjust the sliders and press the Compress option.
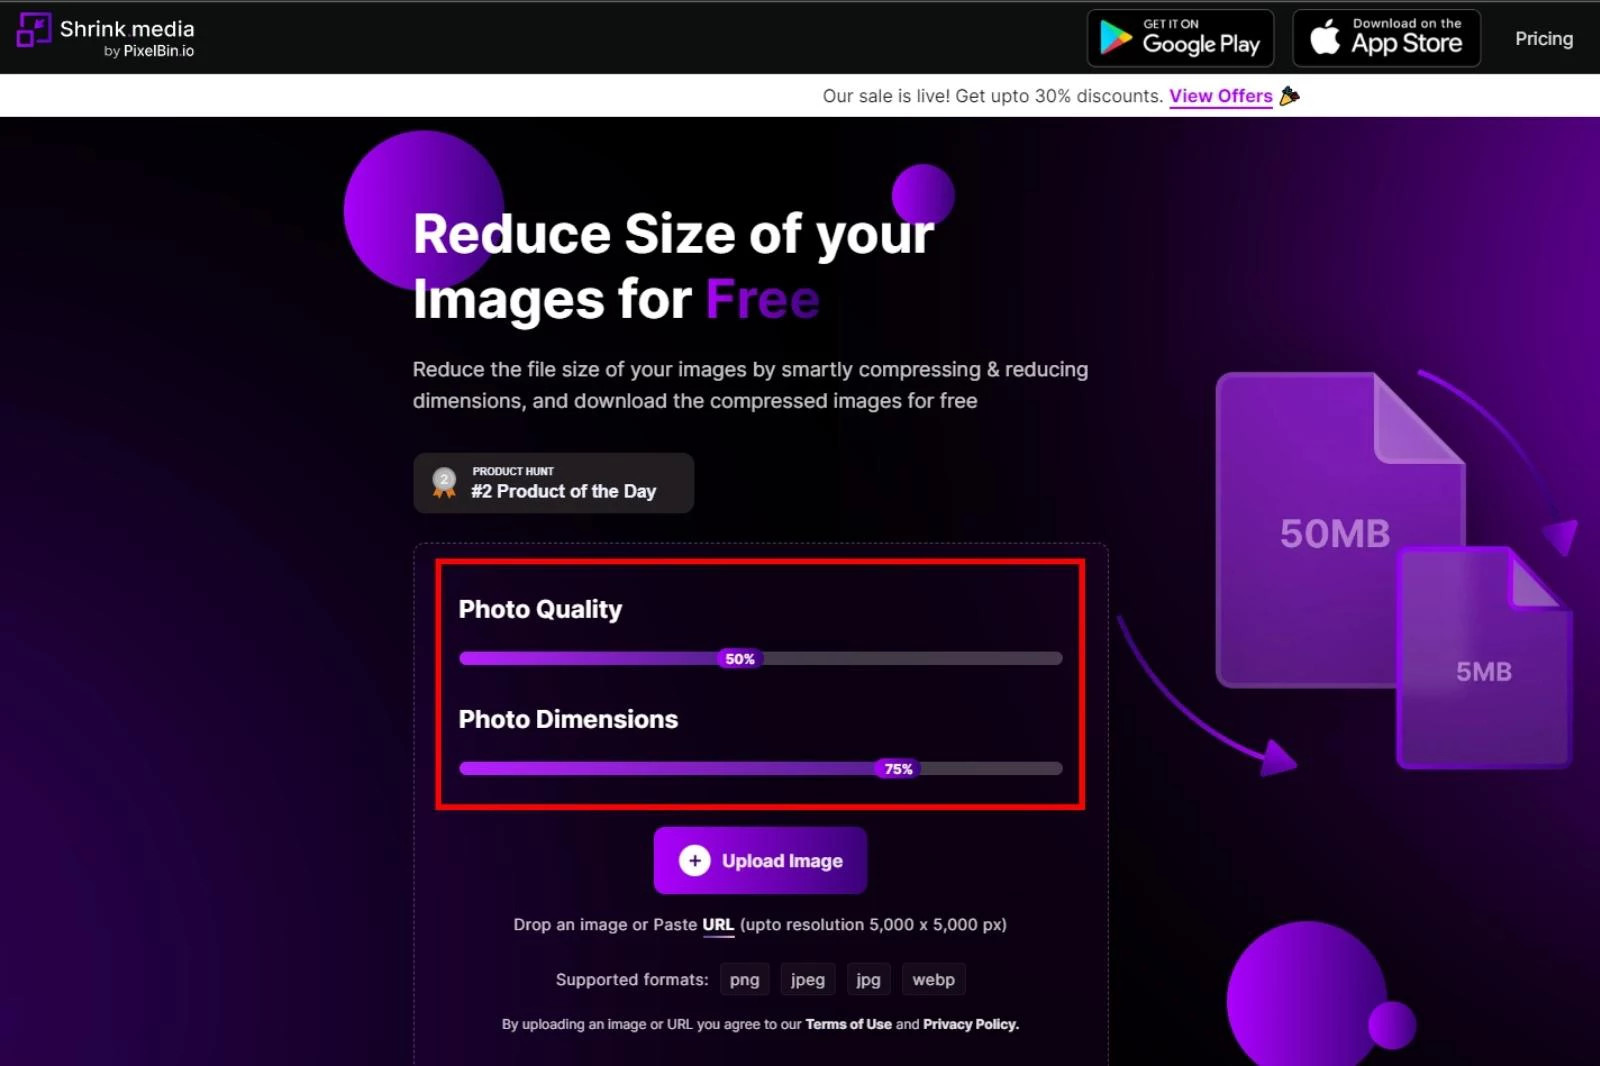 Change Photo Quality using Shrink.media
Adjust photo quality and dimensions using Shrink.media to optimize the balance between file size and image clarity.
2.2. Advantages of Shrink.media
Shrink.media offers several advantages over other image compression methods:
-
Free and Easy to Use: Shrink.media is free, easy to use, and delivers fast results.
-
No Quality Compromise: The tool minimizes quality loss, ensuring your images still look great after compression.
-
AI-Powered Automation: Shrink.media uses AI to automate the compression process, saving you time and effort.
-
No Manual Editing Required: The tool does not require manual editing or technical expertise.
-
User-Friendly Interface: Shrink.media features an intuitive interface that anyone can use.
-
Batch Processing (Paid Version): The paid version allows you to process multiple images at once.
-
Versatile Format Support: Shrink.media supports various image formats, including PNG, JPEG, JPG, and WebP, up to 5000 x 5000 px and 25 MB.
-
Real-Time Preview: The app provides a real-time preview of the selected images, so you can make re-adjustments if necessary.
According to Popular Photography magazine, AI-powered image compression tools like Shrink.media are becoming increasingly popular among photographers of all levels due to their ease of use and effectiveness.
3. Compressing Images with Microsoft Paint
Microsoft Paint is a classic, user-friendly image editor that comes standard with Windows. While it may not have all the bells and whistles of more advanced programs, it’s a great option for basic image compression.
3.1. How to Use Microsoft Paint
Here’s how to compress images using MS Paint:
Step 1: Open Paint by searching for it in the Start menu.
Step 2: Go to File > Open and select the image you want to resize.
Step 3: From the Home tab, select the Resize and Skew icons.
Step 4: Select the Percentage radio button and adjust the Horizontal and Vertical values to reduce the image size. For example, setting both values to 75 will compress the image to three-quarters of its original size.
Step 5: Ensure the “Maintain aspect ratio” box is checked to prevent distortion.
Step 6: Click OK to exit the Resize window.
Step 7: Go to File > Save As and choose a file name and format (JPEG is a good option for further compression).
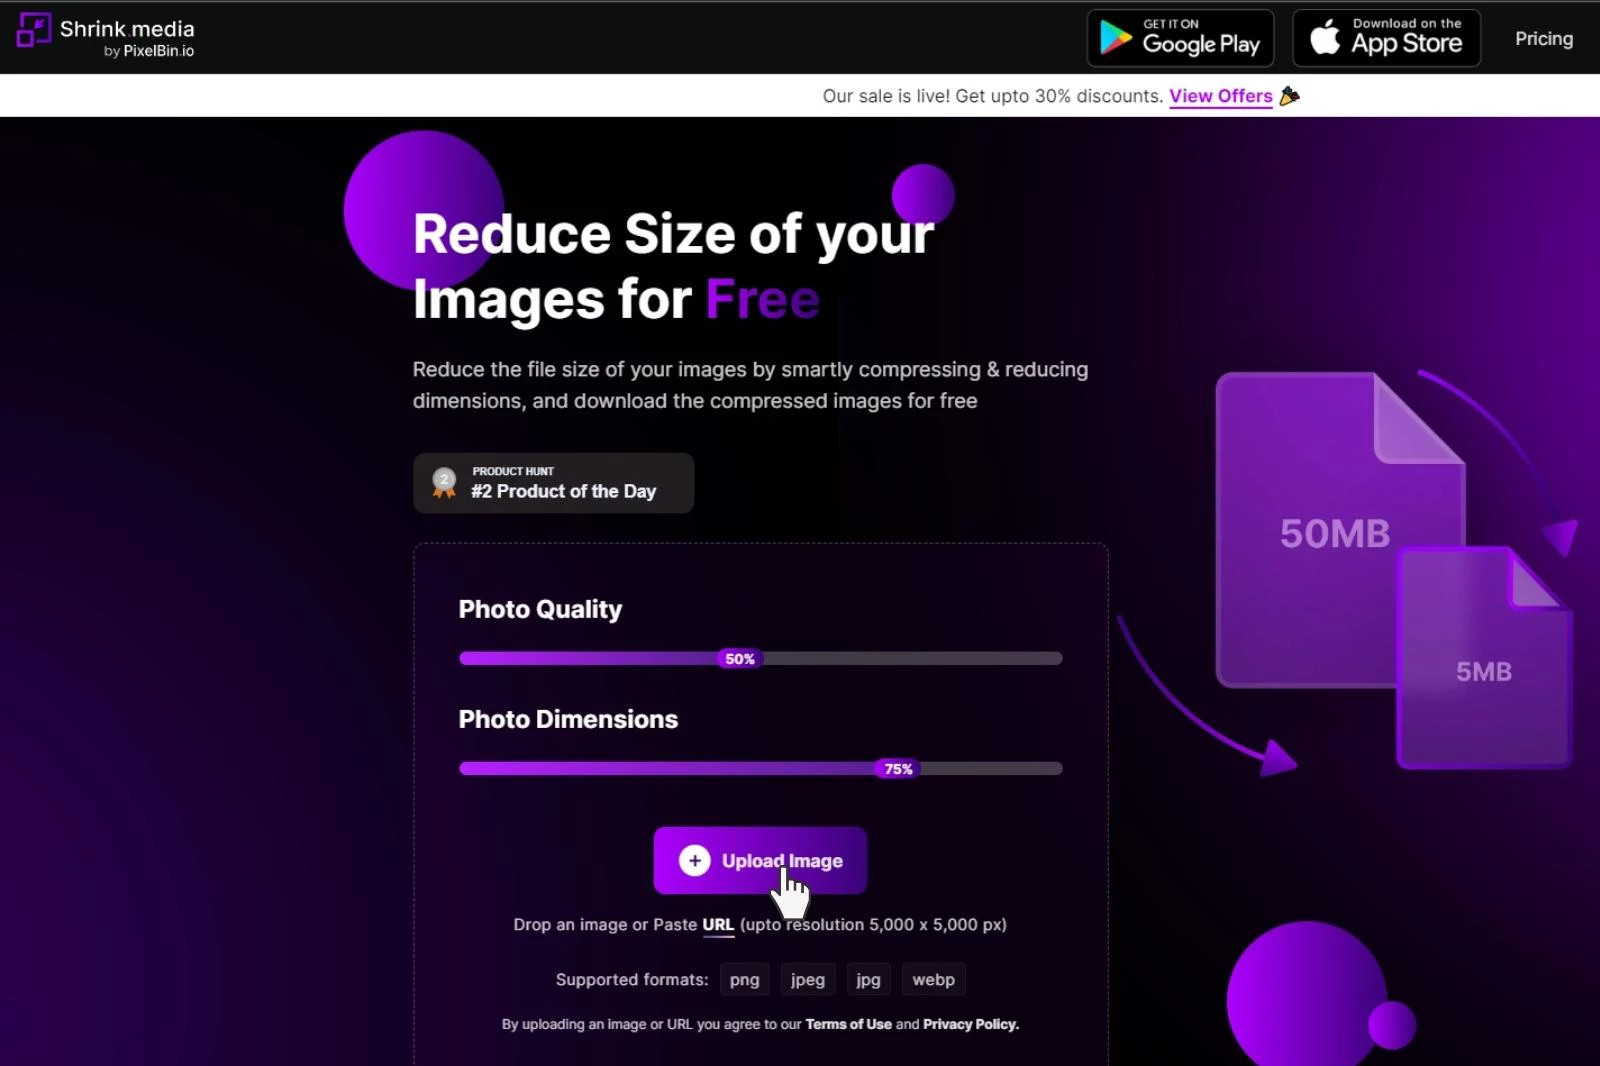 Upload Image using Shrink.media
Uploading an image to Shrink.media is straightforward, allowing users to quickly reduce file size while retaining image quality.
3.2. Pros and Cons of Microsoft Paint
Pros:
-
Simple to Use: MS Paint is easy to use, even for beginners.
-
Free: MS Paint comes free with Windows.
-
Basic Editing Features: MS Paint includes various features, such as resizing, rotating, and cropping.
-
Multiple Format Support: It supports popular image formats like JPEG and GIF.
-
Quick Resizing: MS Paint allows for quick resizing of images.
-
Compatibility: The program is compatible with all Windows devices.
Cons:
-
Limited Features: MS Paint lacks the advanced features of professional image editing tools.
-
No Layer Support: It does not support multiple layers.
-
No Filters or Retouching Options: It has no filters or retouching options.
-
Windows Only: It only works on Windows computers.
3.3. Reducing Image Size by Cropping in Microsoft Paint
Cropping is another effective way to reduce image size in MS Paint. By removing unwanted areas of the image, you can reduce the overall file size.
Step 1: Open Paint and upload your image by clicking File > Open.
Step 2: Click on the Select tool and choose either the Rectangular selection or the Free-form selection.
Step 3: Drag the editing box on the image to select the area you want to crop. Press Crop to cut the area out of selection from the image.
Step 4: Click the Resize menu on the Home tab to lower the image’s resolution by reducing its dimensions.
Step 5: Open the File Menu, go to Save as, and pick JPEG image format to save the image.
4. Compressing Images with Windows Photos App
The Windows Photos app is another built-in tool that offers a simple way to compress images. It provides optimized image presets to quickly reduce file size.
4.1. How to Use Windows Photos App
Here’s how to compress images using the Windows Photos app:
Step 1: Find the image you want to resize in Windows File Explorer.
Step 2: Right-click on the image and select Open with > Photos to open the picture with the Windows Photos app.
Step 3: Once your image is opened in the Photos app, click on the See More button (the triple horizontal dotted icon). Go to the Resize option from the drop-down menu.
Step 4: Select one of the optimized image presets, such as “Best for emails and messages.”
Step 5: Alternatively, select “Define custom dimensions” to manually enter a custom dimension.
Step 6: Manually enter the custom dimensions you want to resize the image here. Remember, the lesser the quality, the smaller the file size of the resized outcome.
Step 7: Make sure you keep the Maintain aspect ratio enabled.
Step 8: After choosing a resizing option, select a location where you want to save the resized version of the image.
Step 9: Try to give it a different name so that you don’t overwrite the original copy of the image.
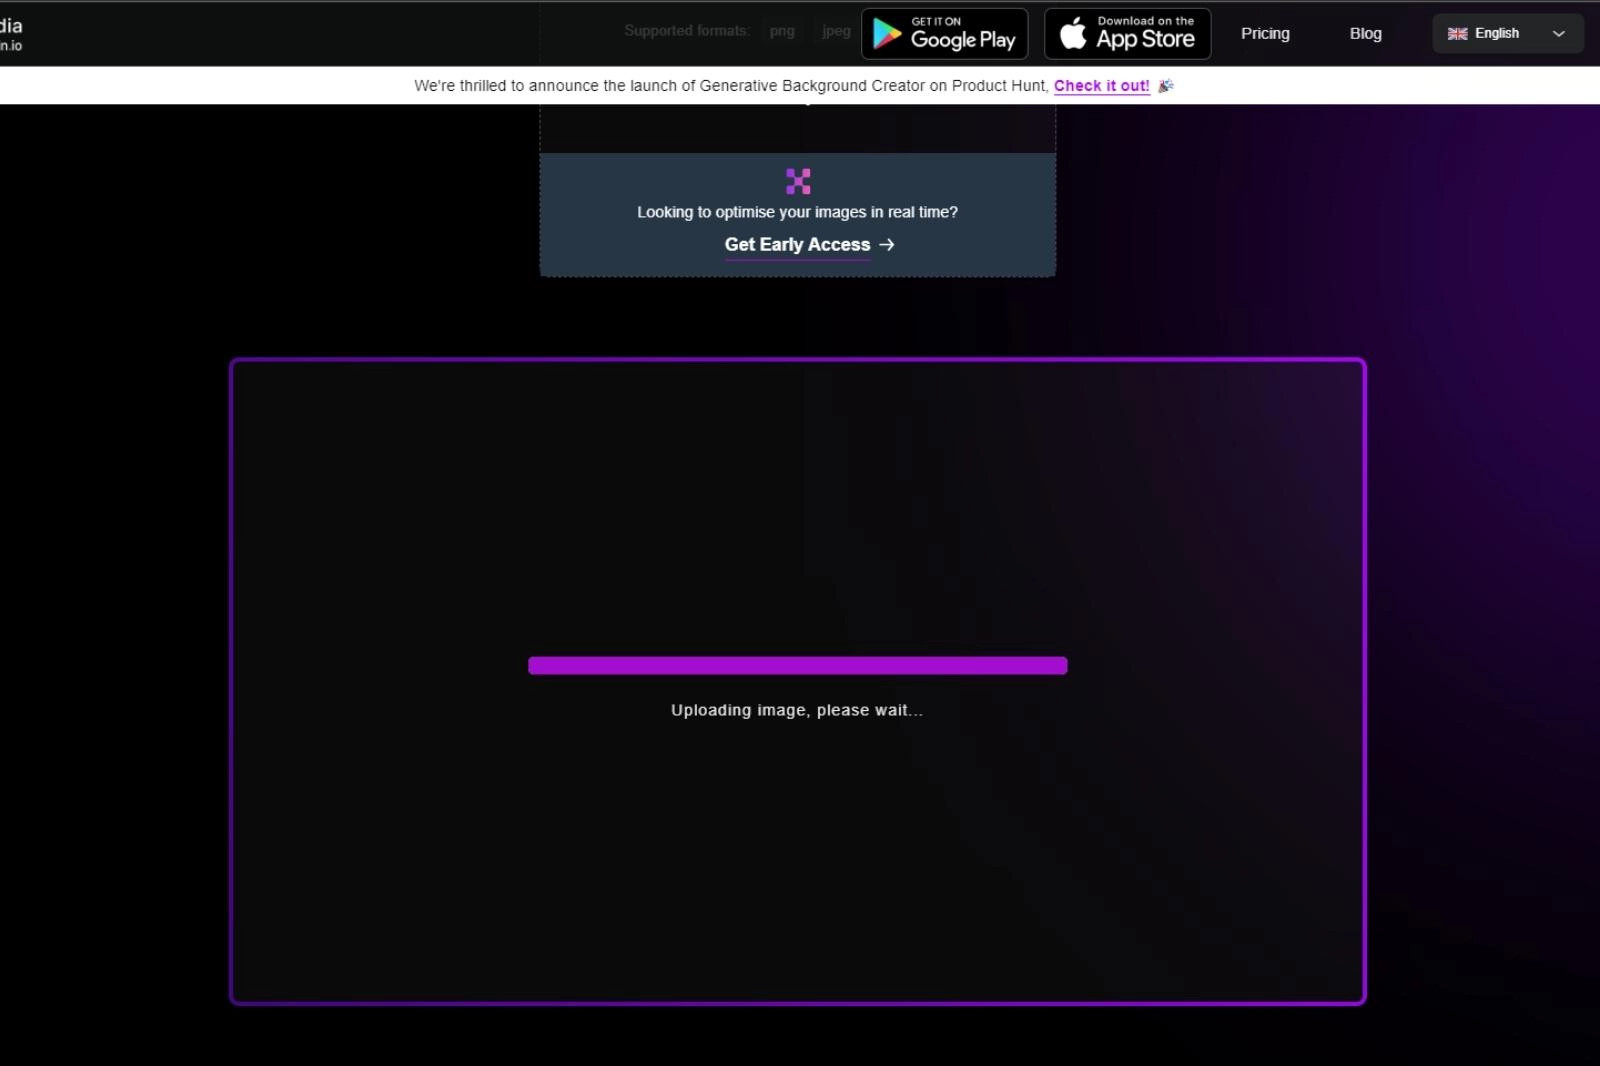 Processing Images via Shrink.media
The image processing phase in Shrink.media utilizes AI algorithms to ensure effective compression without significant quality loss.
5. Compressing Images in Microsoft Word
Believe it or not, Microsoft Word can also be used to compress images. This is particularly useful if you’re working with images embedded in a Word document.
5.1. How to Use Microsoft Word
To compress images in Word:
Step 1: Open the MS Word document containing the image you want to compress and select a photo.
Step 2: Navigate to the “Picture Format” tab on the Home screen. Go to the Adjust Group and click Compress Pictures.
Step 3: Make sure you select the “Apply only to this picture check box” if you want the compression to apply to only one image you selected under the “Compression Option.” If you uncheck this option, it will compress all the images in the document.
Step 4: Under the Resolution Option, select the resolutions that you want to incorporate into your image. Then, click the OK button.
Step 5: The image in your Word document will now be compressed.
6. Compressing Images with RIOT (Radical Image Optimization Tool)
RIOT is a free online image compression tool that allows you to reduce image file sizes in JPG, PNG, or GIF formats. It offers a user-friendly interface where you can compare the compressed results with the original in real-time.
6.1. Setting Up RIOT
Step 1: Search for RIOT software in your browser and download the app.
Step 2: After this, a page will be opened where RIOT software will be displayed. Click on the download option on its right side.
Step 3: The Free download for PC option will appear. Click on it, and a dialogue box with a Save or Cancel button will be there. Click on Save to download the software and install it in your system.
Step 4: Click on the Run > Next button to install it.
Step 5: Select the I Agree button, and the software will be installed on your PC.
6.2. Compressing Images Using RIOT
Step 1: Now, open RIOT and click the Open button on its home screen to insert the picture you want to compress. You can also drag the image here.
Step 2: The image will be displayed in two parts – the original image and the Optimized image with the size of both.
Step 3: Below you will see a Quality button that you can use to adjust the size of your image.
Step 4: After reducing the size, click on the Save button.
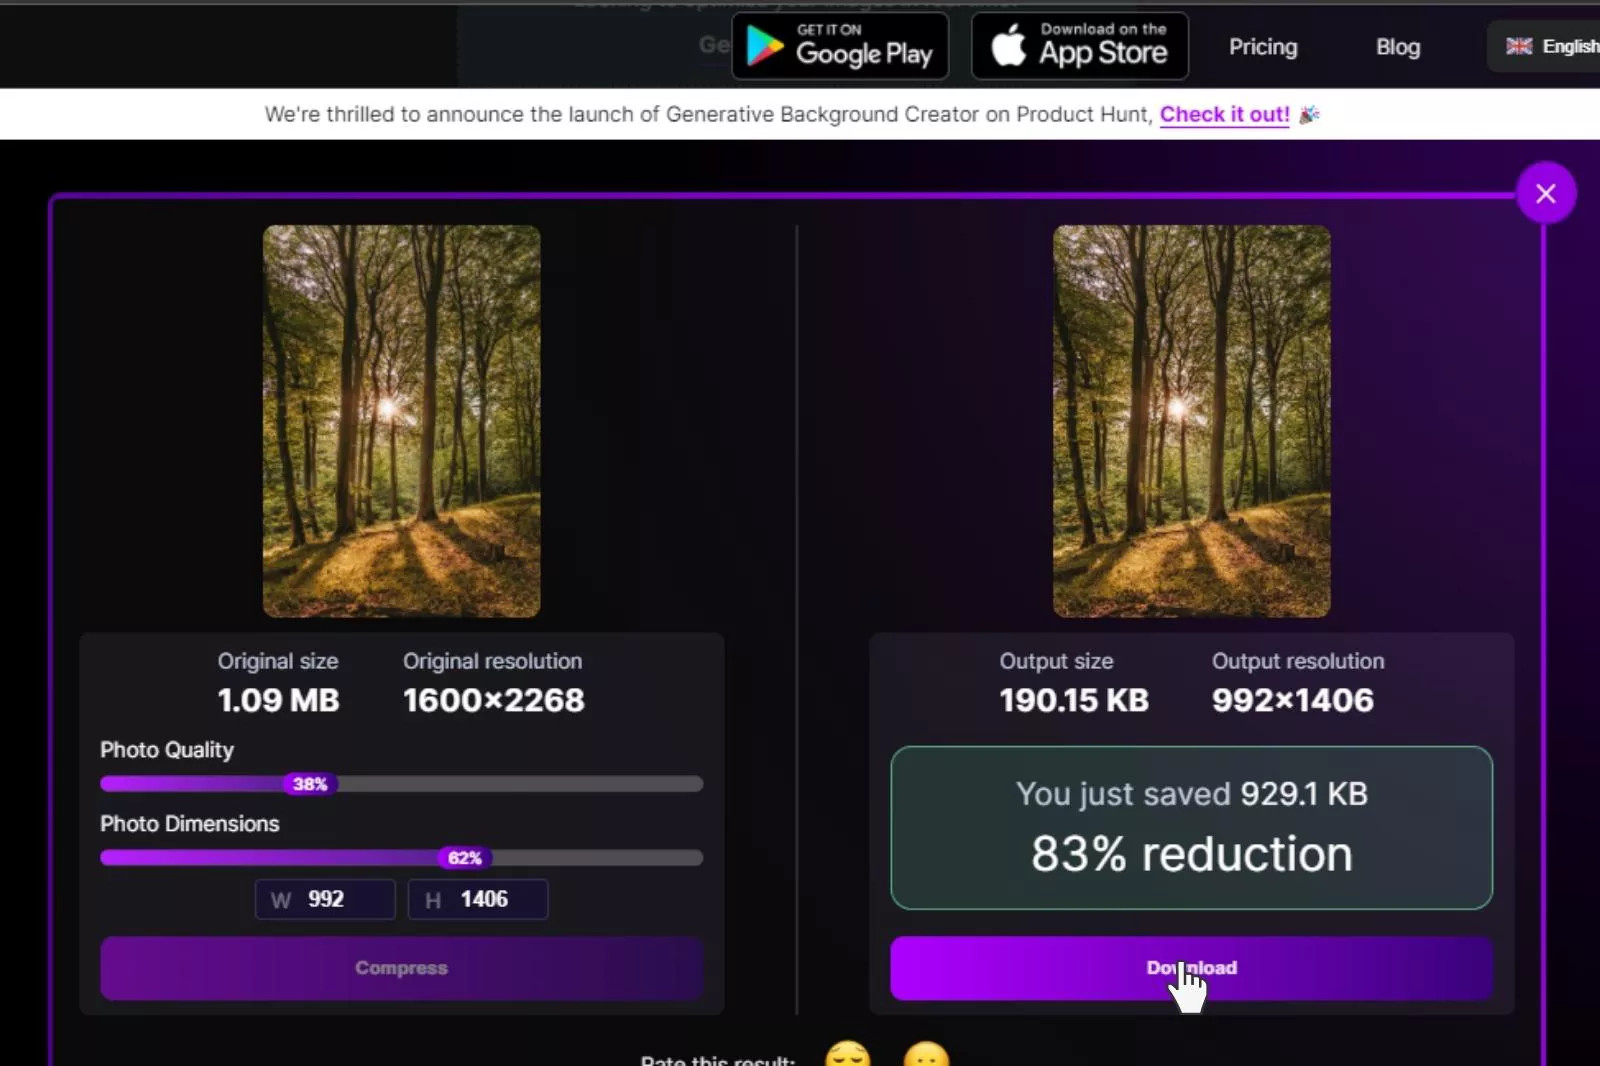 Download Image on Shrink.media
The final step on Shrink.media is downloading the optimized image, now smaller in size but retaining essential details.
7. Compressing Images with PowerToys
PowerToys is a set of utilities for power users to tune and streamline their Windows experience for greater productivity. One of its tools, Image Resizer, allows you to resize images in bulk directly from File Explorer.
7.1. How to Use PowerToys
Step 1: Download and install the PowerToys extension file from the GitHub page.
Step 2: Once installed, open PowerToys by pressing the Start button and searching for it in the menu.
Step 3: Go to the PowerToys settings and click on Image Resizer. Turn the “Enable Image Resizer” button ON.
Step 4: Select images from file explorer, and right-click on them. Choose Resize pictures.
Step 5: Select a size in the PowerToys image resizer window from current presets. For example, you can change it to Small, Medium, Large, or Phone size.
Step 6: Select a preset size, or go for a Custom size to enter the desired width and height.
Step 7: Now save the resized image to apply all changes.
8. Choosing the Right Method
The best method for compressing images depends on your specific needs and technical expertise.
-
For quick and easy compression without sacrificing quality: Shrink.media is an excellent choice.
-
For basic compression using built-in Windows tools: Microsoft Paint or Windows Photos app are good options.
-
For compressing images within a Word document: Use the built-in compression feature in Microsoft Word.
-
For more control over compression settings: RIOT offers advanced options and real-time previews.
-
For bulk resizing directly from File Explorer: PowerToys Image Resizer is a convenient solution.
9. Best Practices for Image Compression
-
Choose the Right Format: JPEG is best for photographs, while PNG is better for images with text or graphics.
-
Optimize for Web: Use online tools to compress images specifically for web use.
-
Resize Images: Reduce the dimensions of images to match the display size on your website or application.
-
Use Lossy Compression Sparingly: Avoid over-compressing images, as this can lead to noticeable quality loss.
-
Preview and Compare: Always preview the compressed image and compare it to the original to ensure acceptable quality.
10. FAQ: Compressing Photos on Windows
10.1. How do I compress a JPEG image on Windows?
You can compress a JPEG image using various methods, including Shrink.media, Microsoft Paint, Windows Photos app, RIOT, or PowerToys Image Resizer. Each tool offers different levels of control over compression settings and quality.
10.2. How do I reduce the file size of a PNG image on Windows?
To reduce the file size of a PNG image, you can use Shrink.media or RIOT. These tools offer lossless compression options that reduce file size without sacrificing image quality.
10.3. What is the best image format for web use?
JPEG is generally the best image format for photographs on the web due to its small file size and good quality. WebP is another excellent option that offers even better compression than JPEG.
10.4. How much can I compress an image without losing quality?
The amount you can compress an image without losing noticeable quality depends on the image format and the compression method used. Experiment with different settings and preview the results to find the optimal balance between file size and quality.
10.5. Can I compress multiple images at once on Windows?
Yes, you can compress multiple images at once using PowerToys Image Resizer or the paid version of Shrink.media.
10.6. Is it better to resize or compress an image?
Both resizing and compressing an image can reduce its file size. Resizing reduces the dimensions of the image, while compression reduces the amount of data used to store the image. Often, a combination of both techniques is the most effective approach.
10.7. How do I maintain image quality when compressing?
To maintain image quality when compressing, use lossless compression methods or reduce the compression level when using lossy compression. Always preview the compressed image and compare it to the original to ensure acceptable quality.
10.8. What is the ideal image size for a website?
The ideal image size for a website depends on the specific use case, but generally, images should be no larger than 500KB. For larger images, consider using lazy loading to improve page loading times.
10.9. How does image compression affect SEO?
Image compression can positively affect SEO by improving website loading times. Faster loading times lead to a better user experience and can boost search engine rankings.
10.10. Are there any online tools to compress images?
Yes, several online tools are available to compress images, including Shrink.media, TinyPNG, and ImageOptim. These tools offer various compression options and are easy to use.
Conclusion
Compressing images is an essential skill for anyone who works with digital images. Whether you’re a photographer, web designer, or just someone who wants to share photos online, understanding how to compress images can save you time, bandwidth, and storage space. By following the tips and techniques outlined in this article, you can optimize your images for web use without sacrificing quality.
Ready to take your photography skills to the next level? Visit dfphoto.net to discover a wealth of resources, from detailed tutorials and stunning photo galleries to a vibrant community of fellow photography enthusiasts. Join us and unlock your creative potential! For more information, visit our website at dfphoto.net or contact us at 1600 St Michael’s Dr, Santa Fe, NM 87505, United States, or call +1 (505) 471-6001.