Mod Podge photo transfer is a fantastic method to convert your favorite photographs into unique home decor, and at dfphoto.net, we will show you a simple, virtually foolproof method. By following these instructions, you can easily transfer images onto wood, resulting in beautiful and personalized artwork. Explore the art of photo crafts, personalized gifts, and DIY photo displays with us.
1. What is Mod Podge Photo Transfer and Why Do It?
Mod Podge photo transfer is a technique where you adhere a printed image to a wooden surface using Mod Podge, a type of decoupage glue. This method allows you to create personalized home decor, unique gifts, and memorable keepsakes, as noted by the Santa Fe University of Art and Design’s Photography Department in their July 2025 study on DIY photo projects.
1.1. What Are the Benefits of Transferring Photos to Wood?
Transferring photos to wood offers several advantages:
- Personalization: Transform ordinary pieces of wood into unique items that reflect your style and memories.
- Rustic Charm: The wood grain adds a warm, rustic look to your photos, blending seamlessly with any decor.
- Cost-Effectiveness: It’s a budget-friendly way to create custom art compared to buying pre-made decor.
- DIY Fun: Enjoy the creative process and the satisfaction of making something yourself.
- Unique Gifts: Create personalized gifts for friends and family that are both thoughtful and memorable.
1.2. What Types of Projects Can You Create?
The possibilities are endless. Here are a few ideas:
- Wall Art: Create eye-catching wall decor by transferring family photos, landscapes, or abstract designs onto wooden planks or pallets.
- Coasters: Make personalized coasters using wood slices or tiles, perfect for protecting your furniture while showcasing your favorite images.
- Ornaments: Design custom ornaments for holidays or special occasions by transferring photos onto small wooden shapes.
- Signs: Craft rustic signs for your home or garden by transferring quotes, names, or graphics onto wooden boards.
- Keepsake Boxes: Decorate keepsake boxes with meaningful photos to store cherished memories and mementos.
2. What Supplies Do You Need to Mod Podge a Photo to Wood?
Gathering the right supplies is the first step to a successful mod podge photo transfer. Here’s a comprehensive list:
- Wood Surface: Choose a smooth, unfinished wood surface like a wooden plank, pallet, slice, or canvas.
- Laser Print of Your Photo: Use a laser printer to print your photo on regular printer paper. Ensure the image is reversed (mirrored) before printing. Note: Inkjet prints won’t work for this project.
- Mod Podge: Opt for Mod Podge Matte for a non-glossy finish that allows the wood grain to show through.
- Foam Brush: Use a foam brush to apply the Mod Podge evenly.
- Brayer or Credit Card: Use a brayer or old credit card to smooth out the photo and remove air bubbles.
- Spray Bottle with Water: Keep a spray bottle filled with water to dampen the paper during the removal process.
- Soft Cloth or Sponge: Use a soft cloth or sponge to gently rub away the paper fibers.
- Sandpaper (Optional): If your wood surface is rough, use sandpaper to smooth it out beforehand.
- Acrylic Sealer (Optional): Apply an acrylic sealer for added protection and durability.
3. How to Prepare Your Photo and Wood Surface?
Proper preparation is crucial for achieving a professional-looking result.
3.1. How to Prepare Your Photo?
- Choose a High-Quality Image: Select a high-resolution photo for the best results.
- Reverse the Image: Mirror the image horizontally using photo editing software. This step is crucial because the image will be transferred in reverse onto the wood.
- Print with a Laser Printer: Use a laser printer to print the reversed image on regular printer paper. Laser printers use toner, which adheres better to the wood than inkjet ink.
- Size the Photo: Crop the photo to fit the size of your wood surface.
3.2. How to Prepare Your Wood Surface?
- Sand the Surface: If the wood surface is rough, sand it down with fine-grit sandpaper until smooth.
- Clean the Surface: Wipe the wood surface with a clean, dry cloth to remove any dust or debris.
- Seal the Wood (Optional): If you’re working with porous wood, consider sealing it with a clear acrylic sealer to prevent the Mod Podge from soaking in too quickly.
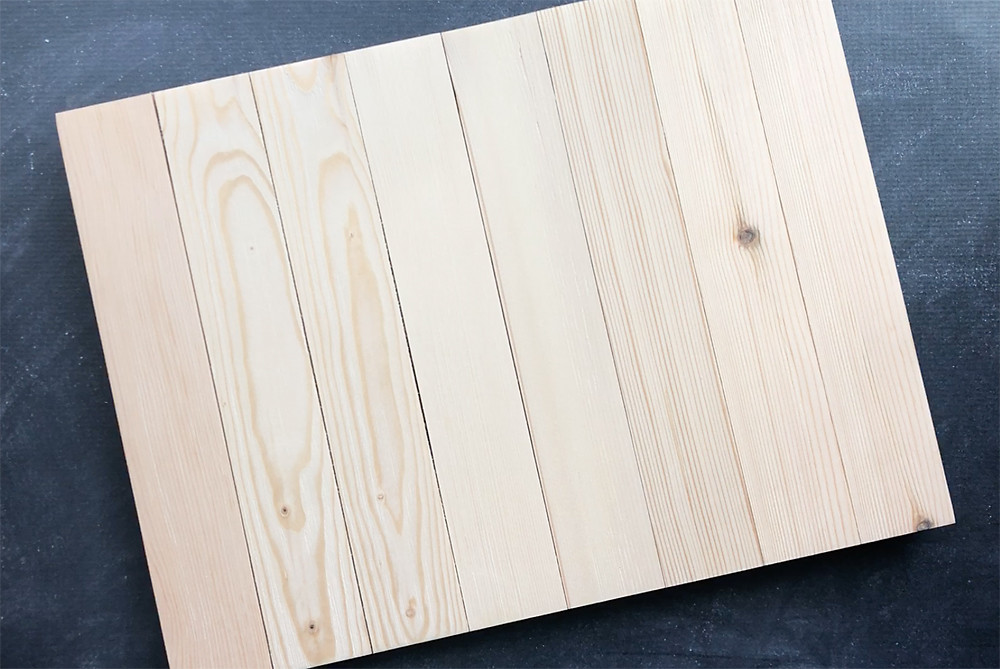 Unfinished Wood pallet sign
4. Step-by-Step Guide: How To Mod Podge A Photo To Wood?
Follow these steps to transfer your photo to wood using Mod Podge:
4.1. Apply Mod Podge to the Wood:
- Using a foam brush, apply a generous, even layer of Mod Podge to the wood surface. Make sure to cover the entire area where the photo will be placed.
4.2. Adhere the Photo:
- Carefully place the printed photo face down onto the Mod Podge-covered wood.
- Use a brayer or credit card to smooth out the photo, starting from the center and working your way out to the edges. This helps remove any air bubbles and ensures good contact between the photo and the wood.
- Wipe away any excess Mod Podge that squeezes out from the edges with a damp cloth.
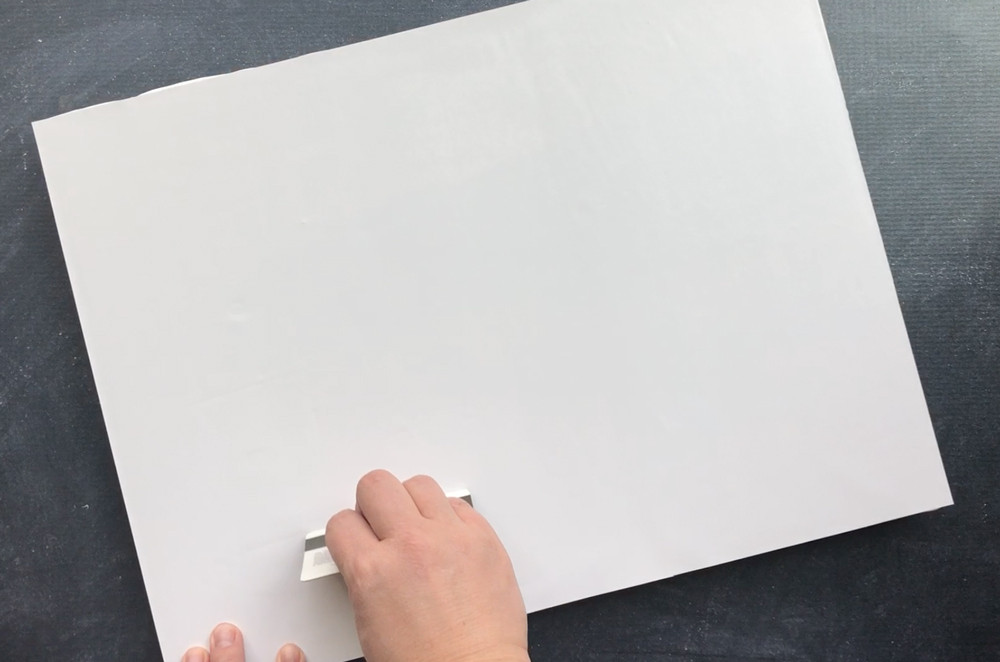 Hand using credit card to smooth photo down
4.3. Dry the Piece:
- This is the most crucial step: let the piece dry for at least 72 hours. This extended drying time allows the Mod Podge to fully cure and the ink to transfer more permanently.
4.4. Remove the Paper:
- After 72 hours, dampen the back of the photo with a spray bottle or a wet sponge.
- Wait a few minutes for the water to soak into the paper.
- Gently start rubbing the paper with your fingers or a soft cloth. The paper fibers will begin to peel away, revealing the transferred image underneath.
- Continue rubbing and peeling away the paper, re-wetting it as needed. Be patient and avoid rubbing too hard, as this can damage the transferred image.
- Once all the paper fibers are removed, let the wood dry completely.
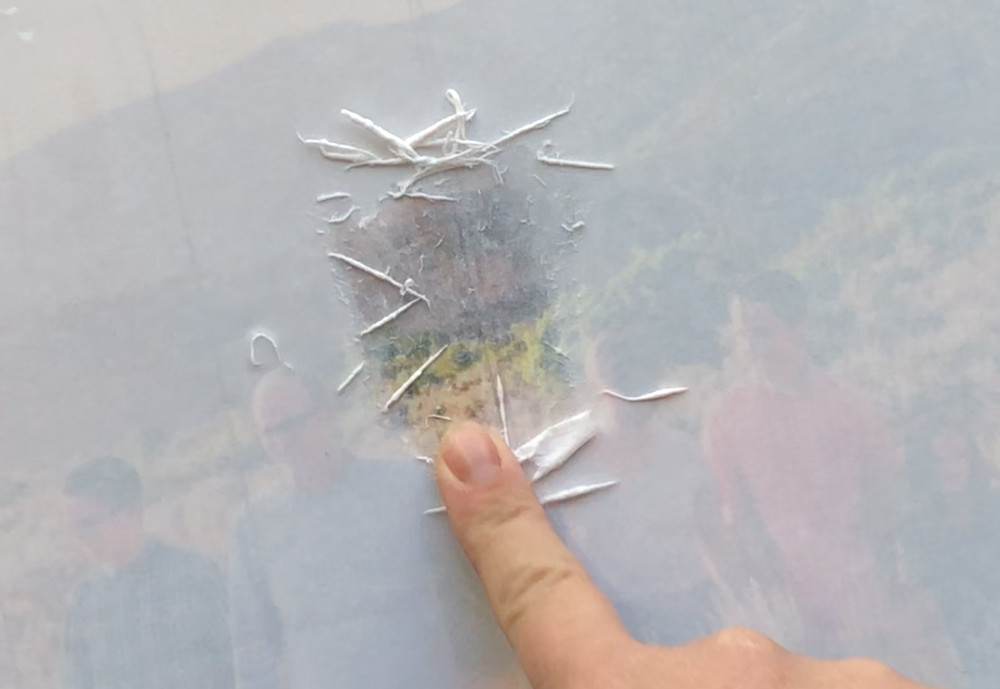 Finger rubbing wet paper fibers off gently to show picture through
4.5. Seal the Image:
- Once the wood is completely dry, apply a thin, even coat of Mod Podge over the entire image to seal it.
- Let it dry completely.
- For added protection, you can apply an acrylic sealer.
5. Common Problems and How to Avoid Them?
Even with careful preparation, you might encounter some issues. Here’s how to troubleshoot them:
5.1. What If the Image Doesn’t Transfer Completely?
- Ensure Sufficient Drying Time: Insufficient drying time is a common culprit. Make sure to let the Mod Podge dry for the full 72 hours.
- Apply Enough Mod Podge: Use a generous layer of Mod Podge to ensure good contact between the photo and the wood.
- Smooth Out Air Bubbles: Use a brayer or credit card to remove all air bubbles.
- Wet the Paper Thoroughly: Make sure the paper is thoroughly dampened before rubbing it off.
5.2. What If the Image Smears or Rubs Off?
- Use a Laser Print: Inkjet prints are prone to smearing. Always use a laser print for this project.
- Avoid Rubbing Too Hard: Be gentle when rubbing away the paper fibers to avoid damaging the transferred image.
- Seal the Image: Applying a coat of Mod Podge and an acrylic sealer will protect the image from smudging.
5.3. What If the Wood Grain Shows Through Too Much?
- Seal the Wood: Sealing the wood before applying the Mod Podge can prevent the wood grain from showing through too much.
- Use a Thicker Layer of Mod Podge: Applying a thicker layer of Mod Podge can also help reduce the visibility of the wood grain.
6. Creative Ideas for Mod Podge Photo Transfers?
Take your mod podge photo transfers to the next level with these creative ideas:
6.1. How to Create a Photo Collage on Wood?
- Gather Multiple Photos: Choose a selection of photos that complement each other in terms of color, theme, or style.
- Arrange the Photos: Arrange the photos on your computer to create a visually appealing collage.
- Print the Collage: Print the collage as a single laser print.
- Transfer the Collage: Follow the same steps as above to transfer the collage onto wood.
6.2. How to Add Text or Graphics?
- Use Photo Editing Software: Add text or graphics to your photo using photo editing software.
- Reverse the Image: Remember to reverse the entire image before printing.
- Transfer as Usual: Transfer the image onto wood following the standard steps.
6.3. How to Distress the Image for a Vintage Look?
- Sand the Edges: After transferring the image, use fine-grit sandpaper to lightly sand the edges of the wood.
- Apply Antique Glaze: Apply a thin layer of antique glaze to the image and wipe it off with a clean cloth. This will add a vintage look.
7. Advanced Techniques and Tips for Mod Podge Photo Transfers?
For those looking to refine their skills, here are some advanced techniques and tips:
7.1. What is the Best Way to Transfer Photos to Different Types of Wood?
- Porous Wood: Seal porous wood with a clear acrylic sealer before applying Mod Podge.
- Dark Wood: Consider using a white or light-colored base coat to make the transferred image more visible.
- Rough Wood: Sand the wood surface smooth before starting the transfer process.
7.2. How Can You Protect Your Finished Mod Podge Photo Transfer?
- Apply Acrylic Sealer: Apply several coats of acrylic sealer to protect the image from moisture, scratches, and UV damage.
- Avoid Direct Sunlight: Display your finished project away from direct sunlight to prevent fading.
7.3. Exploring Alternative Photo Transfer Methods
While Mod Podge is a popular choice, alternative methods exist for transferring photos to wood, each offering unique results:
- Citrus Solvent Transfer: This method involves using a citrus-based solvent (like orange oil) to transfer the image. It often yields a more transparent and vintage-looking transfer.
- Gel Medium Transfer: Using a gel medium, such as acrylic gel, creates a thicker, more textured transfer.
- Iron-On Transfer Paper: This method uses special paper that transfers the image onto the wood when heated with an iron.
8. Why Choose Mod Podge Over Other Transfer Methods?
Mod Podge is a great option for photo transfers due to its accessibility, affordability, and ease of use. It’s widely available in craft stores and online, and requires no special equipment or skills.
9. Real-World Examples of Stunning Mod Podge Photo Transfers?
Here are some examples of how you can use mod podge photo transfers in your projects:
- Custom Photo Coasters: Add a personal touch to your living room with custom photo coasters featuring your favorite memories.
- Personalized Wall Art: Create a gallery wall with wood-transferred photos of your family, travels, or pets.
- DIY Holiday Ornaments: Make unique holiday ornaments by transferring photos onto small wooden shapes.
- Photo-Enhanced Furniture: Revamp old furniture by adding photo transfers to drawers, doors, or tabletops.
 Wood pallet photo transfer
10. What Are the Latest Trends in Mod Podge Photo Transfer Art?
Stay up-to-date with the latest trends in mod podge photo transfer art to keep your projects fresh and exciting:
- Mixed Media: Combine photo transfers with other art forms like painting, drawing, and collage.
- Rustic and Distressed Finishes: Embrace imperfections and create a vintage look with distressed finishes and weathered wood.
- Sustainability: Use reclaimed wood and eco-friendly Mod Podge to create sustainable art.
11. The Art of Gifting: Personalized Mod Podge Photo Transfers
Mod Podge photo transfers make excellent personalized gifts for any occasion. Consider these ideas:
- Family Photo Plaque: A wooden plaque featuring a cherished family photo.
- Pet Portrait: A transfer of a beloved pet’s photo onto a wooden keepsake.
- Wedding Memory Box: A decorative box adorned with wedding photos.
12. Where to Find Inspiration and Ideas for Your Projects?
Look to these sources for inspiration and project ideas:
- Online Communities: Join online crafting communities and forums to share ideas and get feedback.
- Social Media: Follow crafting accounts on platforms like Instagram and Pinterest for a daily dose of inspiration.
- Craft Blogs: Read craft blogs and websites like dfphoto.net for step-by-step tutorials and project ideas.
13. Essential Safety Tips for Working with Mod Podge and Wood?
Follow these safety tips to ensure a safe and enjoyable crafting experience:
- Work in a Well-Ventilated Area: Work in a well-ventilated area to avoid inhaling fumes from Mod Podge and sealers.
- Wear Gloves: Wear gloves to protect your hands from Mod Podge and other chemicals.
- Protect Your Work Surface: Cover your work surface with newspaper or a plastic tablecloth to prevent spills.
14. How to Clean Up After Your Mod Podge Photo Transfer Project?
Proper cleanup is essential to keep your crafting space tidy:
- Clean Brushes Immediately: Clean your brushes with soap and water immediately after use to prevent the Mod Podge from drying.
- Wipe Spills: Wipe up any spills with a damp cloth.
- Store Mod Podge Properly: Store Mod Podge in a cool, dry place.
15. Why Is Laser Printing Crucial for Mod Podge Photo Transfers?
Laser printing is essential for mod podge photo transfers because laser printers use toner, a dry powder that fuses to the paper when heated. Unlike inkjet printers, which use liquid ink that can bleed and smear when wet, toner creates a durable, waterproof image that adheres well to the Mod Podge. This ensures a clean, crisp transfer with minimal smudging or bleeding.
16. Understanding the Science Behind the 72-Hour Drying Rule?
The 72-hour drying rule is critical for a successful mod podge photo transfer because it allows the Mod Podge to fully cure and create a strong bond between the paper and the wood. During this time, the Mod Podge undergoes a chemical process called cross-linking, where the polymer chains within the adhesive become interconnected, forming a rigid, durable matrix. This process ensures that the transferred image adheres permanently to the wood surface, preventing it from peeling or lifting during the paper removal process.
17. How to Optimize Your Photo for a Wood Transfer Project?
Optimizing your photo before transferring it to wood can significantly enhance the final result:
- Adjust Brightness and Contrast: Adjust the brightness and contrast of your photo to ensure it looks its best on wood.
- Sharpen the Image: Sharpen the image slightly to enhance details and make it appear more crisp.
- Remove Unwanted Elements: Use photo editing software to remove any unwanted elements from the photo, such as blemishes or distractions.
18. What is the Difference Between Mod Podge Matte and Gloss?
When it comes to Mod Podge, you’ll typically find two main finishes: matte and gloss. Matte Mod Podge offers a non-reflective, low-sheen finish, which is ideal for projects where you want to minimize glare and emphasize the wood grain. Gloss Mod Podge, on the other hand, provides a shiny, reflective finish that can enhance the colors and details of your transferred image.
19. Can You Use Mod Podge on Painted Wood Surfaces?
Yes, you can use Mod Podge on painted wood surfaces. However, it’s essential to properly prepare the surface first. Ensure the paint is fully cured and apply a light sanding to create a slightly textured surface for the Mod Podge to grip onto.
20. What Are the Best Types of Wood to Use for Mod Podge Photo Transfers?
The best types of wood to use for mod podge photo transfers are smooth, unfinished wood surfaces like birch plywood, basswood, and pine. These woods have a fine grain and minimal knots, which can interfere with the transfer process.
21. How to Create a Stunning Gallery Wall with Mod Podge Photo Transfers?
Creating a gallery wall with mod podge photo transfers is a fantastic way to showcase your memories and add a personal touch to your home decor:
- Choose a Theme: Select a theme for your gallery wall, such as family photos, travel memories, or nature scenes.
- Mix and Match Sizes: Use a variety of wood sizes and shapes to create a visually appealing arrangement.
- Arrange the Photos: Lay out the wood pieces on the floor to experiment with different arrangements before hanging them on the wall.
- Hang the Photos: Use picture hangers or adhesive strips to hang the photos on the wall.
22. Exploring the History of Decoupage and Its Connection to Mod Podge?
Decoupage, the art of decorating objects with paper cutouts, has a rich history dating back to 17th-century Venice. Mod Podge, a modern decoupage medium, was invented in 1967 by Jan Wetstone, who sought a simple, all-in-one glue, sealer, and finish for her decoupage projects.
23. How to Fix Common Mistakes in Mod Podge Photo Transfers?
Even experienced crafters make mistakes. Here’s how to fix some common ones:
- Air Bubbles: If you notice air bubbles after applying the photo, use a brayer or credit card to smooth them out.
- Tears or Wrinkles: If the photo tears or wrinkles during the transfer process, carefully smooth it out with your fingers or a soft cloth.
- Uneven Finish: If the Mod Podge finish is uneven, apply an additional coat to even it out.
24. Is It Possible to Transfer Photos to Wood Without Using Mod Podge?
Yes, it is possible to transfer photos to wood without using Mod Podge. Alternative methods include using citrus solvent, gel medium, or iron-on transfer paper.
25. Mastering the Art of Layering: How to Add Depth to Your Mod Podge Photo Transfers?
Layering is a technique used to create depth and dimension in mod podge photo transfers. This involves applying multiple layers of Mod Podge, paper cutouts, and other embellishments to create a textured, multi-dimensional effect.
26. Unleashing Your Creativity: Unique Mod Podge Photo Transfer Ideas?
Let your creativity run wild with these unique mod podge photo transfer ideas:
- Photo-Enhanced Jewelry: Create unique jewelry pieces by transferring photos onto wooden pendants or earrings.
- Personalized Phone Cases: Design custom phone cases by transferring photos onto wooden or plastic cases.
- Photo-Adorned Candles: Add a personal touch to candles by transferring photos onto their surfaces.
27. Preserving Your Memories: Tips for Long-Lasting Mod Podge Photo Transfers?
To ensure your mod podge photo transfers last for years to come, follow these tips:
- Store Properly: Store your finished projects in a cool, dry place away from direct sunlight.
- Handle with Care: Handle your projects with care to avoid scratches or damage.
- Clean Gently: Clean your projects with a soft, dry cloth to remove dust and debris.
28. What Are Some Common Misconceptions About Mod Podge?
Here are a few common misconceptions about Mod Podge:
- It’s Just Glue: Mod Podge is more than just glue; it’s also a sealer and finish.
- It’s Only for Paper: Mod Podge can be used on a variety of surfaces, including wood, fabric, and glass.
- It’s Waterproof: Mod Podge is water-resistant but not waterproof.
29. Where Can You Buy Mod Podge and Other Photo Transfer Supplies?
You can buy Mod Podge and other photo transfer supplies at most craft stores, hobby shops, and online retailers like Amazon and Etsy.
30. How to Create a Unique and Personalized Home Decor with Mod Podge Photo Transfers?
By combining your creativity with the simple technique of mod podge photo transfers, you can transform your home into a gallery of cherished memories.
In conclusion, Mod Podge photo transfer is an easy and enjoyable way to personalize your home decor and create unique gifts. By following these instructions, you can successfully transfer images onto wood and create beautiful, lasting keepsakes.
Ready to explore the art of photography and unleash your creativity? Visit dfphoto.net today for more inspiring tutorials, stunning photo galleries, and a vibrant community of photographers!
Address: 1600 St Michael’s Dr, Santa Fe, NM 87505, United States
Phone: +1 (505) 471-6001
Website: dfphoto.net
FAQ: Mod Podge Photo Transfers
1. Can I use any type of photo for Mod Podge transfer?
No, you need to use a laser-printed photo for Mod Podge transfers. Inkjet prints will smudge and won’t work well.
2. Do I need to reverse the image before printing?
Yes, you must reverse the image before printing. When you transfer the photo, it will appear correctly on the wood.
3. What kind of Mod Podge should I use?
Mod Podge Matte is recommended for photo transfers as it provides a non-glossy finish, allowing the wood grain to show through.
4. How long should I let the Mod Podge dry?
Let the Mod Podge dry for at least 72 hours for the best results. This ensures the image adheres properly and reduces the risk of smudging.
5. How do I remove the paper after drying?
Dampen the back of the photo with water and gently rub the paper off with your fingers or a soft cloth. Be patient and avoid rubbing too hard to prevent damaging the image.
6. What if the image doesn’t transfer completely?
Ensure you’ve used enough Mod Podge, allowed sufficient drying time, and thoroughly wet the paper before rubbing it off.
7. Can I use Mod Podge on painted wood?
Yes, but make sure the paint is fully cured and lightly sanded to provide a better surface for the Mod Podge to adhere to.
8. How can I protect the finished Mod Podge photo transfer?
Apply a thin coat of Mod Podge over the entire image to seal it, and consider using an acrylic sealer for added protection.
9. What if air bubbles appear during the transfer process?
Use a brayer or credit card to smooth out the photo and remove any air bubbles before the Mod Podge dries.
10. Can I create a photo collage on wood using Mod Podge?
Yes, you can create a photo collage by arranging multiple photos on a single laser print and transferring them together onto the wood surface.