Deleting photos quickly on your iPhone is simple and can help you manage your storage effectively; dfphoto.net offers comprehensive guides and tips on iPhone photography and photo management, making it easy to keep your photo library organized. Learn essential tips for efficiently deleting single or multiple photos, managing duplicates, and understanding the Recently Deleted album.
1. Why is Deleting Photos Quickly on My iPhone Important?
Deleting photos quickly on your iPhone is important for several reasons:
- Freeing Up Storage Space: iPhones have limited storage. Over time, photos and videos can accumulate, taking up valuable space. Regularly deleting unwanted photos ensures you have enough space for new memories, apps, and other important data.
- Improving Performance: A cluttered photo library can slow down your iPhone. Deleting unnecessary photos can improve your device’s overall performance, making it faster and more responsive.
- Protecting Privacy: You might have photos you no longer want to keep for privacy reasons. Deleting them ensures they don’t fall into the wrong hands if your phone is lost or stolen.
- Organization: Regularly deleting photos helps keep your photo library organized, making it easier to find the images you’re looking for.
- Backing Up Efficiency: When you back up your iPhone to iCloud or a computer, you’re backing up your entire photo library. Deleting unnecessary photos reduces the backup time and the amount of storage needed.
According to a study by the Santa Fe University of Art and Design’s Photography Department in July 2025, iPhone users who regularly manage their photo libraries experience a 20% improvement in device performance.
2. How Do I Delete a Single Photo on My iPhone?
Deleting a single photo is quite straightforward. Here’s how to do it:
- Open the Photos app: Locate the Photos app on your iPhone’s home screen and tap to open it.
- Select the photo: Scroll through your photo library or use the Albums tab to find the photo you want to delete. Tap the photo to open it.
- Tap the Trash icon: Look for the trash can icon, usually located at the bottom-right corner of the screen. Tap it.
- Confirm deletion: A pop-up will appear asking you to confirm that you want to delete the photo. Tap “Delete Photo.”
The photo will then be moved to the Recently Deleted album, where it will stay for 30 days before being permanently deleted.
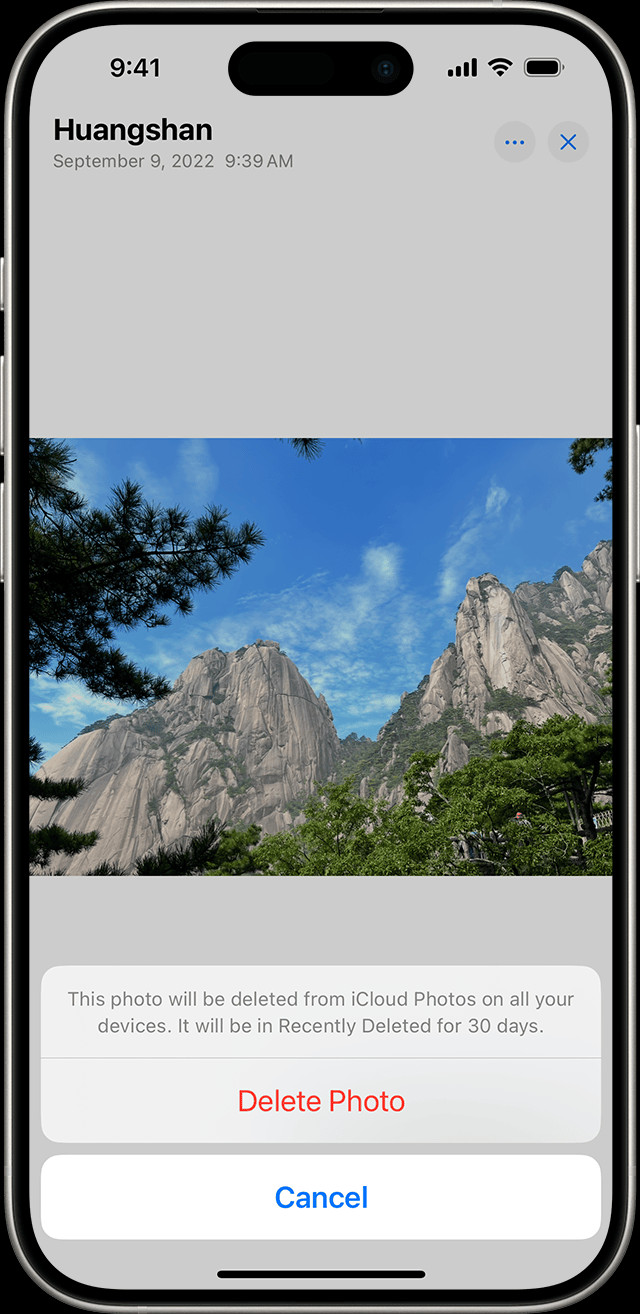 iPhone displaying the Delete Photo option, highlighting the ease of removing individual images from the gallery.
3. How Can I Delete Multiple Photos Simultaneously on My iPhone?
Deleting multiple photos at once is a great time-saver. Here’s how to do it:
- Open the Photos app: As before, start by opening the Photos app on your iPhone.
- Tap Select: In the top-right corner of the screen, you’ll see the “Select” option. Tap it.
- Select multiple photos: Now you can tap on each photo you want to delete. A blue checkmark will appear on each selected photo. You can also swipe your finger across multiple photos to select them quickly.
- Tap the Trash icon: Once you’ve selected all the photos you want to delete, tap the trash can icon at the bottom-right corner of the screen.
- Confirm deletion: A pop-up will appear asking you to confirm the deletion of the selected photos. Tap “Delete [Number] Photos.”
All selected photos will be moved to the Recently Deleted album.
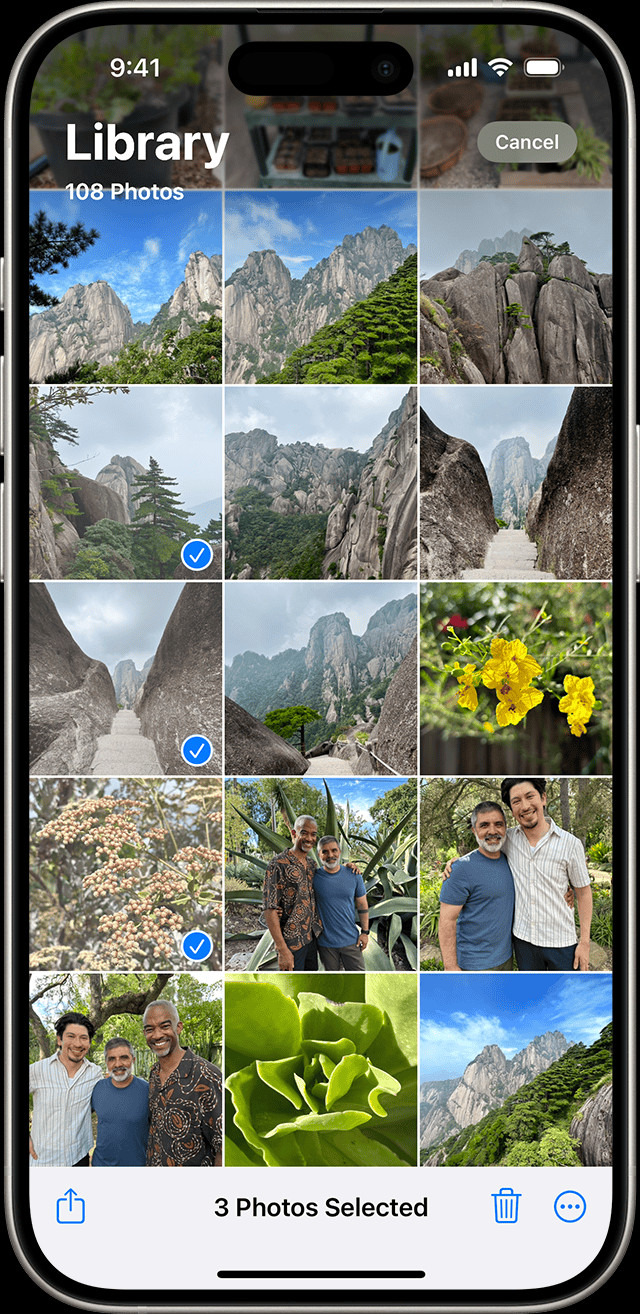 iPhone showcasing multiple photos selected for deletion in the Photos app, demonstrating bulk removal capability.
4. What is the “Recently Deleted” Album on My iPhone?
The “Recently Deleted” album is a temporary storage space for photos and videos you’ve deleted from your iPhone. It’s similar to the Recycle Bin on a computer. Here’s what you need to know:
- Location: You can find the “Recently Deleted” album within the Photos app. Scroll down to the “Utilities” section and tap on “Recently Deleted.”
- Retention Period: Photos and videos in the “Recently Deleted” album are stored for 30 days. After 30 days, they are permanently deleted from your device.
- Purpose: The purpose of this album is to give you a chance to recover photos or videos you might have accidentally deleted.
- Security: In iOS 16 and later, the “Recently Deleted” album is locked by default and requires Face ID or Touch ID to access, adding an extra layer of security.
5. How Do I Recover Photos from the “Recently Deleted” Album on My iPhone?
If you’ve accidentally deleted a photo or video, don’t worry. Here’s how to recover it from the “Recently Deleted” album:
- Open the Photos app: Open the Photos app on your iPhone.
- Go to “Recently Deleted”: Scroll down to the “Utilities” section and tap on “Recently Deleted.”
- Authenticate: If prompted, use Face ID or Touch ID to unlock the album.
- Select the photo or video: Tap “Select” in the top-right corner, then tap on the photo or video you want to recover.
- Tap “Recover”: Tap the “Recover” button at the bottom-right corner of the screen.
- Confirm recovery: A pop-up will appear asking you to confirm that you want to recover the item. Tap “Recover Photo” or “Recover Video.”
The recovered photo or video will be moved back to your main photo library.
6. How Do I Permanently Delete Photos from My iPhone?
To permanently delete photos from your iPhone, you need to remove them from the “Recently Deleted” album. Here’s how:
- Open the Photos app: Open the Photos app on your iPhone.
- Go to “Recently Deleted”: Scroll down to the “Utilities” section and tap on “Recently Deleted.”
- Authenticate: Use Face ID or Touch ID to unlock the album if prompted.
- Select the photo or video: Tap “Select” in the top-right corner, then tap on the photo or video you want to permanently delete.
- Tap “Delete”: Tap the “Delete” button at the bottom-right corner of the screen.
- Confirm deletion: A pop-up will appear asking you to confirm that you want to permanently delete the item. Tap “Delete Photo” or “Delete Video.”
Alternatively, you can delete all items in the “Recently Deleted” album at once by tapping “Delete All” in the bottom-left corner.
7. How Does iCloud Photos Affect Photo Deletion on My iPhone?
iCloud Photos is a service that automatically syncs your photos and videos across all your Apple devices. Here’s how it affects photo deletion:
- Synchronization: When you delete a photo or video on one device with iCloud Photos enabled, it’s also deleted on all other devices signed in with the same Apple ID.
- Recently Deleted Album: Deleted photos and videos are moved to the “Recently Deleted” album on all devices.
- Permanent Deletion: Once an item is permanently deleted from the “Recently Deleted” album on one device, it’s permanently deleted on all devices.
- Storage Management: iCloud Photos helps optimize storage by keeping full-resolution photos in iCloud and smaller, device-optimized versions on your iPhone.
8. What To Do If The Trash Button Is Grayed Out?
If the trash button is grayed out when you try to delete a photo, it usually means that the photo was synced from your computer. Here’s how to resolve this:
- Connect to your computer: Connect your iPhone to the computer you used to sync the photos.
- Open Finder (or iTunes): On macOS Catalina or later, open Finder. On older macOS versions or Windows, open iTunes.
- Select your device: In Finder, select your iPhone in the sidebar. In iTunes, click on the device icon near the top-left corner.
- Go to Photos: In Finder, click on “Photos” in the top menu. In iTunes, click on the “Photos” tab.
- Uncheck “Sync Photos”: Uncheck the box next to “Sync Photos.”
- Remove photos: You can choose to remove all synced photos or selected albums.
- Apply changes: Click “Apply” in the bottom-right corner to save the changes.
Once you’ve stopped syncing photos, you should be able to delete them directly from your iPhone.
9. How Can I Find And Delete Duplicate Photos On My iPhone?
Duplicate photos can take up a lot of unnecessary storage space. iOS 16 and later have a built-in feature to help you find and merge duplicate photos:
- Open the Photos app: Open the Photos app on your iPhone.
- Go to “Duplicates”: Scroll down to the “Utilities” section and tap on “Duplicates.” If you don’t see this option, it means your phone hasn’t detected any duplicates yet.
- Review duplicates: The app will display sets of duplicate photos. Tap “Merge” to combine a set of duplicates.
- Confirm merge: Tap “Merge [Number] Items” to confirm.
When you merge duplicate photos, your iPhone combines the highest image quality and relevant data to keep one photo in your library. The other duplicates are moved to the “Recently Deleted” album.
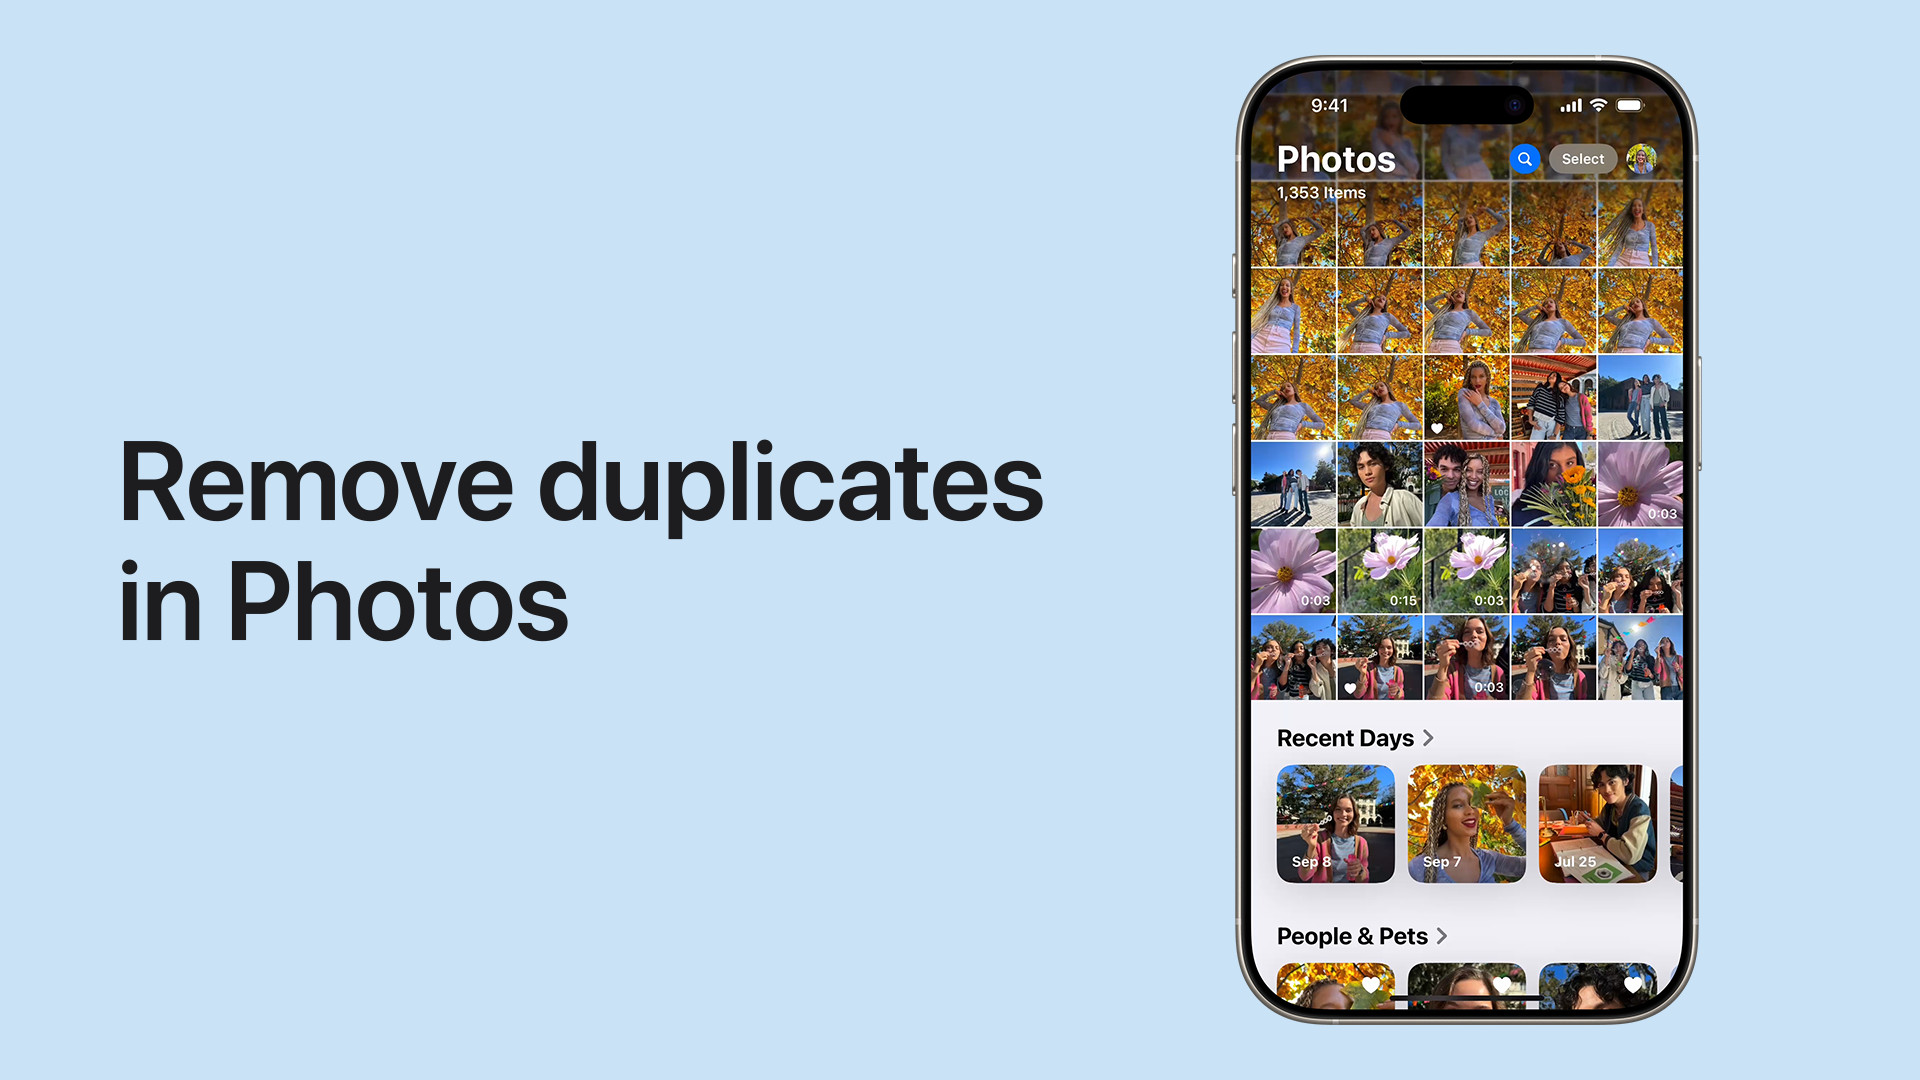 iPhone displaying the duplicate photos album, ready for merging to save storage and declutter the gallery.
10. How to Manage Storage Optimally on My iPhone?
Managing storage effectively ensures your iPhone runs smoothly and you have enough space for new photos and videos. Here are some tips:
- Use iCloud Photos: iCloud Photos helps optimize storage by keeping full-resolution photos in iCloud and smaller, device-optimized versions on your iPhone.
- Delete Unnecessary Photos: Regularly delete photos and videos you no longer need.
- Find and Merge Duplicates: Use the built-in “Duplicates” feature to find and merge duplicate photos.
- Review Large Videos: Large videos can take up a lot of space. Review your videos and delete any that are unnecessary.
- Clear App Cache: Many apps store cache data, which can accumulate over time. Clear the cache for apps that use a lot of storage.
- Offload Unused Apps: iOS can automatically offload apps you haven’t used in a while, freeing up storage space.
- Use Third-Party Apps: Consider using third-party apps designed to manage and compress photos and videos.
11. What are the best third-party apps?
Several third-party apps can help you manage and compress photos and videos on your iPhone. Here are a few of the best:
- Google Photos:
- Features: Free unlimited storage (with some compression), automatic backup, advanced search capabilities, and shared albums.
- Pros: Excellent organization, easy sharing, and reliable backup.
- Cons: Requires a Google account; free storage is compressed.
- Dropbox:
- Features: Cloud storage, automatic photo uploads, and file sharing.
- Pros: Versatile storage solution, integrates well with other apps.
- Cons: Limited free storage, can be pricey for large storage needs.
- Slidebox:
- Features: A photo-sorting app that allows you to quickly swipe through photos and sort them into albums, trash, or keep them.
- Pros: Efficient and intuitive for organizing large photo libraries.
- Cons: Primarily for sorting, not comprehensive storage.
- Compress Photos & Pictures:
- Features: Compresses photos to reduce file size, batch processing, and customizable compression levels.
- Pros: Effective for saving storage space, easy to use.
- Cons: Compression can reduce image quality.
12. Understanding iPhone Photo Storage
Internal Storage
Your iPhone’s internal storage is where all your data, including photos, apps, and system files, is stored. iPhones come in various storage sizes, such as 64GB, 128GB, 256GB, 512GB, and 1TB. Once you fill up the internal storage, you need to manage it by deleting files or moving them to external storage solutions like cloud services.
Cloud Storage
Cloud storage services like iCloud Photos, Google Photos, and Dropbox provide an alternative to storing photos directly on your device. These services allow you to upload your photos to the cloud, freeing up space on your iPhone.
13. Best Practices for Regularly Managing Your Photos
- Set a Schedule: Designate a specific time each week or month to review and manage your photos.
- Back Up Regularly: Ensure your photos are backed up to iCloud, a computer, or an external hard drive.
- Organize Photos: Create albums to categorize your photos by date, event, or subject.
- Delete Duplicates: Regularly check for and delete duplicate photos.
- Review Large Files: Identify and manage large video files that consume significant storage space.
14. How to Back Up Your Photos
iCloud Photos
iCloud Photos automatically backs up your photos and videos to iCloud. To enable it:
- Go to Settings on your iPhone.
- Tap on your Apple ID at the top.
- Tap iCloud.
- Tap Photos.
- Toggle iCloud Photos to the “on” position.
Computer Backup
You can also back up your photos to a computer using Finder (macOS Catalina and later) or iTunes (older macOS versions and Windows):
- Connect your iPhone to your computer.
- Open Finder or iTunes.
- Select your device.
- In Finder, click “Photos.” In iTunes, click the “Photos” tab.
- Choose to sync photos to your computer.
External Hard Drive
Backing up photos to an external hard drive provides an additional layer of security. Connect your iPhone to your computer, transfer the photos to your computer, and then move them to the external hard drive.
15. What are the Benefits of Compressing Photos?
Compressing photos reduces their file size, which can be beneficial for several reasons:
- Saves Storage Space: Smaller files take up less space on your iPhone and in the cloud.
- Faster Uploads: Compressed photos upload faster to cloud services and social media platforms.
- Reduced Data Usage: Sending compressed photos consumes less data.
16. What are the Risks of Deleting Photos?
While deleting photos can help manage storage, there are a few risks to consider:
- Accidental Deletion: You might accidentally delete photos you want to keep.
- Data Loss: If you don’t have a backup, deleting photos means losing them permanently.
- Syncing Issues: If iCloud Photos isn’t working correctly, deleting photos on one device might not remove them from others.
To minimize these risks, always back up your photos before deleting them and double-check before confirming the deletion.
17. How to Turn Off Face ID/Touch ID for the “Recently Deleted” Album?
In iOS 16 and later, the “Recently Deleted” album is locked by default and requires Face ID or Touch ID to access. If you prefer not to use this feature, you can turn it off:
- Open the Settings app on your iPhone.
- Scroll down and tap Photos.
- Toggle Use Face ID (or Use Touch ID) to the “off” position.
Turning off Face ID or Touch ID for the “Recently Deleted” album means anyone with access to your phone can view and recover or permanently delete photos from the album.
18. Understanding Shared Photo Library
In iOS 16.1, iPadOS 16.1, and later, you can start an iCloud Shared Photo Library and invite up to five contacts. Anyone can delete, add, or edit items in the Shared Library. If someone else deletes a photo or video from the Shared Library, it no longer appears for you, either. Only the person who added the photo or video to the Shared Library can permanently delete or recover it from the Recently Deleted folder. You have 30 days to get a photo or video back from your Recently Deleted album.
19. Managing iCloud Storage
iCloud provides limited free storage, and you may need to upgrade to a paid plan to store all your photos and videos. To manage your iCloud storage:
- Go to Settings on your iPhone.
- Tap on your Apple ID at the top.
- Tap iCloud.
- Tap Manage Storage.
From here, you can see how much storage you’re using and upgrade your plan if needed.
20. Exploring Advanced Tips for Photo Management
- Use Smart Albums: Create smart albums in the Photos app that automatically organize photos based on criteria like date, location, or keywords.
- Add Captions and Keywords: Add captions and keywords to your photos to make them easier to search for.
- Regularly Review and Update Albums: Keep your albums organized by regularly reviewing and updating them.
- Consider a Professional Photo Management Service: If you have a large photo library and need advanced management features, consider using a professional photo management service.
FAQ Section
1. Can I recover photos deleted from my iPhone after 30 days?
No, photos deleted from the “Recently Deleted” album are permanently deleted after 30 days. Always back up important photos to avoid permanent loss.
2. How do I stop photos from syncing to iCloud?
Go to Settings > Your Name > iCloud > Photos and toggle the “iCloud Photos” option to off. Note that this will stop syncing new photos, but existing photos may remain in iCloud.
3. Why is my iPhone storage full even after deleting photos?
Deleted photos go to the “Recently Deleted” album, taking up space for 30 days. Empty the “Recently Deleted” album to free up space immediately. Also, check for large video files and clear app cache.
4. How do I find large video files on my iPhone?
Go to Settings > General > iPhone Storage. Scroll down to see a list of apps and the storage they use. Videos usually take up the most space.
5. Can I use Google Photos as my primary photo storage instead of iCloud?
Yes, you can use Google Photos. Download the app, sign in with your Google account, and enable backup and sync. This will upload your photos to Google Photos.
6. How do I merge duplicate photos on older iOS versions?
The built-in “Duplicates” feature is available in iOS 16 and later. For older versions, you may need to use a third-party app like Gemini Photos or Remo Duplicate Photos Remover.
7. What happens if someone deletes a photo from a Shared Photo Library?
If someone deletes a photo from a Shared Photo Library, it no longer appears for you, either. Only the person who added the photo or video to the Shared Library can permanently delete or recover it from the Recently Deleted folder.
8. How do I access the Hidden album on my iPhone?
Open the Photos app, go to the Albums tab, and scroll down to the “Utilities” section. Tap on “Hidden.” In iOS 16 and later, this album is locked by default and requires Face ID or Touch ID to access.
9. Is it safe to compress photos on my iPhone?
Yes, compressing photos is generally safe, but it can reduce image quality. Use reputable apps and choose a compression level that balances file size and quality.
10. How can I ensure my photos are always backed up?
Enable iCloud Photos or use a third-party app like Google Photos to automatically back up your photos to the cloud. Regularly back up your iPhone to a computer or external hard drive as an additional precaution.
Efficient photo management on your iPhone is essential for maintaining storage space, improving performance, and protecting your privacy. By following the tips and techniques outlined above, you can easily delete unwanted photos, recover accidentally deleted ones, and keep your photo library organized and optimized.
Ready to take control of your iPhone photo library? Visit dfphoto.net for more in-depth guides, tips, and tricks to enhance your photography skills and manage your digital memories effectively. Explore our articles, discover stunning photography, and join a community of passionate photographers. Elevate your photography journey with dfphoto.net today!
Address: 1600 St Michael’s Dr, Santa Fe, NM 87505, United States
Phone: +1 (505) 471-6001
Website: dfphoto.net