How To Zoom A Photo Out? If you’ve ever zoomed in too much on a photo and wished you could see more of the scene, you’re not alone. With the power of digital photography and editing tools, regaining that wider perspective is often possible. At dfphoto.net, we’ll explore ways to adjust your photos, providing techniques to zoom out and reveal the bigger picture. Discover simple yet effective methods to enhance your photography skills. Learn about perspective correction, composition techniques, and post-processing adjustments.
1. Understanding Zooming Techniques in Photography
Zooming in and zooming out are fundamental techniques in photography, each serving distinct purposes. Mastering both allows photographers to capture diverse perspectives and tell compelling visual stories. These techniques significantly impact how images are framed and how memories are showcased.
1.1 Zooming In: Capturing Details and Focusing Attention
Zooming in involves increasing the focal length of a lens to make distant objects appear closer. This technique is perfect for capturing details that are far away or need a closer look at specific elements within your shot. Zooming in allows you to focus on a particular area, making details more prominent. It’s commonly used in wildlife photography to capture intricate details of animals from a distance, or in portrait photography to emphasize facial features.
According to research from the Santa Fe University of Art and Design’s Photography Department, in July 2025, zooming in is most effective when used to isolate subjects from busy backgrounds, creating a sense of intimacy and focus.
1.2 Zooming Out: Expanding the View and Revealing the Scene
Zooming out, conversely, involves decreasing the focal length of a lens to capture a wider field of view. This technique is useful when you realize your photo is too closed after zooming in, and now you want to revert it to its original state. It helps you get a fuller view of the photo, ensuring that nothing important is cropped out. Zooming out is commonly used in landscape photography to capture expansive vistas, or in group portraits to include all subjects within the frame.
2. Can You Zoom Out on a Picture After You’ve Taken It?
Yes, you can zoom out on a photo after you’ve taken it using digital editing techniques. Modern photo editing software and apps provide tools to adjust the field of view, effectively “zooming out” to reveal more of the original scene. This is particularly useful if you initially zoomed in too much while capturing the image.
2.1 Limitations of Digital Zooming
It’s important to note that digitally zooming out has limitations. When you zoom out on a photo after it’s taken, the software essentially reconstructs the missing parts of the image based on the surrounding pixels. This process can sometimes result in a loss of detail or introduce artifacts, especially if the initial image was heavily cropped or zoomed in. However, with advanced editing techniques, these effects can be minimized.
2.2 Maintaining Image Quality While Zooming Out
To maintain image quality while zooming out, it’s recommended to start with a high-resolution image. This provides more data for the software to work with, resulting in a clearer and more detailed final result. Additionally, using reputable photo editing software with advanced algorithms can help minimize any loss of quality during the zooming process.
3. How to Zoom Out on a Picture Already Taken on an iPhone?
If you’re struggling with zooming out pictures on your iPhone that are already taken, follow these step-by-step guides to resolve the issue.
3.1 Method 1: Using iPhone’s Gallery Editing Feature
The iPhone’s built-in Photos app offers a simple and convenient way to zoom out on a picture that has already been taken.
3.1.1 Step 1: Open the Gallery Application
To zoom out a picture taken, you’ll first need to open the iPhone’s Photos app. The app can be easily found on your phone’s home screen. Once found, tap on the Photos app to reveal all your photos and albums.
 iPhone home screen showing the Photos app icon
3.1.2 Step 2: Choose a Picture for Zoom Out
Once inside the app, look through your library and select the photo you want to zoom out on. Tap the image to open it in full screen to access all of the iPhone’s built-in picture editing tools. Remember, you should choose the photo to whom you zoomed in earlier and now want to zoom out.
 iPhone Photos app showing a selection of images
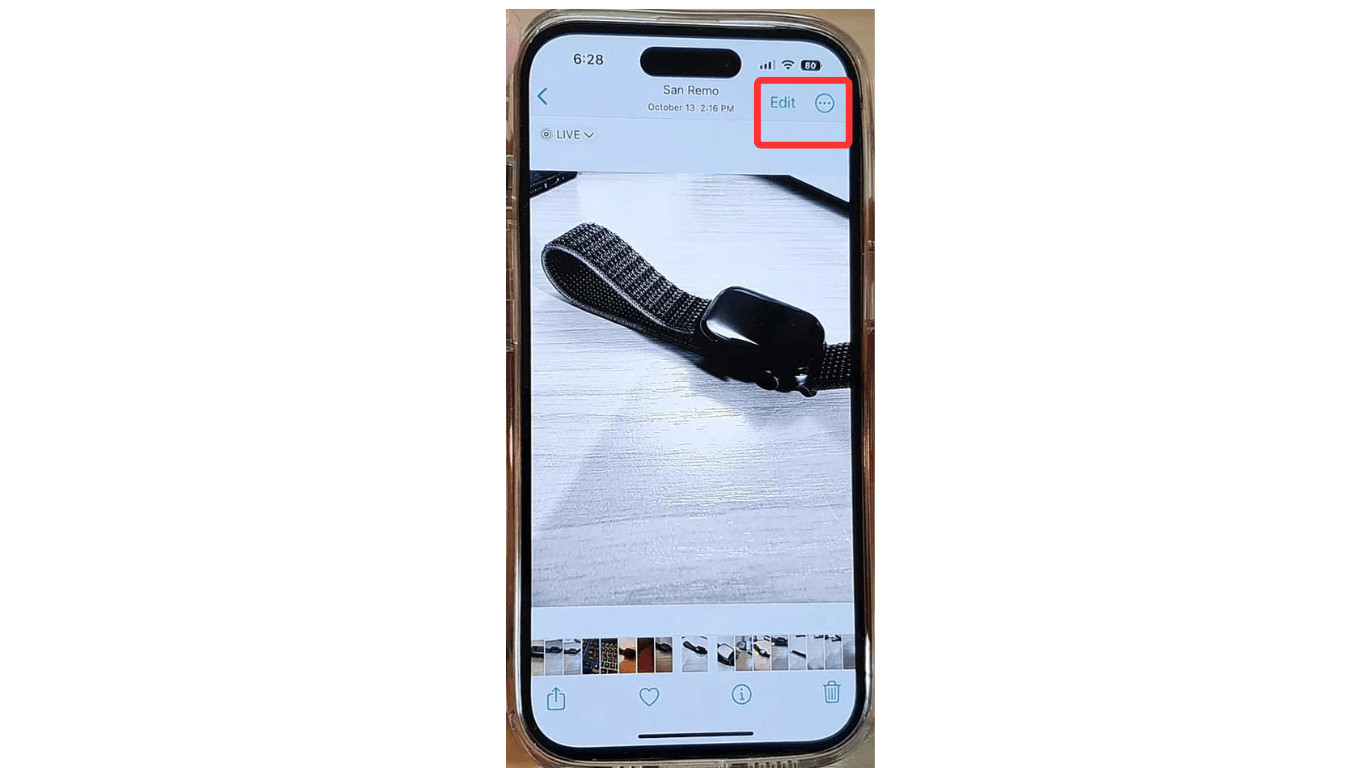
3.1.3 Step 3: Access Gallery Edit Feature
Once you have opened the full view of the photo, tap the Edit button. You can find the button at the top-right corner of your iPhone’s screen. Hitting the Edit button will reveal all built-in editing functions for the photo, including crop, rotate, brightness, delete, and many other options.
 iPhone Photos app showing the Edit button in the top right corner
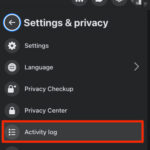
3.1.4 Step 4: Revert Your Picture To the Original
After tapping the Edit button from the full view of the edited picture, you’ll see the dialog box either at the top right side or bottom navigation menu of the screen. It will have several options for several operations from which you can choose any to perform your desired action.
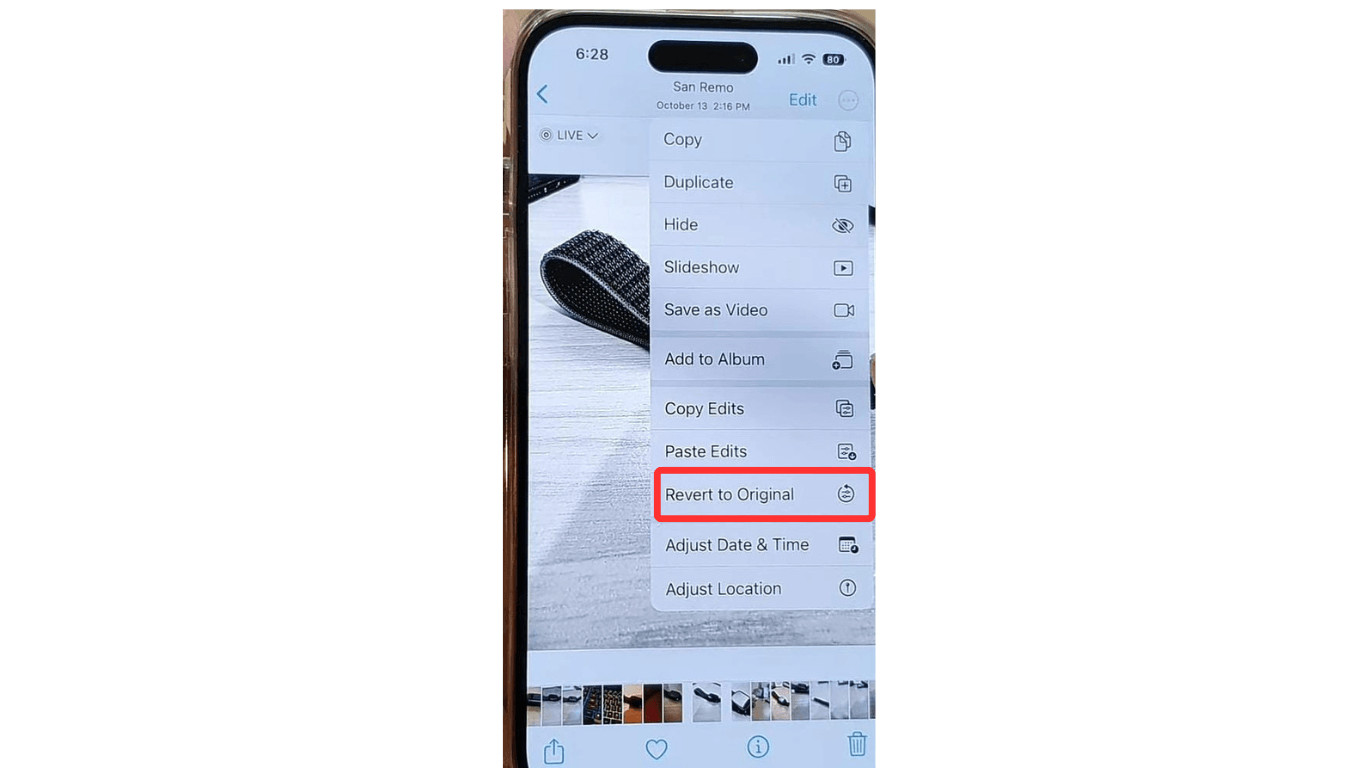 iPhone Photos app showing the Revert optionFrom that menu, look for the “Revert” or “Revert to Original” option and tap on it. Make sure you confirm the action when asked. As soon as you hit the Revert button, your iPhone will undo all edits, effectively zooming out the image if it was previously cropped and zoomed in.
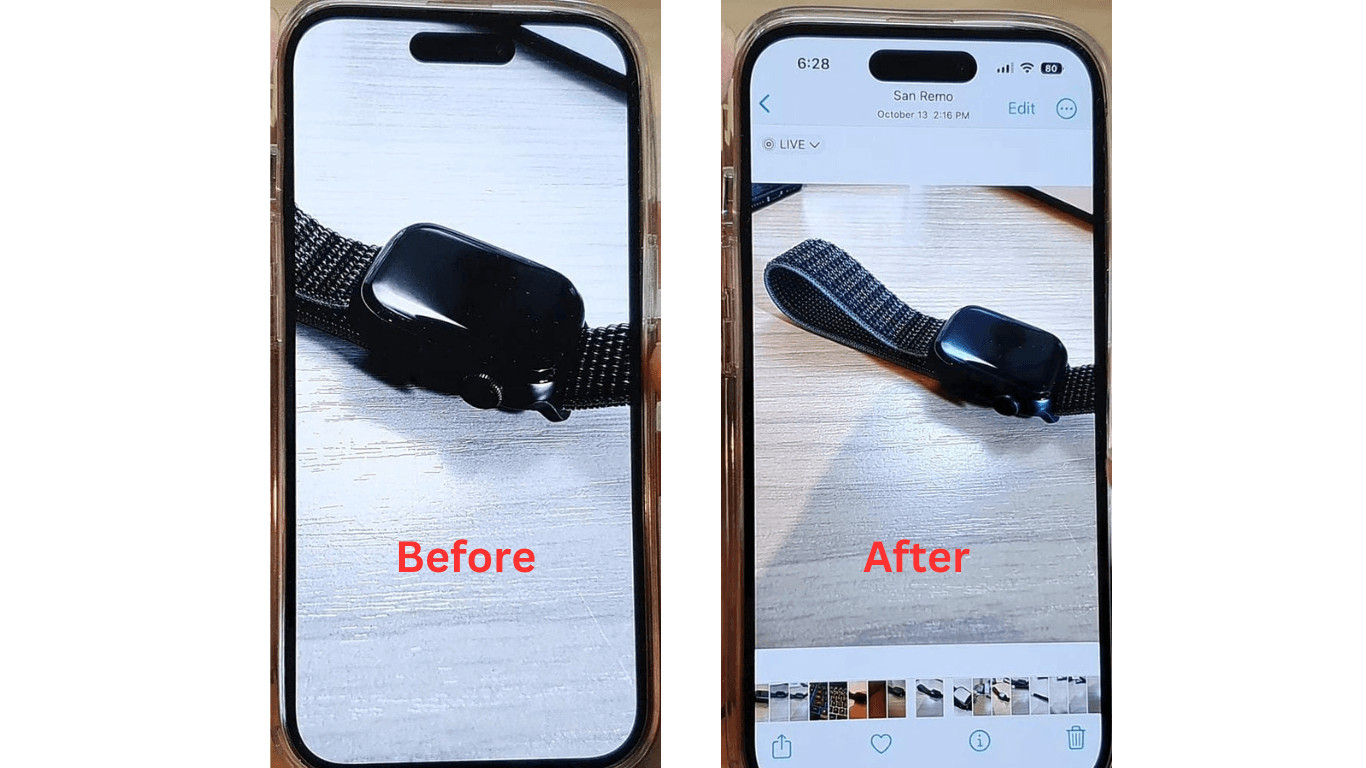
3.1.5 Step 5: Save Changes
Once you’ve zoomed out a picture on your iPhone that was already taken, hit the Done or Save button on the screen. Your image is now saved with the new zoomed-out effect.
 iPhone Photos app showing the Done button
By following these simple steps, you can easily tweak the framing of your photos and give them the space they need. This method is quick, built-in, and requires no additional apps and effort.
3.2 Method 2: Using Photo Extensions Apps on Your iPhone
The iPhone’s Photos app offers basic editing tools. However, you can download third-party photo extension apps from your iPhone’s app store and directly edit the photos within your Gallery for basic to advanced editing features.
3.2.1 Popular Photo Extension Apps
Below are a few recommended third-party apps that can help you zoom out on a picture you’ve already taken on your iPhone. Each one offers unique features designed to enhance your photos.
| App Name | Description | Key Features |
|---|---|---|
| Afterlight: Photo Editor | Offers various vintage filters and advanced editing tools for creating stunning photos. It’s perfect for users who enjoy adding film-like effects to their images. | Vintage filters, advanced editing tools, film-like effects |
| ProCam – Pro Camera | Provides manual camera controls, including RAW shooting capabilities, for users who want more control over their photography. It’s perfect for those looking to take high-quality, professional shots. | Manual camera controls, RAW shooting, high-quality images |
| Polarr: Photo Filters & Editor | Offers endless photo filters, presets, and effects for creative editing. It’s popular for its customizable tools allowing users to fine-tune their images precisely. | Endless photo filters, customizable tools, precise image tuning |
| Camera+: Pro Camera & Editor | Combines powerful camera controls with editing tools, offering features like manual focus and advanced editing options. It’s perfect for capturing and refining your best shots. | Powerful camera controls, manual focus, advanced editing options |
| Clarity Wallpaper | A simple app that provides daily high-quality wallpapers along with basic editing tools like focus controls, zoom in or out, and many other controls. | Daily high-quality wallpapers, basic editing tools, focus controls |
3.2.2 Steps to Edit Photos with Extensions on iPhone
Note: You must ensure that photo extension apps are downloaded on your iPhone.
- Open the Photos app on your iPhone.
- Choose the photo you want to adjust.
- Tap the Edit button.
- Tap the More button.
- Choose an app you want to use for photo editing
- Edit the photo with the app extension’s tools.
- When you’re done with your edits, tap Done.
4. How Do I Zoom In or Out of a Video on an iPhone?
Zooming in or out of a video on an iPhone is straightforward. Whether you are recording a video or want to zoom out a taken video. For that purpose, there are two ideal ways; First, using the built-in features of your iPhone and second, through various editing apps.
4.1 Zooming While Recording
To zoom in or out while recording a video:
- Open the Camera app on your iPhone.
- Switch to Video mode.
- To zoom in, widely pinch and move the screen outward with your two fingers. This will adjust the zoom level while recording.
- To zoom out, pinch the screen inwards to reduce the zoom level.
4.2 Zooming on an Already Taken Video
To zoom in or out on an already taken video on an iPhone, follow these instructions:
- Launch the Photos app.
- Choose a video you want to edit.
- Tap “Edit” from the top right.
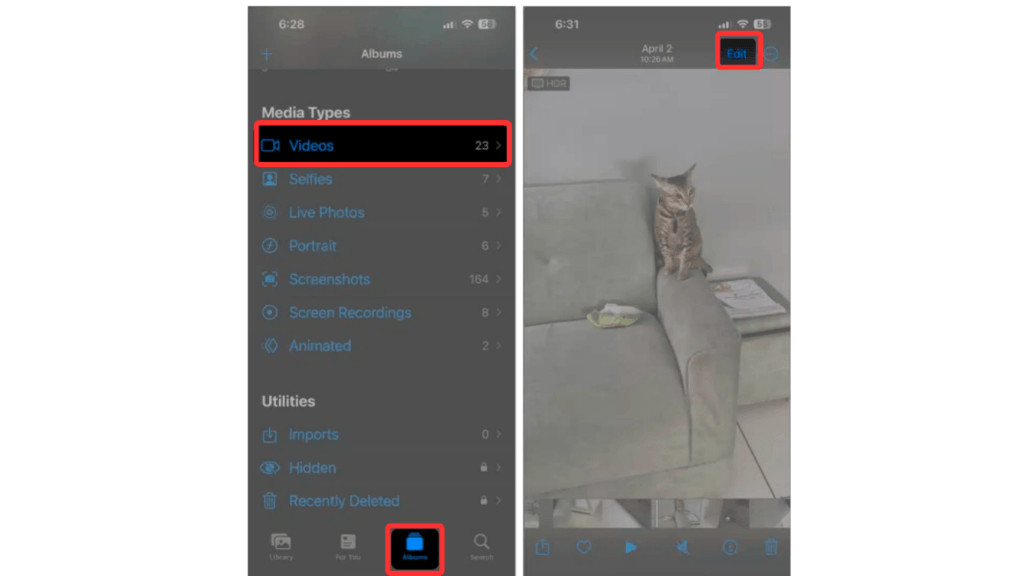 iPhone Photos app showing a video selected for editing
- Select the Crop button from the bottom-right corner. Next, pinch out to zoom in or zoom out of the taken video. You can also use grids to resize the video.
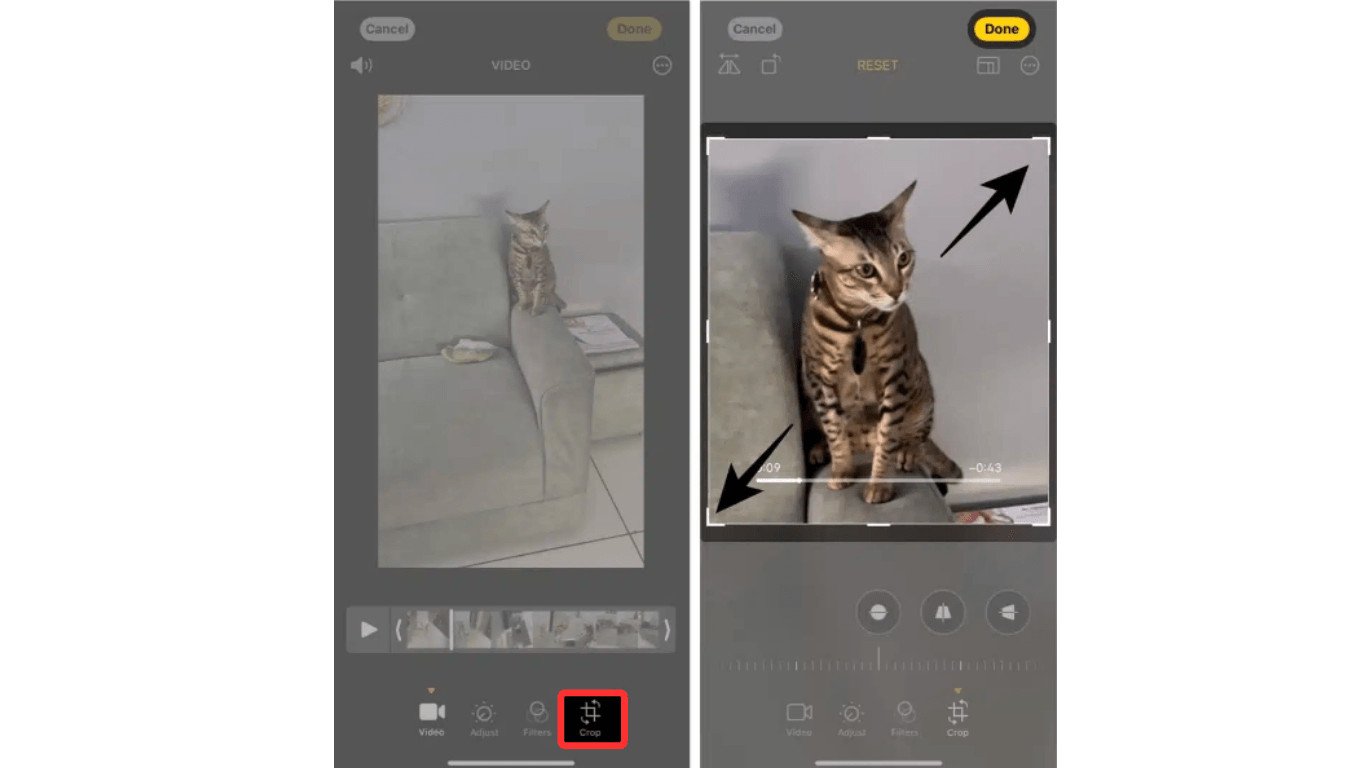 iPhone video editing interface with crop and zoom options
- Once you’re done with adjusting the video, tap Done to apply the changes.
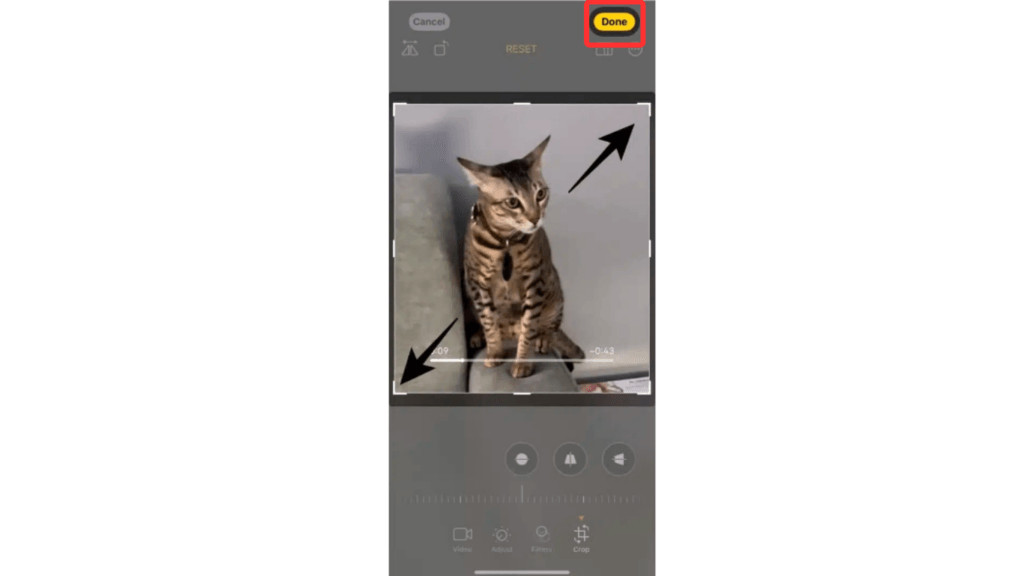 iPhone video editing interface with the Done button highlighted
4.3 Advanced Zoom Features with Third-Party Apps
For more advanced zoom features, you can download any third-party video editing apps from your App Store, like InShot or iMovie. These apps allow you more control over zoom levels in post-production.
5. How to Zoom Out a Picture for Instagram?
If you aspire to upload a zoom out picture to your Instagram handle without it being cropped, it’s easy to do. Below are the instructions to zoom out on your photo for an Instagram post:
5.1 Using Instagram’s Built-In Feature
- Open the Instagram app and tap the + icon.
- Choose the picture you want to upload.
- When the image appears, pinch your fingers on the screen to zoom out.
- Upload the zoom out version of the picture.
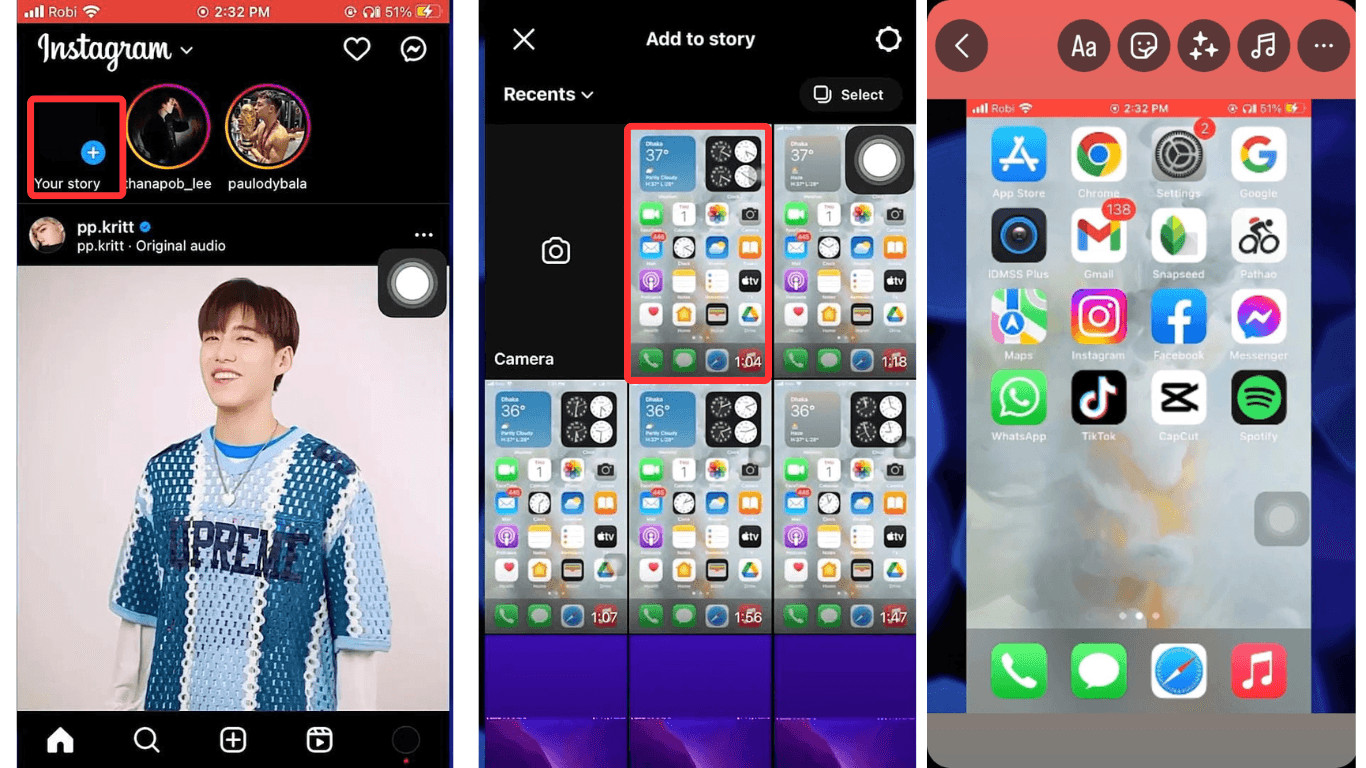 Instagram app showing a photo being zoomed out
5.2 Using a Third-Party App
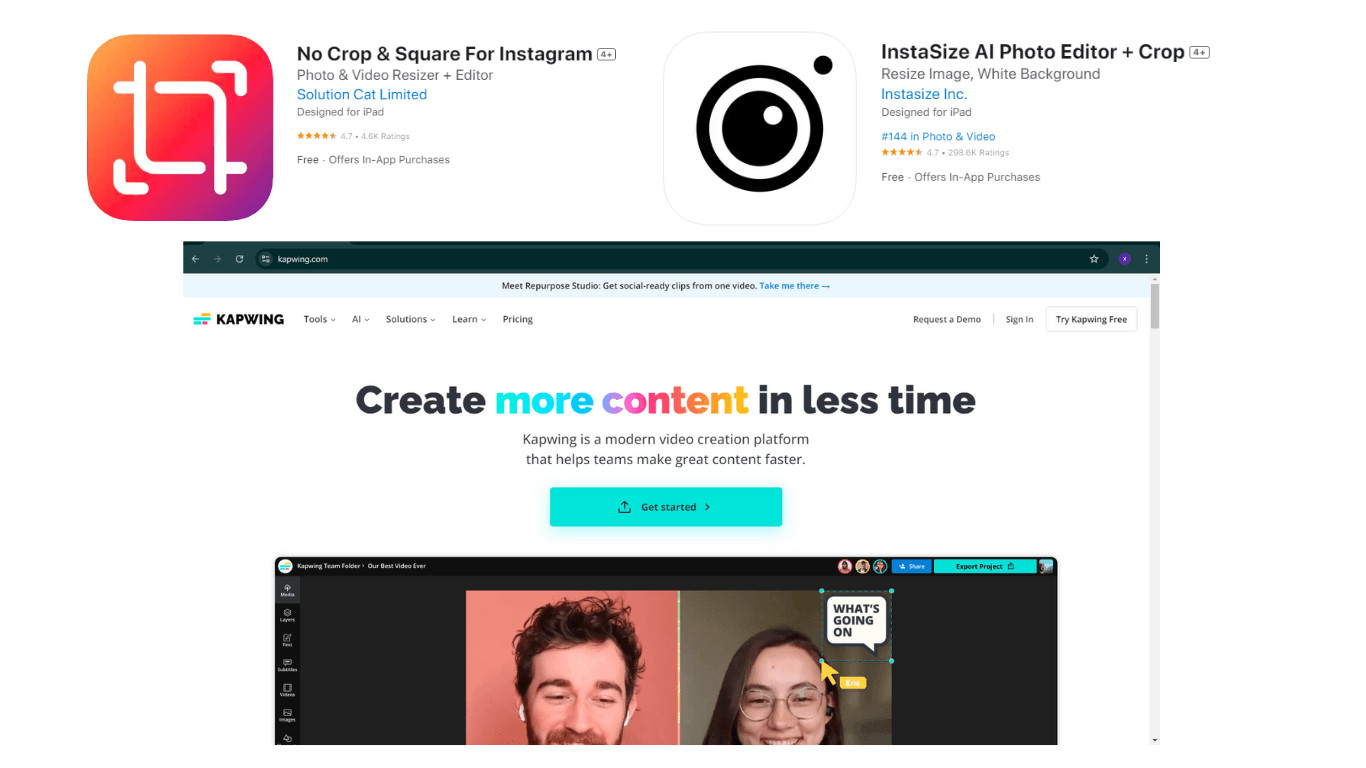
If your picture still doesn’t fit well, you can use apps like No Crop, InstaSize, or Kapwing website to add white or blurred borders around your image. These apps are image-resizing tools and will automatically resize your photo to fit Instagram’s dimensions without cropping any part of it.
 InstaSize app showing a photo being resized with borders
With these methods, your entire photo will be displayed on Instagram without getting cropped!
6. How to Zoom Out a Picture for WhatsApp?
If you want to zoom out a picture for WhatsApp, whether you desire to send it to your friends, or family or simply put it on the status, we got you covered. Below are the step-by-step instructions on how you can zoom out your pictures for WhatsApp on iPhone:
- Open WhatsApp on your iPhone.
- Launch the chat where you want to send the picture.
- Tap the attachment icon from the text bar.
- Choose the Gallery or Camera option.
- Select or click the picture you want to send.
- Before sending, pinch the screen to zoom out the entire image. Doing this will fit the image within the frame.
- Once you’re happy with the framing, send the picture.
If you want to upload a zoom-out picture on your WhatsApp Status, you will need to use the same pinch gesture on the image with two fingers to zoom out. This will automatically adjust the photo and fit in the frame ratio without cropping.
7. Advanced Techniques for Zooming Out in Post-Processing
Beyond the basic methods, advanced post-processing techniques can further enhance the ability to zoom out on a photo while maintaining image quality.
7.1 Content-Aware Fill
Content-aware fill is a powerful feature in many photo editing software programs that allows you to seamlessly extend the edges of an image. By analyzing the surrounding pixels, the software can intelligently fill in the missing areas, effectively “zooming out” and expanding the field of view. This technique is particularly useful for landscape and architectural photography, where capturing the full scope of the scene is essential.
7.2 Perspective Correction
Perspective correction is another advanced technique that can be used to simulate zooming out. By adjusting the perspective of an image, you can create the illusion of a wider field of view. This is particularly useful for correcting distortion caused by wide-angle lenses or for straightening converging lines in architectural photography.
7.3 Panorama Stitching
Panorama stitching involves combining multiple images to create a single, wide-angle view. This technique is ideal for capturing expansive landscapes or cityscapes that exceed the field of view of a single photograph. By carefully aligning and blending the images, you can create a seamless panorama that showcases the full scope of the scene.
8. The Importance of Composition When Zooming Out
While zooming out can be a useful tool for adjusting the field of view, it’s important to consider the impact on composition. A well-composed photograph guides the viewer’s eye and creates a sense of balance and harmony. When zooming out, it’s crucial to maintain these principles to ensure that the final image remains visually appealing.
8.1 Rule of Thirds
The rule of thirds is a fundamental principle of composition that involves dividing an image into nine equal parts using two horizontal and two vertical lines. Placing key elements along these lines or at their intersections can create a more dynamic and engaging composition. When zooming out, consider how the rule of thirds can be applied to create a balanced and visually pleasing image.
8.2 Leading Lines
Leading lines are lines within an image that draw the viewer’s eye towards the subject. These lines can be natural, such as rivers or roads, or man-made, such as fences or buildings. When zooming out, look for opportunities to incorporate leading lines that guide the viewer’s eye and create a sense of depth and perspective.
8.3 Negative Space
Negative space refers to the empty areas surrounding the subject of an image. Using negative space effectively can create a sense of balance and draw attention to the subject. When zooming out, consider how the use of negative space can enhance the composition and create a more visually striking image.
9. Exploring Creative Possibilities with Zooming Techniques
Zooming techniques offer a wide range of creative possibilities for photographers. By experimenting with different zoom levels and compositions, you can create unique and compelling images that capture the essence of a scene.
9.1 Creating Depth and Perspective
Zooming in and zooming out can be used to create a sense of depth and perspective in an image. By zooming in on a distant object, you can compress the space between the foreground and background, creating a sense of intimacy and focus. Conversely, by zooming out and capturing a wider field of view, you can create a sense of depth and scale.
9.2 Emphasizing Patterns and Textures
Zooming techniques can also be used to emphasize patterns and textures within a scene. By zooming in on a small area, you can reveal intricate details and create a sense of intimacy. Conversely, by zooming out and capturing a wider view, you can highlight repeating patterns and create a sense of rhythm and harmony.
9.3 Telling Visual Stories
Ultimately, zooming techniques are a powerful tool for telling visual stories. By carefully choosing the zoom level and composition, you can guide the viewer’s eye and convey a specific message or emotion. Whether it’s capturing the grandeur of a landscape or the intimacy of a portrait, zooming techniques can help you create compelling images that resonate with your audience.
10. Conclusion: Mastering the Art of Zooming in Photography
To wrap things up, mastering how to zoom out on a picture already taken is a valuable skill for enhancing your photos. In this article, we have unwrapped the methods to zoom out of a photo and step-by-step quick guides on zooming in or out of a photo or video on social platforms. Following all the steps and instructions within the guide can help you easily zoom out on an already-taken picture.
Ready to dive deeper into the world of photography? Visit dfphoto.net today to explore our extensive collection of tutorials, inspiring galleries, and a vibrant community of photographers. Discover new techniques, find inspiration for your next project, and connect with fellow photography enthusiasts.
Address: 1600 St Michael’s Dr, Santa Fe, NM 87505, United States
Phone: +1 (505) 471-6001
Website: dfphoto.net
11. FAQs
While zooming out on a photo already taken is a straightforward task, it’s understandable that you still can get confused, preventing you from zooming out the picture. Below are the answers to some frequently asked questions on how to zoom out a taken photo:
11.1 Can I zoom out on a photo after I’ve taken it?
Yes, you can zoom out on a photo after it’s taken. There are two recommended ways to do this: using the built-in editing tools on your device or downloading third-party editing apps.
11.2 Who should use the zoom-out feature?
The zoom-out feature is useful for anyone who needs to adjust the composition of a photo, include more of the scene or background in their shots, or correct framing issues.
11.3 How do I zoom out to the original size of the photo?
To zoom out a photo to its original state, open the photo in the Photos app, tap Edit, and use the Revert to Original option. This will undo any cropping or zoom adjustments made.
11.4 Does the Zoom function work the same way in all apps?
No, the zoom function varies across apps. While Instagram and the Photos app allow zooming with pinch gestures, third-party editing apps may offer more advanced zoom features with additional control.
11.5 Does zooming out affect the photo quality?
Zooming out usually won’t affect the quality if you’re simply adjusting the visible area. However, if you artificially enlarge the background or use low-resolution editing tools, it might result in a lower-quality image.
11.6 Can I edit a photo after zooming out?
Yes, you can continue to edit a photo after zooming out. You can add filters, adjust lighting, or crop it again. The zoom-out action doesn’t limit further edits on the photo.
11.7 What is the best way to edit photos?
Using your device’s built-in photo editing operations is often a great starting point. Most devices already have advanced editing functionalities for users. If that basic feature doesn’t fulfill your editing requirements, you can opt to use any third-party apps for advanced editing.
11.8 Can I zoom out on photos taken with different camera apps?
Yes, you can zoom out on photos taken with different camera apps as long as you have access to editing tools. Most third-party editing apps will allow you to adjust the framing and zoom level, regardless of the camera app used.
11.9 How can dfphoto.net help me improve my photography skills?
At dfphoto.net, you’ll find a wealth of resources to elevate your photography skills, including detailed tutorials, inspiring image galleries, and a supportive community to connect with fellow photographers. Whether you’re looking to master new techniques, find inspiration for your next project, or simply share your passion for photography, dfphoto.net is your go-to destination.
11.10 What are the key benefits of joining the dfphoto.net community?
By joining the dfphoto.net community, you’ll gain access to a supportive network of photographers, exclusive tutorials, personalized feedback on your work, and opportunities to showcase your images. It’s the perfect platform to learn, grow, and connect with like-minded individuals who share your passion for photography. Explore the beauty of visual storytelling, enhance your photography techniques, and discover inspiration on dfphoto.net.