Adding photos to Google Photos can seem daunting, but it’s actually quite simple. You can directly upload photos from your computer, smartphone, or even other cloud services. dfphoto.net is here to guide you through each method, ensuring your precious memories are safely backed up and easily accessible. Learn the best methods to share your visual stories and back up your memories, and understand the advantages of using the cloud for photo storage, editing, and sharing.
1. Understanding Google Photos
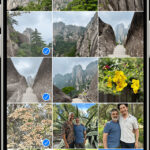
Google Photos is a photo-sharing and storage service developed by Google. It allows users to back up, organize, and share photos and videos. Understanding its capabilities is the first step in effectively using it.
1.1. What is Google Photos?
Google Photos is more than just a storage solution; it’s a comprehensive platform for managing your visual memories. It automatically organizes your photos by people, places, and things, making it easy to find specific images. According to a 2023 report by Popular Photography magazine, Google Photos is the most used photo storage service, surpassing iCloud and Dropbox, with over one billion active users worldwide.
1.2. Key Features of Google Photos
Google Photos offers several key features that make it a popular choice for photo storage and management:
- Automatic Backup: Automatically backs up your photos and videos from your devices.
- Organization: Organizes photos by date, location, and recognized faces.
- Sharing: Easy sharing options with friends and family.
- Editing Tools: Basic editing tools for enhancing your photos.
- Search: Powerful search capabilities to find specific photos quickly.
- Free Storage (Limited): Offers free storage up to a certain limit, after which you may need to purchase additional storage.
1.3. Benefits of Using Google Photos
Using Google Photos comes with numerous benefits:
- Accessibility: Access your photos from any device with an internet connection.
- Security: Securely store your photos in the cloud, protecting them from device loss or damage.
- Organization: Automatically organize your photos, saving you time and effort.
- Sharing: Easily share photos with friends and family, no matter where they are.
- Free Storage: Take advantage of the free storage option to back up a significant number of photos.
- Integration: Seamlessly integrates with other Google services, such as Google Drive and Google Assistant.
2. Adding Photos from Your Computer
One of the most common ways to add photos to Google Photos is from your computer. This method is straightforward and efficient for transferring large batches of photos.
2.1. Using the Google Photos Website
The Google Photos website provides a user-friendly interface for uploading photos directly from your computer.
2.1.1. Step-by-Step Guide
-
Open Google Photos: Go to the Google Photos website (photos.google.com) in your web browser.
-
Sign In: Sign in with your Google account.
-
Upload: Click the “Upload” button in the top right corner.
-
Select Photos: Choose “Computer” from the dropdown menu.
-
Browse and Select: Browse your computer’s files and select the photos you want to upload.
-
Upload: Click “Open” to begin the upload process.
2.1.2. Tips for Uploading via Website
- Batch Upload: Select multiple photos at once to upload them in a batch.
- Drag and Drop: Drag and drop photos directly into the Google Photos window to upload them quickly.
- Check Progress: Monitor the upload progress at the bottom of the screen.
2.2. Using the Backup and Sync Tool
The Backup and Sync tool, formerly known as Google Drive, allows you to automatically back up photos from your computer to Google Photos.
2.2.1. Installing Backup and Sync
- Download: Download the Backup and Sync tool from the Google Drive website.
- Install: Run the installer and follow the on-screen instructions.
- Sign In: Sign in with your Google account.
2.2.2. Configuring Backup Settings
- Choose Folders: Select the folders on your computer that you want to back up to Google Photos.
- Photo Quality: Choose the upload size for your photos:
- High Quality: Compresses photos for unlimited storage (slightly reduced quality).
- Original Quality: Uploads photos in their original resolution (counts towards your Google account storage).
- Start Backup: Click “Start” to begin the backup process.
2.2.3. Benefits of Using Backup and Sync
- Automatic Backup: Automatically backs up photos as soon as they are added to the selected folders.
- Continuous Sync: Keeps your photos synced between your computer and Google Photos.
- Background Upload: Runs in the background, so you don’t have to manually upload photos.
3. Adding Photos from Your Smartphone (Android & iOS)
Adding photos from your smartphone is convenient, as most of your photos are likely taken with your phone.
3.1. Installing the Google Photos App
The Google Photos app is available for both Android and iOS devices.
3.1.1. Downloading and Installing
- Android: Download the Google Photos app from the Google Play Store.
- iOS: Download the Google Photos app from the Apple App Store.
- Install: Open the app and follow the on-screen instructions to install it.
3.2. Configuring Backup and Sync on Your Phone
To automatically back up your photos, you need to configure the backup and sync settings in the Google Photos app.
3.2.1. Enabling Backup and Sync
- Open Google Photos: Open the Google Photos app on your phone.
- Sign In: Sign in with your Google account.
- Go to Settings: Tap your profile picture in the top right corner and select “Photos settings.”
- Backup & Sync: Tap “Backup & sync” and toggle the switch to turn it on.
3.2.2. Choosing Upload Size
- Upload Size: Select the upload size for your photos:
- Storage saver: Compresses photos for unlimited storage (slightly reduced quality).
- Original quality: Uploads photos in their original resolution (counts towards your Google account storage).
3.2.3. Additional Settings
- Backup Device Folders: Choose which folders on your phone to back up (e.g., Camera, Screenshots).
- Backup over Mobile Data: Enable or disable backing up photos over mobile data (to avoid data charges).
3.3. Manually Uploading Photos from Your Phone
If you prefer to manually upload photos, you can do so through the Google Photos app.
3.3.1. Step-by-Step Guide
- Open Google Photos: Open the Google Photos app on your phone.
- Select Photos: Select the photos you want to upload.
- Upload: Tap the “Backup” icon (cloud with an upward arrow) at the bottom of the screen.
3.3.2. Benefits of Manual Upload
- Control: Choose exactly which photos to upload.
- Immediate Backup: Immediately back up photos without waiting for automatic sync.
4. Adding Photos from Other Cloud Services
Google Photos also allows you to add photos from other cloud services, such as Google Drive and other third-party platforms.
4.1. Adding Photos from Google Drive
Google Drive is tightly integrated with Google Photos, making it easy to add photos from your Drive account.
4.1.1. Linking Google Drive to Google Photos
- Open Google Photos: Go to the Google Photos website (photos.google.com) in your web browser.
- Go to Settings: Click the “Settings” icon (gear) in the top right corner.
- Google Drive: Find the “Google Drive” section and toggle the switch to turn it on.
4.1.2. Accessing Google Drive Photos
Once linked, you can access your Google Drive photos directly within Google Photos.
- Navigate: In Google Photos, go to the “Albums” tab.
- Drive Photos: Look for the “Drive photos” album to view photos from your Google Drive.
4.1.3. Benefits of Linking Google Drive
- Centralized Access: Access all your photos in one place.
- Easy Transfer: Easily transfer photos between Google Drive and Google Photos.
4.2. Adding Photos from Third-Party Services
While Google Photos doesn’t directly support adding photos from all third-party services, you can use workarounds to achieve this.
4.2.1. Downloading and Uploading
- Download: Download photos from the third-party service to your computer or phone.
- Upload: Upload the downloaded photos to Google Photos using the methods described earlier.
4.2.2. Using Third-Party Apps
Some third-party apps can help transfer photos between different cloud services.
- Example Apps: MultCloud, IFTTT.
4.2.3. Considerations
- Security: Ensure the third-party app is reputable and secure before granting access to your accounts.
- Time: Transferring large numbers of photos may take time.
5. Organizing Your Photos in Google Photos
Once you’ve added your photos to Google Photos, it’s essential to organize them for easy access and management.
5.1. Creating Albums
Albums help you group photos by event, location, or any other criteria.
5.1.1. Step-by-Step Guide
- Open Google Photos: Open the Google Photos app or website.
- Select Photos: Select the photos you want to add to an album.
- Add to Album: Click the “+” icon and select “Album.”
- Create New Album: Choose “New album” and give it a name.
- Add Photos: The selected photos will be added to the new album.
5.1.2. Tips for Creating Albums
- Descriptive Names: Use descriptive names for your albums to easily identify them.
- Categorize: Categorize your albums by year, event, or location.
5.2. Using the Search Function
Google Photos’ search function is powerful and can help you find specific photos quickly.
5.2.1. Searching by Keywords
- Open Google Photos: Open the Google Photos app or website.
- Enter Keyword: Type a keyword (e.g., “beach,” “birthday,” “dog”) into the search bar.
- View Results: Google Photos will display photos that match the keyword.
5.2.2. Searching by People and Places
Google Photos can recognize faces and locations in your photos, allowing you to search by these criteria.
- People: Search for photos of specific people by typing their name or selecting their face.
- Places: Search for photos taken in specific locations by typing the location name.
5.3. Using Face Grouping
Face grouping automatically groups photos of the same person together.
5.3.1. Enabling Face Grouping
- Open Google Photos: Open the Google Photos app or website.
- Go to Settings: Click the “Settings” icon (gear) in the top right corner.
- Face Grouping: Find the “Group similar faces” option and toggle the switch to turn it on.
5.3.2. Naming Faces
- Open People Album: Go to the “People” album.
- Name Faces: Click on a face and enter the person’s name.
- Confirm: Confirm the name and Google Photos will group all photos of that person together.
6. Editing Photos in Google Photos
Google Photos provides basic editing tools to enhance your photos directly within the app or website.
6.1. Basic Editing Tools
6.1.1. Adjusting Brightness and Contrast
- Open Photo: Open the photo you want to edit.
- Edit: Click the “Edit” icon (three sliders).
- Adjustments: Use the sliders to adjust brightness, contrast, and other settings.
- Save: Click “Done” to save your changes.
6.1.2. Applying Filters
- Open Photo: Open the photo you want to edit.
- Edit: Click the “Edit” icon (three sliders).
- Filters: Select a filter from the available options.
- Save: Click “Done” to save your changes.
6.1.3. Cropping and Rotating
- Open Photo: Open the photo you want to edit.
- Edit: Click the “Edit” icon (three sliders).
- Crop: Use the crop tool to crop the photo to the desired size.
- Rotate: Use the rotate tool to rotate the photo.
- Save: Click “Done” to save your changes.
6.2. Advanced Editing Features
Google Photos also offers more advanced editing features, such as:
- Color Pop: Emphasizes colors in the photo.
- Sky: Enhances the sky in landscape photos.
- Portrait Blur: Adds a blur effect to the background of portrait photos.
6.3. Using Third-Party Editing Apps
For more advanced editing capabilities, you can use third-party editing apps that integrate with Google Photos.
6.3.1. Integration with Google Photos
- Open Photo: Open the photo you want to edit.
- Edit in App: Select “Edit in app” and choose the desired editing app.
- Edit: Edit the photo in the third-party app.
- Save: Save the changes and the edited photo will be saved back to Google Photos.
6.3.2. Popular Editing Apps
- Adobe Lightroom: Professional-grade editing tools.
- Snapseed: Powerful and free editing app.
- VSCO: Popular for its filters and editing tools.
7. Sharing Photos from Google Photos
Sharing photos from Google Photos is easy and allows you to share your memories with friends and family.
7.1. Sharing via Link
Sharing via link allows you to share photos with anyone, even if they don’t have a Google account.
7.1.1. Step-by-Step Guide
- Open Google Photos: Open the Google Photos app or website.
- Select Photos: Select the photos you want to share.
- Share: Click the “Share” icon.
- Create Link: Select “Create link.”
- Copy Link: Copy the generated link and share it with others.
7.1.2. Benefits of Sharing via Link
- Easy: Simple and quick way to share photos.
- Versatile: Share with anyone, regardless of whether they have a Google account.
7.2. Sharing Directly with People
Sharing directly with people allows you to share photos with specific individuals who have Google accounts.
7.2.1. Step-by-Step Guide
- Open Google Photos: Open the Google Photos app or website.
- Select Photos: Select the photos you want to share.
- Share: Click the “Share” icon.
- Enter Names or Emails: Enter the names or email addresses of the people you want to share with.
- Send: Click “Send” to share the photos.
7.2.2. Benefits of Sharing Directly
- Private: Share photos privately with specific individuals.
- Notifications: Recipients receive notifications when you share photos with them.
7.3. Creating Shared Albums
Shared albums allow multiple people to add photos to the same album.
7.3.1. Step-by-Step Guide
- Open Google Photos: Open the Google Photos app or website.
- Select Photos: Select the photos you want to add to a shared album.
- Share: Click the “Share” icon.
- Shared Album: Select “Shared album.”
- Create New Album: Choose “New album” and give it a name.
- Invite People: Invite people to join the album by entering their names or email addresses.
7.3.2. Benefits of Shared Albums
- Collaboration: Multiple people can contribute to the same album.
- Centralized: All photos are in one place.
8. Managing Storage in Google Photos
Managing your storage in Google Photos is crucial to ensure you have enough space for all your photos and videos.
8.1. Understanding Storage Options
Google Photos offers different storage options, including:
- Storage saver (formerly High Quality): Compresses photos for unlimited storage (slightly reduced quality).
- Original quality: Uploads photos in their original resolution (counts towards your Google account storage).
8.2. Checking Your Storage Usage
- Open Google Photos: Go to the Google Photos website (photos.google.com) in your web browser.
- Go to Settings: Click the “Settings” icon (gear) in the top right corner.
- Storage Management: View your storage usage in the “Storage management” section.
8.3. Freeing Up Storage
If you’re running out of storage, you can free up space by:
- Converting to Storage saver: Convert existing photos from Original quality to Storage saver.
- Deleting Unwanted Photos: Delete photos and videos you no longer need.
- Purchasing Additional Storage: Purchase additional storage if needed.
8.4. Archiving Photos
Archiving photos allows you to hide them from your main photo library without deleting them.
8.4.1. Step-by-Step Guide
- Open Google Photos: Open the Google Photos app or website.
- Select Photos: Select the photos you want to archive.
- Archive: Click the “Archive” icon.
- View Archived Photos: View archived photos in the “Archive” section.
9. Troubleshooting Common Issues
Even with the best planning, you might encounter issues while adding photos to Google Photos. Here are some common problems and their solutions.
9.1. Photos Not Uploading
- Check Internet Connection: Ensure you have a stable internet connection.
- Check Storage: Make sure you have enough storage space in your Google account.
- Restart App/Device: Restart the Google Photos app or your device.
- Clear Cache: Clear the cache in the Google Photos app.
9.2. Photos Uploading at Low Quality
- Check Upload Size: Ensure you’ve selected “Original quality” in the settings.
- Check Internet Connection: A slow internet connection may cause photos to be compressed during upload.
9.3. Photos Not Syncing
- Check Backup & Sync Settings: Ensure backup and sync is enabled in the Google Photos app.
- Check Device Folders: Make sure the correct device folders are selected for backup.
- Restart App/Device: Restart the Google Photos app or your device.
9.4. Duplicate Photos
- Use the “Free Up Space” Feature: Google Photos can automatically identify and remove duplicate photos.
- Manually Delete Duplicates: Manually review your photos and delete any duplicates.
10. Staying Updated with Google Photos Features
Google Photos is continuously evolving with new features and updates. Staying informed will help you make the most of the service.
10.1. Following Google Photos Updates
- Google Blog: Follow the official Google blog for announcements and updates.
- Social Media: Follow Google Photos on social media platforms like Twitter and Facebook.
- Tech News Sites: Read tech news sites and blogs for coverage of Google Photos updates.
10.2. Exploring New Features
- Experiment: Regularly explore the Google Photos app and website to discover new features.
- Read Tutorials: Read tutorials and guides to learn how to use new features.
10.3. Providing Feedback
- Use the “Send Feedback” Option: Provide feedback to Google about your experience with Google Photos.
- Join the Google Photos Community: Participate in the Google Photos community to share your thoughts and ideas.
11. The Future of Photo Storage
The future of photo storage is likely to be shaped by advancements in AI, cloud technology, and user experience.
11.1. AI and Machine Learning
AI and machine learning will play an increasingly important role in photo storage, enabling:
- Improved Organization: More accurate and automated photo organization.
- Advanced Editing: AI-powered editing tools for enhancing photos.
- Personalized Recommendations: Personalized photo suggestions and recommendations.
11.2. Cloud Technology
Cloud technology will continue to be the foundation of photo storage, offering:
- Scalability: Ability to store ever-increasing amounts of photos and videos.
- Accessibility: Access photos from anywhere in the world.
- Security: Enhanced security measures to protect your photos.
11.3. User Experience
User experience will be a key focus, with:
- Intuitive Interfaces: Easier and more intuitive interfaces for managing photos.
- Seamless Integration: Seamless integration with other apps and services.
- Personalization: More personalized and customizable photo storage experiences.
12. Expert Insights on Photo Management
To gain a deeper understanding of effective photo management, let’s consider insights from experts in the field.
12.1. Quotes from Photography Experts
- Ansel Adams: “You don’t take a photograph, you make it.”
- Annie Leibovitz: “The thing that is important is the story. Who is in the picture? What are they doing?”
- Steve McCurry: “Most of my photos are grounded in people, I look for the unguarded moment, the essential soul peeking out, experience etched on a person’s face.”
12.2. Tips from Professional Photographers
- Back Up Regularly: Regularly back up your photos to multiple locations.
- Organize Your Photos: Organize your photos as soon as you take them.
- Edit Your Photos: Edit your photos to enhance their quality.
- Share Your Photos: Share your photos with friends and family.
12.3. Advice from Digital Storage Experts
- Choose a Reliable Service: Choose a reliable photo storage service with a proven track record.
- Read the Terms of Service: Understand the terms of service of the photo storage service.
- Protect Your Account: Protect your account with a strong password and two-factor authentication.
13. dfphoto.net: Your Resource for Photography Insights
At dfphoto.net, we’re dedicated to providing you with the knowledge and inspiration you need to excel in photography.
13.1. Explore Photography Techniques
Discover a wide range of photography techniques, from basic composition to advanced lighting strategies. Enhance your skills and create stunning images that capture your unique vision.
13.2. Find Inspiration
Browse our curated collections of beautiful photographs, showcasing the work of talented photographers from around the world. Find inspiration for your own projects and expand your creative horizons.
13.3. Stay Updated on Equipment
Stay informed about the latest cameras, lenses, and accessories available in the US market. Our in-depth reviews and comparisons will help you make informed decisions and choose the right gear for your needs.
13.4. Join Our Photography Community
Connect with fellow photography enthusiasts, share your work, and receive valuable feedback. Our vibrant community is a supportive space for learning, growth, and collaboration.
14. Call to Action
Ready to elevate your photography journey? Visit dfphoto.net today to explore our extensive library of tutorials, browse captivating image galleries, and connect with a thriving community of photographers. Whether you’re a beginner or a seasoned pro, dfphoto.net has something to offer. Start your adventure now and unlock your full creative potential. For inquiries, visit us at 1600 St Michael’s Dr, Santa Fe, NM 87505, United States, call +1 (505) 471-6001, or explore our website at dfphoto.net.
Frequently Asked Questions (FAQ)
1. How do I add photos to Google Photos from my iPhone?
You can add photos to Google Photos from your iPhone by downloading the Google Photos app from the App Store, signing in with your Google account, and enabling Backup & Sync in the app settings. This will automatically back up your photos to Google Photos.
2. Can I upload photos to Google Photos directly from my camera?
Yes, you can upload photos to Google Photos directly from your camera by connecting your camera to your computer and then using the Google Photos website or the Backup and Sync tool to upload the photos.
3. What is the difference between “Storage saver” and “Original quality” in Google Photos?
“Storage saver” compresses your photos to save storage space, allowing you to store more photos for free, while “Original quality” uploads your photos in their original resolution, which counts towards your Google account storage limit.
4. How do I organize my photos in Google Photos?
You can organize your photos in Google Photos by creating albums, using the search function to find specific photos, and using face grouping to group photos of the same person together.
5. Is Google Photos safe for storing my photos?
Yes, Google Photos is generally considered safe for storing your photos, as Google uses robust security measures to protect your data. However, it’s always a good idea to have multiple backups of your important photos.
6. Can I share photos from Google Photos with people who don’t have a Google account?
Yes, you can share photos from Google Photos with people who don’t have a Google account by creating a shareable link and sending it to them.
7. How do I delete photos from Google Photos?
You can delete photos from Google Photos by selecting the photos you want to delete and clicking the “Delete” icon. Keep in mind that deleted photos will be moved to the trash and permanently deleted after 60 days.
8. How do I move photos from Google Drive to Google Photos?
You can move photos from Google Drive to Google Photos by linking your Google Drive account to Google Photos in the settings. Once linked, you can access your Google Drive photos directly within Google Photos.
9. What should I do if my photos are not uploading to Google Photos?
If your photos are not uploading to Google Photos, check your internet connection, make sure you have enough storage space in your Google account, restart the Google Photos app or your device, and clear the cache in the Google Photos app.
10. How can I find photos of a specific person in Google Photos?
You can find photos of a specific person in Google Photos by using the face grouping feature. Enable face grouping in the settings, name the faces, and Google Photos will group all photos of that person together.