Are you looking to display your cherished memories in a creative and visually appealing way? dfphoto.net offers a comprehensive guide on How To Hang A Photo Collage, transforming your blank walls into captivating showcases of your life’s moments. From selecting the perfect frames to arranging your photos with artistic flair, we provide the tips and tricks you need to create a stunning photo display. Explore the art of wall decor, picture arrangement, and creative displays with us.
1. Understanding the Basics of Photo Collage Arrangement
What makes a photo collage truly stand out? It’s not just about slapping a bunch of pictures on a wall; it’s about curating a visual narrative that speaks to your personal style. According to research from the Santa Fe University of Art and Design’s Photography Department, in July 2025, a well-planned photo collage can significantly enhance the aesthetic appeal of any room. This involves understanding the basic principles of design, such as balance, symmetry, and color coordination.
- Balance: A balanced collage feels visually stable and harmonious. This can be achieved through symmetrical arrangements or asymmetrical designs where elements are strategically placed to create equilibrium.
- Symmetry: Symmetrical collages offer a formal and structured look. They involve arranging photos and frames in a mirrored pattern, creating a sense of order and predictability.
- Color Coordination: Consider the colors in your photos and frames. A cohesive color scheme can tie the entire collage together, creating a unified and polished appearance.
These elements work together to create a visually appealing and emotionally resonant display.
2. What Are the Key Considerations Before You Start?
Before you even think about hammering a nail into the wall, it’s crucial to consider several key factors that will influence the final outcome of your photo collage. These considerations include wall space, theme, and personal style.
- Wall Space: Measure the available wall space and determine the ideal size and shape of your collage. A collage that’s too large can overwhelm a small room, while one that’s too small may get lost on a large wall.
- Theme: Decide on a theme that will guide your photo selection. This could be a collection of family memories, travel adventures, or artistic shots. A consistent theme adds cohesiveness and tells a story.
- Personal Style: Reflect your personal style in the design and arrangement of your collage. Whether you prefer a modern, minimalist look or a more eclectic and bohemian vibe, let your personality shine through.
Taking these factors into account will ensure that your photo collage is not only visually appealing but also a true reflection of your unique taste and experiences.
3. How To Choose the Right Photos for Your Collage?
Selecting the right photos is paramount to creating a compelling collage. Not every snapshot deserves a place on your wall. Consider the following criteria to narrow down your choices:
- Quality: Choose high-resolution photos that are sharp and clear. Blurry or pixelated images will detract from the overall aesthetic.
- Composition: Select photos with strong compositions that are visually interesting. Look for images with leading lines, interesting perspectives, and balanced elements.
- Emotional Connection: Include photos that evoke positive emotions and memories. These are the images that will bring joy and meaning to your collage.
In addition to these criteria, consider the colors and tones of your photos. A mix of black and white and color photos can add visual interest, but ensure that the overall palette is harmonious.
4. What Frames And Materials Should You Use?
The frames and materials you choose can significantly impact the look and feel of your photo collage. Consider the following options:
| Frame Type | Material | Style |
|---|---|---|
| Classic | Wood | Timeless, elegant |
| Modern | Metal | Sleek, minimalist |
| Rustic | Reclaimed Wood | Natural, organic |
| Eclectic | Mixed | Unique, personalized |
| Floating Frames | Acrylic | Contemporary, emphasizes the photo itself |
In addition to frames, consider using other materials to add texture and interest to your collage. This could include decorative paper, fabric, or even small objects that complement your photos.
5. What is the best way to Plan Your Collage Layout?
Planning your collage layout is a crucial step that can make or break the final result. Here’s a systematic approach to help you create a visually appealing arrangement:
- Measure Your Space: Accurately measure the wall space where you plan to hang your collage. This will help you determine the overall size and shape of your arrangement.
- Gather Your Materials: Collect all the photos, frames, and materials you plan to use in your collage. Lay them out on a large surface, such as the floor or a table.
- Experiment with Arrangements: Play around with different arrangements to see what looks best. Consider factors such as balance, symmetry, and visual flow.
- Take a Photo: Once you’re happy with the layout, take a photo of it with your phone. This will serve as a reference when you start hanging the photos on the wall.
- Transfer to Wall: Use painter’s tape to mark the outline of each frame on the wall. This will give you a visual guide to follow as you hang the photos.
By following these steps, you can ensure that your photo collage is well-planned and visually cohesive.
6. Step-by-Step Guide: How to Hang Your Photo Collage
Now that you’ve planned your layout and gathered your materials, it’s time to hang your photo collage. Follow these steps for a professional-looking result:
- Prepare Your Wall: Clean the wall and ensure it’s free of dust and debris. Use a level to draw a straight line where you want the top edge of your collage to be.
- Mark the Nail Positions: Using your layout photo as a reference, mark the positions of the nails or hooks for each frame on the wall.
- Hammer in the Nails or Install Hooks: Carefully hammer in the nails or install the hooks at the marked positions. Use a stud finder to locate studs in the wall for added stability, especially for heavier frames.
- Hang the Photos: Hang each photo in its designated spot, referring to your layout photo to ensure proper placement. Use a level to make sure each frame is straight.
- Make Adjustments: Step back and assess the overall arrangement. Make any necessary adjustments to ensure that the collage is balanced and visually appealing.
7. What Are Some Creative Arrangement Ideas for Photo Collages?
Looking for inspiration? Here are a few creative arrangement ideas to spark your imagination:
- Grid Layout: A classic and organized arrangement where photos are arranged in a symmetrical grid pattern.
- Organic Layout: A more free-flowing and asymmetrical arrangement where photos are arranged in a random, yet balanced, manner.
- Heart Shape: A romantic and sentimental arrangement where photos are arranged in the shape of a heart.
- Word or Letter: Spell out a word or create a monogram using photos. This is a fun and personalized way to display your memories.
- Staircase Collage: Create a dynamic display by arranging photos along a staircase, following the angle of the steps.
Don’t be afraid to experiment and come up with your own unique arrangement. The key is to have fun and let your creativity shine.
8. How Can You Incorporate Other Decorative Elements?
To add even more visual interest to your photo collage, consider incorporating other decorative elements. This could include:
- Quotes or Sayings: Add framed quotes or sayings that complement your photos and add a personal touch.
- Artwork: Mix in small paintings, drawings, or prints to create a more eclectic and artistic display.
- Mirrors: Incorporate small mirrors to reflect light and create the illusion of more space.
- Plants: Add small potted plants or succulents to bring a touch of nature to your collage.
- Objects: Include small objects that have personal meaning or complement your photos. This could be anything from vintage cameras to travel souvenirs.
9. How To Light Your Photo Collage for Maximum Impact?
Proper lighting can dramatically enhance the visual impact of your photo collage. Consider the following lighting options:
- Track Lighting: Install track lighting above your collage to provide focused and adjustable illumination.
- Picture Lights: Use individual picture lights to highlight specific photos or artwork.
- Ambient Lighting: Ensure that the room has adequate ambient lighting to complement the focused lighting on your collage.
- Natural Light: If possible, position your collage near a window to take advantage of natural light during the day.
Experiment with different lighting options to find the perfect balance that showcases your photo collage in the best possible light.
10. What Are Common Mistakes To Avoid When Hanging A Photo Collage?
Even with careful planning, it’s easy to make mistakes when hanging a photo collage. Here are a few common pitfalls to avoid:
- Hanging Photos Too High: Art should be hung at eye level. The center of your collage should be about 4′ to 4.5′ from the floor.
- Spacing Photos Too Far Apart: Keep the frames relatively close together, about 2″ apart, to create a cohesive unit.
- Using Frames That Are Too Small: Choose frames that are proportionate to the size of the photos and the wall space.
- Ignoring the Overall Composition: Pay attention to the balance, symmetry, and visual flow of your collage.
- Not Using a Level: Ensure that each frame is straight by using a level during installation.
Avoiding these common mistakes will help you create a photo collage that is both visually appealing and professionally executed.
11. How To Maintain and Update Your Photo Collage?
Once your photo collage is complete, it’s important to maintain it and update it periodically to keep it looking fresh and interesting. Here are a few tips:
- Dust Regularly: Dust the frames and photos regularly to keep them clean and free of debris.
- Replace Faded Photos: If any of your photos start to fade, replace them with fresh prints.
- Rotate Photos: Rotate the photos in your collage periodically to keep the display interesting and highlight different memories.
- Add New Photos: Add new photos as you create new memories. This will keep your collage evolving and reflecting your current life.
- Rearrange the Layout: Occasionally rearrange the layout of your collage to give it a fresh new look.
By following these tips, you can ensure that your photo collage remains a cherished and dynamic part of your home décor for years to come.
12. How To Create Digital Photo Collages Before Printing?
Before committing to a physical photo collage, consider creating a digital version first. This allows you to experiment with different layouts and arrangements without the hassle of printing and framing. Here’s how:
- Choose a Software or App: Select a photo editing software or collage-making app that suits your needs. Popular options include Adobe Photoshop, Canva, and PicCollage.
- Upload Your Photos: Upload the photos you want to include in your collage to the software or app.
- Experiment with Layouts: Use the software or app to experiment with different layouts and arrangements. Try different sizes, shapes, and orientations.
- Add Text and Graphics: Add text, graphics, or other decorative elements to enhance your collage.
- Save and Print: Once you’re happy with the digital collage, save it as a high-resolution file and print it out at your local print shop.
Creating a digital photo collage first allows you to fine-tune your design and ensure that you’re completely satisfied with the final result before committing to a physical display.
13. Can You Use Double-Sided Tape Instead of Nails?
For renters or those who prefer not to use nails, double-sided tape can be a convenient alternative for hanging a photo collage. However, it’s important to choose the right type of tape and use it properly to avoid damaging your walls or having your photos fall down.
- Choose the Right Tape: Select a high-quality, heavy-duty double-sided tape that is specifically designed for hanging items on walls. Look for tape that is labeled as “removable” or “damage-free.”
- Prepare Your Wall: Clean the wall thoroughly with a damp cloth and let it dry completely before applying the tape.
- Apply the Tape: Apply strips of tape to the back of each frame, making sure to cover the entire surface.
- Press Firmly: Press each frame firmly against the wall for at least 30 seconds to ensure a strong bond.
- Check Regularly: Check the tape regularly to make sure it is still holding. If you notice any signs of loosening, replace the tape immediately.
While double-sided tape can be a convenient option, it’s not as secure as nails or hooks. Use caution and consider the weight of your frames when deciding whether to use tape.
14. How Can Children Participate in Creating a Photo Collage?
Creating a photo collage can be a fun and engaging activity for children of all ages. Here are a few ways to involve your kids in the process:
- Let Them Choose the Photos: Allow your children to select their favorite photos to include in the collage. This will make the project more personal and meaningful for them.
- Help with Arranging: Let your children help with arranging the photos on the wall or on a large piece of paper. This will encourage their creativity and problem-solving skills.
- Decorate the Frames: Provide your children with paint, markers, stickers, and other craft supplies to decorate the frames. This will allow them to personalize the collage and make it their own.
- Add Their Artwork: Include your children’s drawings, paintings, or other artwork in the collage. This will add a unique and personal touch to the display.
Creating a photo collage with your children is a great way to bond, create lasting memories, and foster their creativity.
15. Are There Software Tools That Can Help Plan a Photo Collage?
Yes, several software tools can help you plan a photo collage. These tools allow you to experiment with different layouts, arrangements, and designs before committing to a physical display. Here are a few popular options:
- Canva: A user-friendly graphic design platform that offers a wide range of templates and tools for creating photo collages.
- PicCollage: A mobile app that allows you to quickly and easily create photo collages on your smartphone or tablet.
- Adobe Photoshop: A professional-grade photo editing software that offers advanced tools for creating custom photo collages.
- Fotor: An online photo editor that offers a variety of collage templates and editing tools.
- BeFunky: An online photo editor that allows you to create photo collages with various layouts and effects.
These software tools can save you time and effort by allowing you to visualize your photo collage before you start hanging it on the wall.
16. How To Handle Oddly Shaped Walls When Hanging a Collage?
Oddly shaped walls can present a challenge when hanging a photo collage. However, with a little creativity and planning, you can create a visually appealing display that complements the unique shape of your wall. Here are a few tips:
- Embrace the Shape: Instead of trying to create a symmetrical collage on an oddly shaped wall, embrace the shape and create an asymmetrical arrangement that follows the contours of the wall.
- Use Templates: Create paper templates of your frames and use them to experiment with different layouts on the wall. This will help you visualize the final result and avoid mistakes.
- Create a Focal Point: Choose one large photo or artwork to serve as a focal point and arrange the other photos around it.
- Use Varying Frame Sizes: Use frames of different sizes and shapes to create visual interest and complement the shape of the wall.
- Extend Beyond the Wall: If possible, extend your collage beyond the wall and onto an adjacent surface, such as a bookshelf or cabinet.
17. Where To Find Inspiration for Photo Collage Ideas?
Looking for inspiration for your photo collage? Here are a few great sources:
- Pinterest: A visual discovery platform where you can find thousands of photo collage ideas, ranging from simple and minimalist to elaborate and eclectic.
- Instagram: A social media platform where you can follow photographers, designers, and home décor enthusiasts who share their photo collage creations.
- Home Décor Magazines: Browse home décor magazines for inspiration on wall décor and photo collage arrangements.
- Online Blogs: Read online blogs and articles about photo collages for tips, ideas, and tutorials.
- Visit Art Galleries: Visit art galleries and museums to see how professional artists display their work.
18. How To Protect Your Photos from Fading in a Collage?
Protecting your photos from fading is crucial to ensure that your photo collage remains vibrant and beautiful for years to come. Here are a few tips:
- Use Archival-Quality Prints: Use archival-quality prints that are designed to resist fading and discoloration.
- Avoid Direct Sunlight: Avoid hanging your photo collage in direct sunlight, as this can cause the photos to fade quickly.
- Use UV-Protective Glass: Use UV-protective glass in your frames to filter out harmful ultraviolet rays.
- Store Negatives or Digital Copies: Store the negatives or digital copies of your photos in a safe place so you can reprint them if necessary.
- Consider a Protective Spray: Consider applying a protective spray to your photos to help protect them from fading and damage.
19. Can You Mix Black and White and Color Photos in a Collage?
Yes, you can definitely mix black and white and color photos in a collage. In fact, this can be a great way to add visual interest and create a more dynamic display. Here are a few tips for mixing black and white and color photos effectively:
- Create a Balance: Strive for a balance between black and white and color photos. Too many of one or the other can make the collage look unbalanced.
- Use a Consistent Theme: Choose a consistent theme or style for your photos to create a cohesive look.
- Consider the Colors: Pay attention to the colors in your color photos and make sure they complement each other.
- Use Black and White as Accents: Use black and white photos to highlight certain elements or create contrast.
- Experiment with Layouts: Experiment with different layouts and arrangements to see what looks best.
20. What Are Some DIY Alternatives to Store-Bought Frames?
If you’re on a budget or looking for a more unique and personal touch, here are some DIY alternatives to store-bought frames:
- Repurpose Old Frames: Repurpose old frames from thrift stores or flea markets. You can paint them, decorate them, or leave them as is for a vintage look.
- Use Clipboards: Use clipboards to display your photos. This is a simple and affordable way to create a casual and modern collage.
- Create a Clothesline Collage: Hang your photos on a clothesline using clothespins. This is a fun and whimsical way to display your memories.
- Use Washi Tape: Use washi tape to create borders around your photos. This is a colorful and easy way to add a personal touch.
- Create a Pallet Collage: Use a wooden pallet as a base for your collage. This is a rustic and unique way to display your photos.
21. How To Incorporate Travel Souvenirs into Your Photo Collage?
Incorporating travel souvenirs into your photo collage is a great way to add a personal touch and create a lasting reminder of your adventures. Here are a few ideas:
- Use Postcards: Use postcards from your travels as part of your collage.
- Include Maps: Include small maps or sections of maps that highlight the places you visited.
- Add Ticket Stubs: Add ticket stubs from museums, concerts, or other events you attended on your travels.
- Use Small Objects: Include small objects that you collected on your travels, such as seashells, stones, or coins.
- Create a Travel-Themed Layout: Create a layout that reflects the places you visited, such as arranging your photos in the shape of a map or a landmark.
22. What Are the Best Glues to Use for a Scrapbook Photo Collage?
When creating a scrapbook photo collage, choosing the right glue is essential to ensure that your photos and embellishments stay in place and your scrapbook lasts for years to come. Here are some of the best glues to use:
- Acid-Free Glue Sticks: Acid-free glue sticks are a popular choice for scrapbooking because they are easy to use and won’t damage your photos or paper.
- Photo Mounting Squares: Photo mounting squares are small, adhesive squares that are specifically designed for mounting photos in scrapbooks.
- Adhesive Runners: Adhesive runners are dispensers that apply a thin strip of adhesive to your photos or embellishments.
- Glue Pens: Glue pens are pens that dispense a small amount of glue, making them ideal for attaching small embellishments.
- Liquid Adhesives: Liquid adhesives, such as Mod Podge, can be used to attach photos and embellishments to a variety of surfaces, but be sure to choose an acid-free formula.
23. How To Add Texture To A Photo Collage?
Adding texture to a photo collage can make it more visually interesting and engaging. Here are a few ideas:
- Use Textured Paper: Use textured paper as a background or to create embellishments.
- Add Fabric Scraps: Add fabric scraps to your collage for a soft and tactile feel.
- Use Embossing Powders: Use embossing powders to create raised designs on your photos or embellishments.
- Add Natural Elements: Add natural elements, such as dried flowers, leaves, or twigs, to your collage.
- Use Mixed Media: Use mixed media, such as paint, ink, or markers, to add texture and dimension to your collage.
24. What Are Some Themes for a Photo Collage?
Choosing a theme for your photo collage can help you create a cohesive and meaningful display. Here are a few popular themes:
- Family History: Create a collage that tells the story of your family history, with photos of your ancestors and relatives.
- Travel Adventures: Create a collage that showcases your travel adventures, with photos of the places you visited and the things you saw.
- Childhood Memories: Create a collage that celebrates your childhood memories, with photos of you as a child and the people and places that were important to you.
- Wedding Day: Create a collage that captures the magic of your wedding day, with photos of you and your spouse, your family and friends, and the special moments you shared.
- Pet Love: Create a collage that celebrates your love for your pet, with photos of your furry friend doing cute and funny things.
25. How Often Should You Update a Photo Collage?
The frequency with which you should update a photo collage depends on your personal preferences and the purpose of the collage. Here are a few guidelines:
- For a Family History Collage: Update the collage every few years to add new photos of your family members as they grow and change.
- For a Travel Adventures Collage: Update the collage after each major trip to add photos of the places you visited and the things you saw.
- For a Childhood Memories Collage: Update the collage as you discover new photos from your childhood or as you create new memories with your own children.
- For a Wedding Day Collage: Update the collage on your anniversary each year to add new photos from your life together as a married couple.
- For a Pet Love Collage: Update the collage as your pet grows and changes or as you capture new photos of your furry friend doing cute and funny things.
26. Are There Rules To Arranging a Photo Collage?
While there are no hard and fast rules for arranging a photo collage, here are a few guidelines to help you create a visually appealing display:
- Create a Focal Point: Choose one large photo or artwork to serve as a focal point and arrange the other photos around it.
- Use Varying Frame Sizes: Use frames of different sizes and shapes to create visual interest.
- Consider the Colors: Pay attention to the colors in your photos and frames and make sure they complement each other.
- Create a Balance: Strive for a balance between different elements, such as black and white and color photos, textured and smooth surfaces, and large and small frames.
- Experiment with Layouts: Experiment with different layouts and arrangements until you find one that you love.
27. How Can You Preserve Old Photos Before Adding to Collage?
Preserving old photos before adding them to a collage is crucial to ensure that they last for years to come. Here are a few tips:
- Handle with Care: Handle old photos with clean, dry hands to avoid damaging them.
- Store in Acid-Free Materials: Store old photos in acid-free materials, such as acid-free paper, albums, or boxes.
- Avoid Direct Sunlight: Avoid exposing old photos to direct sunlight, as this can cause them to fade and discolor.
- Keep Away from Heat and Humidity: Keep old photos away from heat and humidity, as these can cause them to warp and deteriorate.
- Digitize Your Photos: Digitize your old photos by scanning them or taking digital photos of them. This will create a backup copy that you can use to create a collage without risking damage to the original photos.
28. What if You Run Out of Wall Space For Your Photo Collage?
Running out of wall space for your photo collage is a common problem, but there are several creative solutions you can try:
- Create a Rotating Display: Create a rotating display by switching out photos in your collage periodically.
- Use a Gallery Wall: Use a gallery wall to create a larger display that can accommodate more photos.
- Create a Digital Collage: Create a digital collage that you can display on your computer, tablet, or smartphone.
- Create a Scrapbook Collage: Create a scrapbook collage that you can flip through and enjoy.
- Create a Photo Album: Create a photo album that you can store on a shelf or coffee table.
29. How Do You Ensure a Photo Collage Is Level When Hanging It?
Ensuring that your photo collage is level when hanging it is essential for creating a professional-looking display. Here are a few tips:
- Use a Level: Use a level to make sure that the top edge of your collage is straight.
- Measure Carefully: Measure carefully to make sure that the frames are evenly spaced and aligned.
- Use Painter’s Tape: Use painter’s tape to mark the positions of the frames on the wall before you start hammering in the nails.
- Step Back and Check: Step back and check your progress frequently to make sure that the collage is level and balanced.
- Make Adjustments: Make any necessary adjustments to ensure that the collage is perfectly level.
30. How Do You Remove a Photo Collage Without Damaging the Wall?
Removing a photo collage without damaging the wall requires care and patience. Here are a few tips:
- Use a Hair Dryer: Use a hair dryer to heat the adhesive on the back of the frames. This will make it easier to remove the frames without damaging the wall.
- Use a Putty Knife: Use a putty knife to gently pry the frames away from the wall.
- Remove Nails Carefully: Remove nails carefully to avoid damaging the wall.
- Fill Nail Holes: Fill any nail holes with spackle and let it dry completely.
- Sand Smooth: Sand the spackle smooth and paint over it to match the wall.
By following these tips, you can remove your photo collage without leaving any unsightly marks on your wall.
Creating a photo collage is a wonderful way to showcase your cherished memories and add a personal touch to your home décor. With careful planning, creativity, and attention to detail, you can create a stunning display that you’ll enjoy for years to come.
For more inspiration, expert tips, and a vibrant community of fellow photography enthusiasts, visit dfphoto.net today. Discover a wealth of resources, connect with like-minded individuals, and unlock your creative potential. Let dfphoto.net be your guide as you embark on a journey of visual storytelling and artistic expression.
Address: 1600 St Michael’s Dr, Santa Fe, NM 87505, United States.
Phone: +1 (505) 471-6001.
Website: dfphoto.net.
FAQ: Hanging Photo Collages
- Q1: What’s the best height to hang a photo collage?
The best height is to position the center of the collage between 4 to 4.5 feet from the floor, ensuring it’s at eye level. This placement creates a comfortable viewing experience and integrates the collage seamlessly into the room. - Q2: How do I choose the right frame sizes for a collage?
Choose a variety of frame sizes to add visual interest. Mix large and small frames to create a dynamic and balanced composition, considering the size of your photos and the overall wall space. - Q3: What is the ideal spacing between frames in a photo collage?
Maintain a consistent spacing of about 2 inches between frames. This spacing creates a cohesive look and prevents the collage from appearing cluttered or disjointed, ensuring a unified visual impact. - Q4: Can I mix different frame styles in a photo collage?
Yes, mixing frame styles can add character to your collage. Combine different materials, colors, and textures to create an eclectic and personalized display, reflecting your unique style and taste. - Q5: How do I plan a photo collage layout before hanging it?
Lay out your frames on the floor to experiment with different arrangements. Take a photo of your favorite layout as a reference before transferring it to the wall, ensuring a well-planned and visually appealing collage. - Q6: What tools do I need to hang a photo collage?
Gather a level, measuring tape, hammer, nails, and painter’s tape. These tools will help you plan the layout, ensure straight alignment, and hang your collage securely and accurately. - Q7: How can I protect my walls when hanging a photo collage?
Use painter’s tape to mark nail positions and prevent wall damage. Consider using adhesive strips for lightweight frames, minimizing the need for nails and protecting your walls from unnecessary holes. - Q8: How do I incorporate non-photo elements into my collage?
Incorporate items like postcards, artwork, and small mementos. These additions can enhance the collage’s storytelling aspect and add personal significance, creating a richer and more engaging visual narrative. - Q9: What are some creative themes for a photo collage?
Consider themes like family history, travel adventures, or childhood memories. A consistent theme adds meaning and coherence to your collage, turning it into a visual representation of cherished experiences and stories. - Q10: How often should I update my photo collage?
Update your collage periodically to keep it fresh and relevant. Rotate photos or add new memories to reflect your evolving life and maintain the collage’s personal significance, ensuring it remains a dynamic and engaging display.
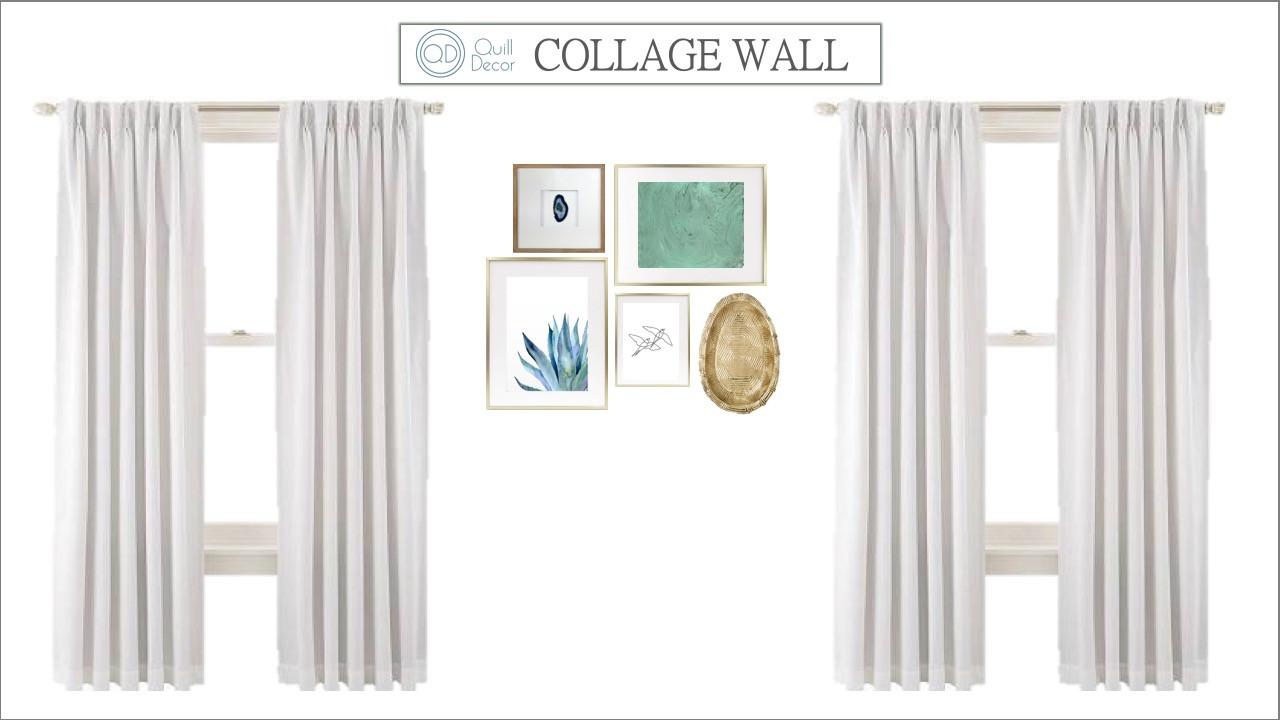 Photo Collage Wall Example
