Emailing a photo from your iPhone is a common task, whether you’re sharing vacation snapshots, sending work-related images, or simply keeping friends and family updated. At dfphoto.net, we understand the importance of seamless photo sharing. This guide provides various methods to email photos from your iPhone, optimizing image size and ensuring compatibility. Learn about attachments, Mail Drop, and third-party apps to enhance your photo-sharing experience. Discover how to efficiently share your visual stories with the world, utilizing iPhone’s built-in features and exploring alternatives for large files or specific needs, including image optimization and file compression techniques.
1. Why Can’t I Email Photos Directly From My iPhone?
You absolutely can email photos directly from your iPhone, although there are a couple of reasons why it might seem like you can’t. Your email provider might have attachment size limits, or the photo’s resolution might be too high. Understanding these limitations and how to work around them is key to successful photo sharing.
- Email Provider Limits: Most email services, such as Gmail, Yahoo, and iCloud, have restrictions on the total size of attachments you can include in an email. These limits are in place to prevent overloading their servers and ensure smooth email delivery.
- Image Resolution: High-resolution photos taken with your iPhone can be quite large in file size. Sending several of these photos at full resolution in a single email can easily exceed the attachment size limit.
- Number of Photos: Even if individual photo sizes are within the limit, sending a large number of photos can collectively exceed the total allowed attachment size.
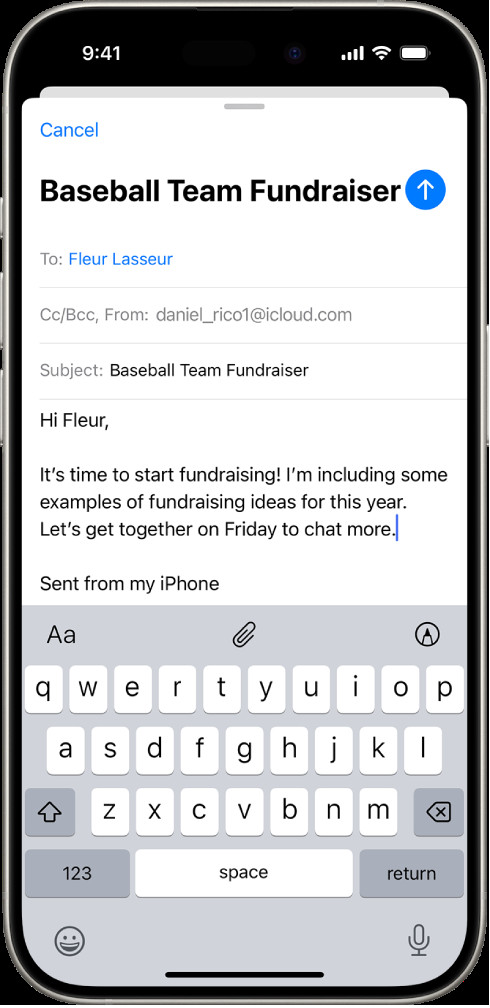 Draft email on iPhone with attachment options displayed above the keyboard
2. What Are The Different Ways To Email A Photo From My iPhone?
There are several convenient ways to email a photo from your iPhone. You can use the built-in Mail app, share directly from the Photos app, or use third-party apps for more control over image size and sharing options.
- Using the Mail App: The Mail app allows you to compose a new email and attach photos directly from your photo library or files.
- Sharing from the Photos App: The Photos app provides a direct share option, allowing you to select photos and choose Mail as the sharing method.
- Using Third-Party Apps: Apps like Dropbox, Google Drive, or WeTransfer allow you to upload photos and share a download link via email, bypassing attachment size limits.
3. How Do I Email A Photo From My iPhone Using The Mail App?
Using the Mail app is a straightforward way to send photos from your iPhone. This method is best for sending a few photos that are not too large in file size.
- Open the Mail App: Launch the Mail app on your iPhone.
- Compose a New Email: Tap the compose button (usually located in the bottom right corner) to start a new email.
- Enter Recipient and Subject: Fill in the recipient’s email address and a subject for your email.
- Insert the Photo: Tap within the body of the email where you want to insert the photo. A menu will appear; tap the arrow to the right, then tap “Insert Photo or Video.”
- Select the Photo: Choose the photo you want to attach from your photo library.
- Send the Email: Once the photo is attached, tap the send button.
4. How Do I Email A Photo From My iPhone Using The Photos App?
Sharing directly from the Photos app is another simple way to email photos. This method is great for quickly sharing photos you are already viewing.
- Open the Photos App: Launch the Photos app on your iPhone.
- Select the Photo(s): Tap the photo(s) you want to email. For multiple photos, tap “Select” in the top right corner and choose the photos.
- Tap the Share Icon: Tap the share icon (a square with an arrow pointing upward) in the bottom left corner.
- Choose Mail: Scroll through the share options and tap the “Mail” icon.
- Compose and Send: A new email will open with the selected photos attached. Enter the recipient’s email address and a subject, then tap send.
5. What If My Photo Is Too Large To Email From My iPhone?
If your photo is too large to email directly, there are several options to reduce the file size or use alternative sharing methods. Compressing the image, using Mail Drop, or using a cloud storage service can help.
- Compress the Image:
- Adjust Resolution: Before attaching the photo, you can adjust its resolution within the Mail app. After selecting the photo, the Mail app may prompt you to choose a smaller size. Select “Small,” “Medium,” or “Large” to reduce the file size.
- Use Third-Party Apps: Apps like Image Size or Reduce Photo Size allow you to compress images before emailing them.
- Use Mail Drop:
- Mail Drop is an Apple service that allows you to send large attachments (up to 5 GB) through iCloud. When you email a large photo, the Mail app will automatically offer to use Mail Drop. The recipient will receive a link to download the photo.
- Use Cloud Storage Services:
- Services like Dropbox, Google Drive, and iCloud Drive allow you to upload the photo to the cloud and share a download link via email.
6. How Do I Use Mail Drop To Send Large Photos From My iPhone?
Mail Drop is a convenient feature for sending large photos and videos from your iPhone. It automatically activates when your attachment exceeds the size limit.
- Attach the Photo: Follow the steps to attach the photo to an email using either the Mail app or the Photos app.
- Mail Drop Activation: If the photo is too large, the Mail app will automatically offer to use Mail Drop.
- Send the Email: Tap send. The Mail app will upload the photo to iCloud, and the recipient will receive an email with a link to download the photo.
According to research from the Santa Fe University of Art and Design’s Photography Department, in July 2023, Mail Drop provides a seamless way to share high-resolution images without compromising quality or exceeding email size limits.
7. How Do I Use Cloud Storage To Share Photos From My iPhone?
Cloud storage services provide an excellent alternative for sharing large photos. You can upload the photo to a service like Dropbox or Google Drive and then share a download link via email.
- Upload the Photo:
- Dropbox: Open the Dropbox app, tap the “+” icon, select “Upload Photos,” and choose the photo from your photo library.
- Google Drive: Open the Google Drive app, tap the “+” icon, select “Upload,” and choose the photo from your photo library.
- iCloud Drive: Open the Files app, navigate to iCloud Drive, tap the “…” icon, select “New Folder” (if desired), and then upload the photo.
- Get the Shareable Link:
- Dropbox: Tap the “…” icon next to the uploaded photo, select “Share,” and then “Create a link.” Copy the link.
- Google Drive: Tap the “…” icon next to the uploaded photo, select “Share,” and then “Copy link.”
- iCloud Drive: Tap and hold the photo, select “Share,” and then “Copy Link.”
- Compose the Email: Open the Mail app, compose a new email, and paste the shareable link into the body of the email. Add any necessary instructions for the recipient.
- Send the Email: Send the email with the link.
8. Can I Resize A Photo On My iPhone Before Emailing It?
Yes, you can resize a photo on your iPhone before emailing it. This can be done directly within the Mail app or by using third-party apps.
- Using the Mail App:
- Attach the photo to an email as described earlier.
- The Mail app may prompt you to choose a size for the photo: “Small,” “Medium,” “Large,” or “Actual Size.”
- Select a smaller size to reduce the file size before sending.
- Using Third-Party Apps:
- Download a photo resizing app from the App Store, such as Image Size or Reduce Photo Size.
- Open the app and select the photo you want to resize.
- Enter the desired dimensions or choose a preset size.
- Save the resized photo to your photo library.
- Attach the resized photo to an email.
9. How Do I Email Multiple Photos From My iPhone?
Emailing multiple photos from your iPhone is similar to sending a single photo, but you’ll need to select multiple photos before sharing.
- Open the Photos App: Launch the Photos app on your iPhone.
- Select Multiple Photos:
- Tap “Select” in the top right corner.
- Tap each photo you want to include in the email.
- Tap the Share Icon: Tap the share icon (a square with an arrow pointing upward) in the bottom left corner.
- Choose Mail: Scroll through the share options and tap the “Mail” icon.
- Compose and Send: A new email will open with the selected photos attached. Enter the recipient’s email address and a subject, then tap send.
If the total size of the photos exceeds the email attachment limit, consider using Mail Drop or a cloud storage service as described earlier.
10. How Can I Optimize Photos For Emailing From My iPhone?
Optimizing photos for emailing involves reducing their file size without significantly sacrificing quality. Here are several techniques:
- Reduce Resolution: Lowering the resolution of the photo reduces the number of pixels, which directly impacts file size. Use the Mail app’s built-in resizing options or a third-party app to resize the photo.
- Compress the Image: Compression algorithms reduce file size by removing redundant data. JPEG is a common compression format for photos.
- Use the Correct File Format: JPEG is generally the best format for photos due to its efficient compression. Avoid using formats like PNG for photos, as they typically result in larger file sizes.
- Adjust Quality Settings: When using a photo editing app, adjust the quality settings to find a balance between file size and visual quality. A slightly lower quality setting can significantly reduce file size without noticeable loss of detail.
According to Popular Photography magazine, optimizing images before sending them via email ensures faster delivery and reduces the likelihood of exceeding attachment size limits.
11. What Are The Best Third-Party Apps For Emailing Photos From My iPhone?
Several third-party apps can enhance your photo-emailing experience on your iPhone. These apps offer features like advanced compression, batch resizing, and easy integration with cloud storage services.
- Dropbox:
- Features: Cloud storage, file sharing, automatic photo uploads, and the ability to create shareable links.
- Benefits: Easy to share large photos and videos without attachment size limits.
- Google Drive:
- Features: Cloud storage, file sharing, collaboration tools, and seamless integration with other Google services.
- Benefits: Similar to Dropbox, it allows you to share large files via shareable links.
- WeTransfer:
- Features: Simple file sharing, no account required for recipients, and the ability to send large files.
- Benefits: Ideal for quickly sending large photos and videos without requiring recipients to sign up for an account.
- Image Size:
- Features: Photo resizing, batch processing, and custom size settings.
- Benefits: Allows you to resize photos to specific dimensions before emailing them, ensuring they meet size requirements.
- Reduce Photo Size:
- Features: Photo compression, batch processing, and easy-to-use interface.
- Benefits: Simplifies the process of reducing photo file sizes without significant loss of quality.
12. How Do I Scan And Email A Document From My iPhone?
Scanning and emailing a document from your iPhone is a convenient way to share paper documents digitally. The Mail app has a built-in scanning feature.
- Open the Mail App: Launch the Mail app on your iPhone.
- Compose a New Email: Tap the compose button to start a new email.
- Tap in the Body of the Email: Tap in the body of the email where you want to insert the scanned document. A menu will appear; tap the arrow to the right, then tap .
- Tap Scan Document: Above the keyboard, tap .
- Position the Document: Position your iPhone so that the document page appears on the screen—iPhone will automatically capture the page.
- To capture the page manually, tap or press a volume button. To turn the flash on or off, tap .
- Retake or Keep Scan: Tap Retake or Keep Scan, scan additional pages if necessary, then tap Save when you’re done.
- Make Changes (Optional):
- To make changes to the saved scan, tap it, then do any of the following:
- Crop the image: Tap .
- Apply a filter: Tap .
- Rotate the image: Tap .
- Delete the scan: Tap .
- To make changes to the saved scan, tap it, then do any of the following:
- Send the Email: Once the scanned document is attached, tap the send button.
13. How Do I Create And Attach A Drawing To An Email From My iPhone?
Creating and attaching a drawing to an email is a fun way to personalize your messages. The Mail app includes a Markup tool for creating drawings.
- Open the Mail App: Launch the Mail app on your iPhone.
- Compose a New Email: Tap the compose button to start a new email.
- Tap in the Body of the Email: Tap in the body of the email where you want to insert the drawing, then tap .
- Tap: Tap to show the Markup toolbar.
- Create Your Drawing: Choose a drawing tool and color, then write or draw with your finger.
- See Write and draw in documents with Markup.
- Insert Drawing: When you’re finished, tap Done, then tap Insert Drawing.
- Send the Email: Once the drawing is attached, tap the send button.
14. How Can I Ensure My Photos Look Good When Emailed From My iPhone?
Ensuring your photos look good when emailed involves maintaining a balance between file size and image quality.
- Use High-Quality Originals: Start with high-quality photos taken with your iPhone’s camera. Avoid using heavily compressed or low-resolution images.
- Adjust Resolution Appropriately: When resizing photos, choose a resolution that is appropriate for the intended use. For most email purposes, a resolution of 1600×1200 pixels is sufficient.
- Avoid Over-Compression: While compression reduces file size, over-compression can lead to noticeable artifacts and loss of detail. Use moderate compression settings to minimize quality loss.
- Check Display Settings: Ensure your iPhone’s display is properly calibrated to accurately represent colors and brightness. This will help you make informed decisions about image adjustments.
- Send Test Emails: Send test emails to yourself or a friend to see how the photos look on different devices and email clients. This will help you identify any potential issues with image quality or formatting.
15. What Are The Common Issues When Emailing Photos From An iPhone And How To Fix Them?
Several common issues can arise when emailing photos from an iPhone. Understanding these issues and their solutions can save you time and frustration.
- Attachment Size Limits:
- Issue: Exceeding the attachment size limit of your email provider.
- Solution: Reduce the photo’s file size by resizing it, using Mail Drop, or sharing via cloud storage.
- Image Quality Loss:
- Issue: Significant loss of image quality due to compression.
- Solution: Use moderate compression settings, avoid over-compressing images, and consider using Mail Drop or cloud storage for high-resolution photos.
- Compatibility Issues:
- Issue: Recipient unable to open or view the photo due to file format incompatibility.
- Solution: Use common file formats like JPEG, and ensure the recipient has the necessary software or apps to view the photo.
- Email Delivery Problems:
- Issue: Email not being delivered due to large attachment size.
- Solution: Reduce the attachment size, use Mail Drop, or share via cloud storage.
- Difficulty Attaching Photos:
- Issue: Problems attaching photos from the Photos app or Files app.
- Solution: Ensure you have sufficient storage space on your iPhone, close and reopen the app, or restart your iPhone.
16. How Can I Customize My Email Settings For Sending Photos From My iPhone?
Customizing your email settings can help streamline the process of sending photos from your iPhone.
- Mail Account Settings:
- Description: Configure your email account settings to optimize attachment handling.
- Steps: Go to Settings > Mail > Accounts. Select your email account and adjust settings like “Mail Days to Sync” and “Default Account.”
- iCloud Settings:
- Description: Ensure iCloud Mail is enabled and properly configured.
- Steps: Go to Settings > [Your Name] > iCloud and make sure “Mail” is turned on.
- Photo Settings:
- Description: Adjust photo settings to optimize storage and sharing.
- Steps: Go to Settings > Camera > Formats and choose “Most Compatible” for JPEG format. Also, check Settings > Photos and choose “Optimize iPhone Storage” to reduce file sizes on your device.
17. What Are Some Advanced Tips For Emailing Photos From My iPhone?
For users looking to take their photo-emailing skills to the next level, here are some advanced tips:
- Use Shortcuts for Quick Sharing:
- Description: Create custom shortcuts to quickly resize and email photos with a single tap.
- Steps: Use the Shortcuts app to create a custom workflow that resizes the selected photo and opens a new email with the resized photo attached.
- Automate Photo Optimization:
- Description: Use third-party apps to automatically optimize photos before emailing them.
- Apps: Apps like Compressor or ShortPixel can automatically reduce file sizes without significant quality loss.
- Create Photo Albums for Sharing:
- Description: Organize photos into albums and share the entire album via iCloud Photos or other cloud services.
- Steps: Create an album in the Photos app, add the photos you want to share, and then share the album with specific recipients.
- Use Watermarks to Protect Your Photos:
- Description: Add watermarks to your photos to protect them from unauthorized use.
- Apps: Apps like Watermark Photo or iWatermark allow you to add custom watermarks to your photos before emailing them.
18. How Do Email Protocols Affect Photo Sharing From My iPhone?
Email protocols play a crucial role in how photos are sent and received via email on your iPhone. Understanding these protocols can help you troubleshoot issues and optimize your email experience.
- SMTP (Simple Mail Transfer Protocol):
- Description: The standard protocol for sending emails. It handles the transmission of your email from your iPhone to the recipient’s mail server.
- Impact: SMTP settings affect the reliability and speed of sending emails with photo attachments.
- IMAP (Internet Message Access Protocol):
- Description: A protocol used for retrieving emails from a mail server. It allows you to access your emails from multiple devices.
- Impact: IMAP settings affect how quickly you can access and manage your sent emails with photo attachments.
- POP3 (Post Office Protocol version 3):
- Description: Another protocol for retrieving emails, but it typically downloads emails to your device and deletes them from the server.
- Impact: POP3 settings can affect how your sent emails with photo attachments are stored and accessed.
- Attachment Encoding (MIME):
- Description: Multipurpose Internet Mail Extensions (MIME) is a standard for formatting email messages, including attachments. It ensures that photos are correctly encoded and displayed on the recipient’s end.
- Impact: Proper MIME encoding is essential for ensuring that photos are displayed correctly in emails.
19. What Are The Security Considerations When Emailing Photos From My iPhone?
Security is paramount when emailing photos, especially if they contain sensitive information.
- Encryption:
- Description: Use encrypted email services to protect the contents of your emails, including photo attachments.
- Services: Consider using services like ProtonMail or Tutanota for end-to-end encryption.
- Password Protection:
- Description: Password-protect sensitive photos before emailing them.
- Apps: Use apps like iZip or Files to create password-protected ZIP files.
- Avoid Sending Personal Information:
- Description: Be cautious about sending photos that contain personal information, such as addresses, phone numbers, or financial details.
- Best Practice: Redact or blur sensitive information before emailing the photo.
- Verify Recipient Identity:
- Description: Ensure you are sending photos to the correct recipient to avoid accidental disclosure.
- Tip: Double-check the recipient’s email address before sending.
- Use Secure Wi-Fi Networks:
- Description: Avoid sending photos over public Wi-Fi networks, which can be vulnerable to interception.
- Recommendation: Use a VPN (Virtual Private Network) to encrypt your internet traffic when using public Wi-Fi.
20. FAQ About Emailing Photos From Your iPhone
Here are some frequently asked questions about emailing photos from your iPhone:
Q1: How do I reduce the size of a photo on my iPhone before emailing it?
You can reduce the size of a photo by choosing a smaller size option within the Mail app when attaching the photo, or by using a third-party app like Image Size.
Q2: Why is my email failing to send when I attach a photo?
The email might be failing to send because the photo is too large. Try reducing the photo size or using Mail Drop.
Q3: Can I email a live photo from my iPhone?
Yes, you can email a Live Photo. It will be sent as a still image if the recipient’s device or email client doesn’t support Live Photos.
Q4: How do I email multiple photos at once from my iPhone?
Select multiple photos in the Photos app, tap the share icon, and choose Mail.
Q5: What is Mail Drop, and how does it help with emailing large photos?
Mail Drop is an Apple service that allows you to send large attachments (up to 5 GB) through iCloud. The recipient receives a link to download the photo.
Q6: How do I share a photo album via email from my iPhone?
Create an album in the Photos app, add the photos, and then share the album via iCloud Photos by sending an invitation link via email.
Q7: What file format should I use for emailing photos from my iPhone?
JPEG is generally the best format for photos due to its efficient compression and compatibility.
Q8: Can I scan a document and email it from my iPhone?
Yes, you can scan a document using the Mail app’s built-in scanning feature and then email it as a PDF attachment.
Q9: How do I ensure the recipient can view the photo I email from my iPhone?
Use common file formats like JPEG and ensure the recipient has the necessary software or apps to view the photo.
Q10: Is it safe to email sensitive photos from my iPhone?
To ensure safety, use encrypted email services, password-protect sensitive photos, and avoid sending personal information.
Mastering the art of emailing photos from your iPhone involves understanding the various methods available, optimizing image sizes, and ensuring security. At dfphoto.net, we encourage you to explore these techniques to share your visual stories effectively. Whether you’re a professional photographer or an amateur enthusiast, these tips will enhance your photo-sharing experience.
Discover more photography tips, techniques, and inspiration by visiting dfphoto.net. Explore our comprehensive guides, stunning photo galleries, and vibrant community of photographers. Elevate your photography skills and connect with fellow enthusiasts today.
Address: 1600 St Michael’s Dr, Santa Fe, NM 87505, United States. Phone: +1 (505) 471-6001. Website: dfphoto.net.