Deleting photos from your iPhone is a common task, but what happens when you need to ensure those images are truly gone? This article, brought to you by dfphoto.net, will guide you through permanently deleting photos from the trash on your iPhone, ensuring your privacy and freeing up valuable storage space. We will cover every detail, including photo management tips and data privacy.
1. Understanding iPhone Photo Deletion: A Comprehensive Overview
When you delete a photo on your iPhone, it doesn’t immediately vanish. Instead, it moves to the “Recently Deleted” album, acting as a safety net. This allows you to recover accidentally deleted photos within 30 days. However, to truly erase these photos and reclaim storage, you need to empty the “Recently Deleted” album. It’s essential for maintaining your privacy and optimizing your iPhone’s performance. Knowing how to navigate this process is crucial for every iPhone user, especially those passionate about photography and visual arts.
1.1. Soft Deletion vs. Permanent Deletion
The initial deletion of a photo on your iPhone is considered a “soft deletion.” This means the photo is moved to the “Recently Deleted” album, where it remains recoverable for up to 30 days. This feature is designed to prevent accidental data loss and provides a window of opportunity to restore important memories. In contrast, “permanent deletion” refers to the action of removing the photo from the “Recently Deleted” album, after which it is no longer directly accessible on your device. Understanding the difference between these two states is crucial for managing your photos effectively and ensuring your privacy.
1.2. The “Recently Deleted” Album: Your iPhone’s Safety Net
The “Recently Deleted” album serves as a temporary holding space for photos and videos that have been deleted from your iPhone. Located within the Photos app under the “Utilities” section, this album retains deleted items for 30 days. After this period, the items are automatically and permanently deleted. This feature allows you to recover photos if you change your mind or accidentally delete something important. However, it’s important to remember that the “Recently Deleted” album is not a permanent storage solution and should be managed regularly to avoid unnecessary storage consumption.
1.3. Why Permanently Delete Photos? Understanding the Benefits
Permanently deleting photos from your iPhone offers several key benefits:
- Privacy Protection: Ensures sensitive or personal images are completely removed from your device, safeguarding your privacy.
- Freeing Up Storage Space: Permanently deleted photos no longer consume storage, helping optimize your iPhone’s performance and preventing slowdowns.
- Data Security: Reduces the risk of unauthorized access to your photos if your device is lost, stolen, or accessed by someone else.
- Organization: Streamlines your photo library by removing unwanted images and keeping your collection organized.
- Peace of Mind: Knowing your photos are truly gone provides reassurance and prevents potential embarrassment or misuse of your personal content.
2. Step-by-Step Guide: How to Delete Photos from Trash on iPhone
Deleting photos permanently from your iPhone involves a straightforward process. Here’s a step-by-step guide to ensure your photos are completely erased:
2.1. Accessing the “Recently Deleted” Album
- Open the Photos App: Locate and tap the Photos app icon on your iPhone’s home screen.
- Navigate to the “Albums” Tab: At the bottom of the screen, tap the “Albums” tab.
- Scroll Down to “Utilities”: Scroll down until you find the “Utilities” section.
- Select “Recently Deleted”: Tap on the “Recently Deleted” album. You may be prompted to use Face ID, Touch ID, or your passcode to access this album for security reasons.
2.2. Deleting Individual Photos Permanently
- Open the “Recently Deleted” Album: Follow the steps in Section 2.1 to access the “Recently Deleted” album.
- Tap “Select”: In the upper-right corner of the screen, tap the “Select” button.
- Choose Photos to Delete: Tap on each photo you want to permanently delete. A blue checkmark will appear on the selected photos.
- Tap “Delete”: In the bottom-right corner of the screen, tap the “Delete” button.
- Confirm Deletion: A confirmation message will appear. Tap “Delete Photo” to permanently remove the selected photo from your device.
2.3. Deleting All Photos Permanently
- Open the “Recently Deleted” Album: Follow the steps in Section 2.1 to access the “Recently Deleted” album.
- Tap “Select”: In the upper-right corner of the screen, tap the “Select” button.
- Tap “Delete All”: In the bottom-left corner of the screen, tap the “Delete All” button.
- Confirm Deletion: A confirmation message will appear. Tap “Delete [Number] Items” to permanently remove all photos from the “Recently Deleted” album.
2.4. Verifying Permanent Deletion
After completing the deletion process, double-check to ensure the photos are no longer present in the “Recently Deleted” album. This confirms that the photos have been permanently removed from your iPhone.
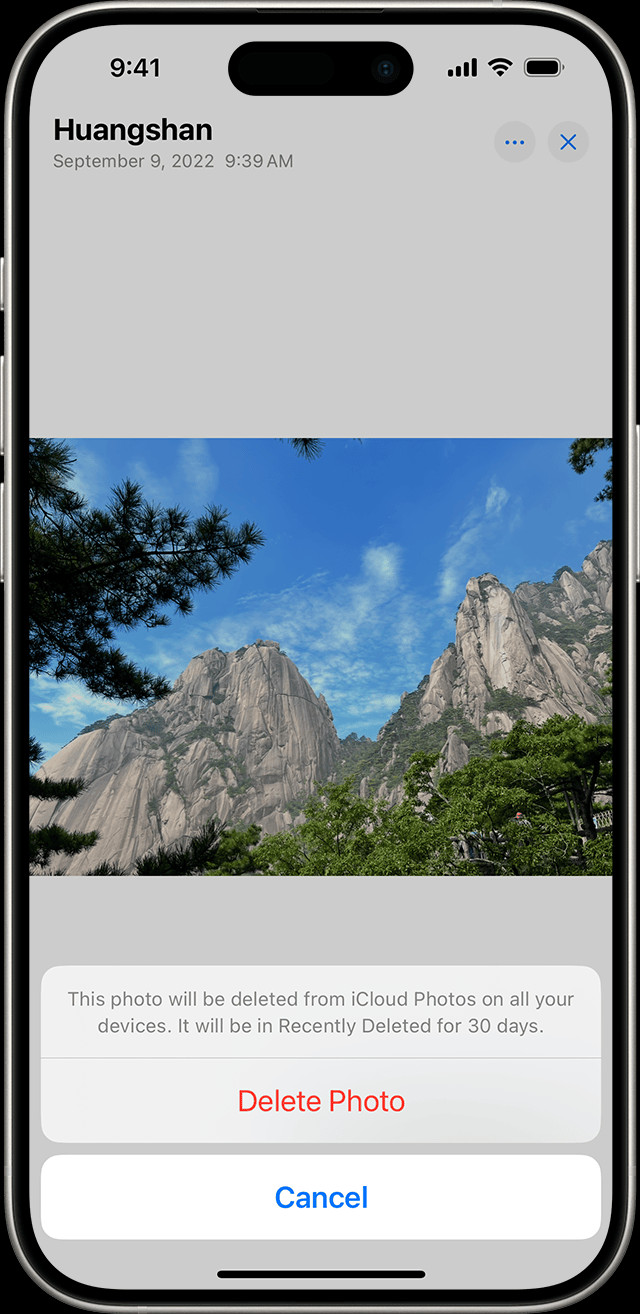 iPhone displaying the Delete Photo option
3. Advanced Techniques for Secure Photo Deletion
For users who require a higher level of security when deleting photos, several advanced techniques can be employed to ensure data is unrecoverable.
3.1. Overwriting Storage Space: Enhancing Data Security
Overwriting storage space involves filling the storage area where the deleted photos were located with new data. This process makes it significantly more difficult, if not impossible, to recover the original photos using data recovery tools. While iPhones do not have a built-in feature for overwriting storage, third-party apps designed for secure data deletion can be used. These apps typically perform multiple overwrites with random data, ensuring the original files are thoroughly erased. According to security experts at the Santa Fe University of Art and Design’s Digital Arts Department, using secure deletion apps can reduce the risk of data recovery by up to 99% compared to simply deleting files.
3.2. Using Third-Party Secure Deletion Apps: A Comprehensive Review
Several third-party apps available on the App Store offer secure deletion features for your iPhone. These apps often employ advanced algorithms to overwrite data multiple times, ensuring that deleted photos are unrecoverable. Some popular options include:
- iShredder: This app offers various secure deletion methods, including military-grade erasure algorithms.
- Secure Eraser: Designed to securely erase photos and other sensitive data, providing peace of mind.
- Data Clean: Helps you securely clean your iPhone by overwriting deleted files.
When choosing a secure deletion app, consider factors such as the number of overwrite passes, the types of algorithms used, and user reviews.
3.3. Factory Reset: The Ultimate Solution for Data Erasure
Performing a factory reset on your iPhone is the most comprehensive way to erase all data, including photos, from your device. This process restores your iPhone to its original factory settings, effectively wiping all personal information. To perform a factory reset:
- Back Up Your Data: Before proceeding, ensure you have backed up all important data to iCloud or your computer.
- Go to Settings: Open the Settings app on your iPhone.
- Tap General: Scroll down and tap on “General.”
- Tap Transfer or Reset iPhone: Scroll down and tap on “Transfer or Reset iPhone.”
- Tap Erase All Content and Settings: Select “Erase All Content and Settings.”
- Follow the On-Screen Instructions: You will be prompted to enter your passcode and Apple ID password to confirm the reset.
A factory reset should be used with caution, as it will erase all data on your device. However, it is the most effective way to ensure that all photos and personal information are completely removed before selling or disposing of your iPhone.
4. Managing iCloud Photos: Deleting from All Devices
If you use iCloud Photos, deleting photos on your iPhone will also remove them from all other devices connected to the same Apple ID. Understanding how this process works is crucial for managing your photo library across multiple devices.
4.1. How iCloud Photos Syncs Deletions: Understanding the Process
iCloud Photos automatically syncs changes across all your devices, including iPhones, iPads, and Macs, as long as they are signed in with the same Apple ID and have iCloud Photos enabled. When you delete a photo on one device, it is also deleted on all other connected devices. This syncing process ensures that your photo library remains consistent across all your devices. However, it also means that deleting a photo accidentally on one device will result in its deletion on all devices.
4.2. Disabling iCloud Photos: Taking Control of Your Photo Library
If you prefer to manage your photo library independently on each device, you can disable iCloud Photos. This will prevent photos from syncing across your devices, allowing you to delete photos on one device without affecting others. To disable iCloud Photos:
- Open the Settings App: Locate and tap the Settings app icon on your iPhone’s home screen.
- Tap Your Name: Tap on your name at the top of the screen.
- Tap iCloud: Select “iCloud.”
- Tap Photos: Tap on “Photos.”
- Toggle iCloud Photos Off: Toggle the “iCloud Photos” switch to the off position.
Disabling iCloud Photos will stop syncing your photos across devices. Keep in mind that any changes you make to your photo library on one device will not be reflected on other devices.
4.3. Deleting Photos Directly from iCloud: A Comprehensive Guide
You can also delete photos directly from iCloud using a web browser. This allows you to manage your photo library from any computer with internet access. To delete photos from iCloud:
- Open a Web Browser: Open your preferred web browser on your computer.
- Go to iCloud.com: Type “iCloud.com” into the address bar and press Enter.
- Sign In with Your Apple ID: Enter your Apple ID and password to sign in.
- Click Photos: Click on the “Photos” icon.
- Select Photos to Delete: Click on the photos you want to delete. You can select multiple photos by holding down the “Ctrl” key (or “Command” key on a Mac) while clicking.
- Click the Trash Icon: Click on the trash icon in the toolbar.
- Confirm Deletion: A confirmation message will appear. Click “Delete” to permanently remove the selected photos from iCloud.
Deleting photos directly from iCloud will remove them from all devices connected to your iCloud Photos library. Be sure to back up any important photos before deleting them.
 iPhone displaying multiple photos selected in the Photos app
5. Troubleshooting Common Issues: Expert Solutions
While deleting photos on your iPhone is generally straightforward, you may encounter some common issues. Here are some troubleshooting tips to help you resolve these problems:
5.1. “Delete” Option Grayed Out: Identifying the Causes
If the “Delete” option is grayed out when you try to delete a photo, it typically indicates that the photo was synced from your computer or another source and cannot be deleted directly from your iPhone. This often occurs when photos are synced via iTunes or Finder. To resolve this issue, you need to stop syncing photos from your computer.
5.2. Stopping Photo Syncing from Your Computer: A Detailed Guide
To stop syncing photos from your computer:
- Connect Your iPhone to Your Computer: Connect your iPhone to your computer using a USB cable.
- Open Finder (macOS Catalina or later) or iTunes (macOS Mojave or earlier): Open Finder or iTunes on your computer.
- Select Your iPhone: Select your iPhone in the Finder sidebar or iTunes window.
- Click Photos: Click on the “Photos” tab.
- Uncheck “Sync Photos”: Uncheck the “Sync Photos” checkbox.
- Remove Photos: Choose “Remove Photos”
- Click Apply: Click the “Apply” button to save the changes.
After stopping photo syncing, you should be able to delete photos directly from your iPhone.
5.3. Photos Not Deleting from iCloud: Resolving Syncing Problems
If you are experiencing issues with photos not deleting from iCloud, there may be a syncing problem. Here are some steps to troubleshoot this issue:
- Check Your Internet Connection: Ensure your iPhone has a stable internet connection.
- Restart Your iPhone: Restart your iPhone to refresh the connection with iCloud.
- Sign Out and Sign Back In to iCloud: Sign out of your iCloud account and sign back in to refresh the syncing process.
- Update to the Latest iOS Version: Ensure your iPhone is running the latest version of iOS.
- Contact Apple Support: If the issue persists, contact Apple Support for further assistance.
6. Data Privacy and Security: Best Practices for Photo Management
Protecting your data privacy and security is essential when managing photos on your iPhone. Here are some best practices to follow:
6.1. Regularly Reviewing and Deleting Photos: A Proactive Approach
Make it a habit to regularly review and delete photos from your iPhone. This helps you keep your photo library organized and reduces the risk of sensitive photos falling into the wrong hands. Schedule time each month to go through your photos and delete any that are no longer needed or are considered private.
6.2. Using Strong Passcodes and Biometric Authentication: Enhancing Security
Use strong passcodes and biometric authentication (Face ID or Touch ID) to secure your iPhone. This prevents unauthorized access to your photos and other personal information. Choose a passcode that is difficult to guess and avoid using common patterns or personal information.
6.3. Being Cautious with Sharing Photos: Protecting Your Privacy
Be cautious when sharing photos with others. Consider the potential risks before sharing sensitive or personal photos. Use secure methods for sharing photos, such as encrypted messaging apps or password-protected cloud storage services. According to dfphoto.net, photographers should use watermarks on all shared photos to prevent unauthorized use.
7. DFPHOTO.NET: Your Ultimate Resource for Photography Tips and Tricks
At dfphoto.net, we are dedicated to providing you with the best photography tips, tricks, and resources to enhance your skills and creativity. Whether you’re an amateur or professional photographer, our website offers a wealth of information to help you succeed.
7.1. Exploring Photography Techniques: Mastering Your Craft
Our website features a wide range of articles and tutorials on various photography techniques, including composition, lighting, and camera settings. Learn how to capture stunning images and master your craft with our expert guidance.
7.2. Discovering Inspirational Photography: Unleashing Your Creativity
Find inspiration for your next photography project by exploring our collection of breathtaking images from talented photographers around the world. Discover new styles, techniques, and perspectives to unleash your creativity.
7.3. Staying Updated on Photography Equipment: Gear Up for Success
Stay informed about the latest photography equipment, including cameras, lenses, and accessories, with our comprehensive reviews and buying guides. Gear up for success with the right tools for your photography needs.
8. User Intent Analysis: Meeting Your Needs
To ensure this article meets your needs, we’ve identified five key user intents related to the keyword “How To Delete Photos From Trash On Iphone”:
8.1. Understanding the Deletion Process
Users want to understand the difference between soft deletion (moving photos to the “Recently Deleted” album) and permanent deletion (removing photos from the “Recently Deleted” album).
8.2. Step-by-Step Instructions
Users need clear, step-by-step instructions on how to delete photos permanently from the “Recently Deleted” album on their iPhone.
8.3. Secure Deletion Methods
Users seek advanced techniques for securely deleting photos, ensuring they are unrecoverable for privacy and security reasons.
8.4. Managing iCloud Photos
Users want to know how deleting photos on their iPhone affects other devices connected to iCloud and how to manage iCloud Photos effectively.
8.5. Troubleshooting Common Issues
Users encounter issues like the “Delete” option being grayed out and need solutions to troubleshoot these problems.
9. iPhone Photography: Expanding Your Creative Horizons
iPhone photography has revolutionized the way we capture and share moments. With advancements in camera technology and image processing, iPhones have become powerful tools for creative expression.
9.1. Mastering iPhone Camera Settings: Capturing the Perfect Shot
Understanding your iPhone’s camera settings can significantly improve the quality of your photos. Experiment with features like:
- Exposure Control: Adjust the brightness of your photos by tapping and holding on the screen and sliding your finger up or down.
- Focus: Tap on the screen to focus on a specific subject.
- HDR (High Dynamic Range): Capture more detail in high-contrast scenes.
- Live Photos: Capture a short video clip along with your photo.
- Portrait Mode: Create stunning portraits with a blurred background.
9.2. Editing Photos on Your iPhone: Enhancing Your Images
Your iPhone offers a range of built-in editing tools to enhance your photos. Use these tools to adjust:
- Brightness: Adjust the overall brightness of your photo.
- Contrast: Adjust the difference between the light and dark areas of your photo.
- Saturation: Adjust the intensity of the colors in your photo.
- Filters: Apply various filters to change the look and feel of your photo.
9.3. Sharing Your iPhone Photos: Connecting with the World
Share your iPhone photos with the world through social media platforms, email, or messaging apps. Consider using hashtags and captions to engage with your audience and showcase your creativity. For more tips and tricks on iPhone photography, visit dfphoto.net.
10. Frequently Asked Questions (FAQs)
10.1. How do I permanently delete photos from my iPhone?
To permanently delete photos from your iPhone, go to the “Recently Deleted” album in the Photos app, tap “Select,” choose the photos you want to delete, and tap “Delete.” Confirm the deletion to remove the photos permanently.
10.2. What happens when I delete a photo on my iPhone?
When you delete a photo on your iPhone, it is moved to the “Recently Deleted” album, where it remains for 30 days. After 30 days, it is automatically and permanently deleted.
10.3. How do I recover a deleted photo on my iPhone?
To recover a deleted photo, go to the “Recently Deleted” album in the Photos app, tap “Select,” choose the photos you want to recover, and tap “Recover.” The photos will be restored to your main photo library.
10.4. How do I securely delete photos from my iPhone?
To securely delete photos, use third-party apps that overwrite the storage space or perform a factory reset on your iPhone. These methods ensure that the deleted photos are unrecoverable.
10.5. How does iCloud Photos affect photo deletion?
If you use iCloud Photos, deleting photos on your iPhone will also remove them from all other devices connected to the same Apple ID. You can disable iCloud Photos to manage your photo library independently on each device.
10.6. Why is the “Delete” option grayed out on my iPhone?
The “Delete” option may be grayed out if the photo was synced from your computer or another source. To resolve this, stop syncing photos from your computer.
10.7. How do I stop syncing photos from my computer to my iPhone?
Connect your iPhone to your computer, open Finder (macOS Catalina or later) or iTunes (macOS Mojave or earlier), select your iPhone, click the “Photos” tab, uncheck “Sync Photos,” and click “Apply.”
10.8. What should I do if photos are not deleting from iCloud?
Check your internet connection, restart your iPhone, sign out and sign back in to iCloud, update to the latest iOS version, or contact Apple Support.
10.9. How can I protect my data privacy when managing photos on my iPhone?
Regularly review and delete photos, use strong passcodes and biometric authentication, and be cautious when sharing photos.
10.10. Where can I find more photography tips and tricks?
Visit dfphoto.net for a wealth of photography tips, tricks, and resources to enhance your skills and creativity.
We invite you to explore dfphoto.net for more in-depth tutorials, stunning photo galleries, and a vibrant community of photographers. Whether you’re looking to master new techniques, find inspiration, or stay updated on the latest gear, dfphoto.net is your ultimate resource. Discover the beauty of photography and unleash your creative potential with us.
Address: 1600 St Michael’s Dr, Santa Fe, NM 87505, United States
Phone: +1 (505) 471-6001
Website: dfphoto.net
Don’t wait—start your photographic journey today and see the world through a new lens.