Sending photos by email is a common task, whether for personal or professional reasons. This guide provides a step-by-step walkthrough on how to attach and send photos via email, covering various devices and email providers. We’ll also explore different methods for optimizing image size and resolution for seamless delivery.
Different Ways to Email a Photo
There are several ways to send a photo via email, depending on your device and email client:
Attaching a Photo from Your Computer
Most email platforms, like Gmail, Outlook, and Yahoo Mail, allow direct photo attachments. The process typically involves these steps:
- Compose a New Email: Open your email client and click on “Compose,” “New Message,” or a similar option.
- Attach the Photo: Look for a paperclip icon, a plus sign, or an “Attach” button. Clicking this will open a file browser window.
- Select the Photo: Navigate to the folder where your photo is saved and select it. You can often select multiple photos at once.
- Send the Email: Once the photo is attached, enter the recipient’s email address, subject line, and message body. Then, click “Send.”
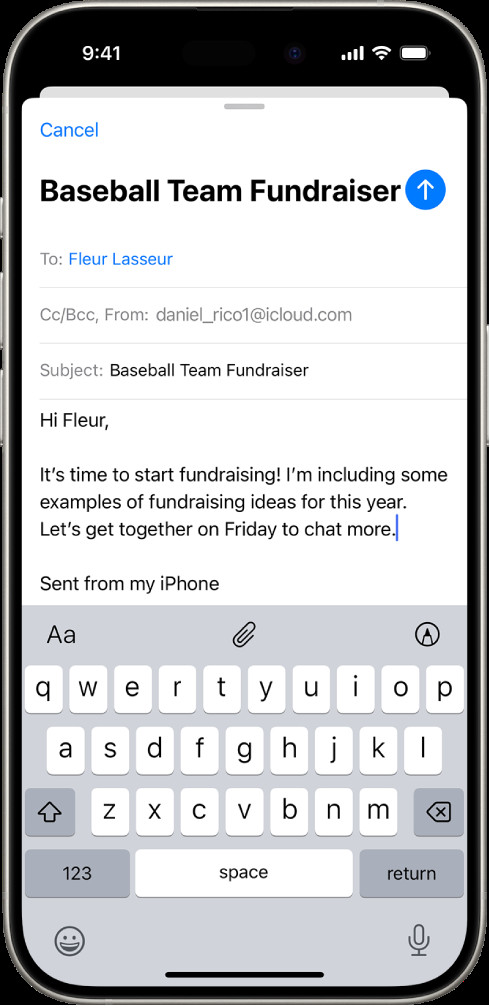 A draft email being composed with the attachment options above the keyboard.
Sending a Photo from Your Smartphone
Sending photos from your smartphone is equally straightforward:
- Open Your Email App: Launch the email application on your phone (e.g., Gmail app, Mail app).
- Create a New Email: Tap the icon for a new message.
- Attach the Photo: Look for a paperclip icon, a plus sign, an image icon, or an “Attach” button within the email composer.
- Choose the Photo Source: You might be prompted to choose between taking a new photo or selecting one from your photo library.
- Select the Photo: Browse your photo gallery and tap the photo you want to send.
- Send the Email: Enter the recipient’s information, subject, and message, then tap “Send.”
Icon used to access attachment options in Apple Mail.
Copying and Pasting a Photo
In some cases, you can directly copy and paste a photo into the email body:
- Copy the Photo: Right-click on the image and select “Copy” or use the keyboard shortcut (Ctrl+C or Cmd+C).
- Paste into Email: In the email body, right-click and select “Paste” or use the keyboard shortcut (Ctrl+V or Cmd+V). The photo will be embedded directly in the email.
Optimizing Photos for Email
Large image files can cause delivery issues or inconvenience recipients. Consider these optimization techniques:
Resizing Images
Reduce the dimensions of your photo without significantly compromising quality. Many image editing tools, even basic ones, allow resizing.
Compressing Images
Compression reduces file size without drastically altering dimensions. Common image formats like JPEG offer compression options.
Troubleshooting Common Issues
- File Size Limits: Email providers often impose limits on attachment sizes. If your file is too large, consider using file compression or cloud storage services like Google Drive or Dropbox to share a link to the photo. Mail Drop is also an option for sending large files with Apple Mail. See Mail Drop limits for more information.
- Image Not Displaying: Ensure the recipient’s email client supports the image format you used.
Conclusion
Sending photos by email is a simple process with various methods available depending on your device and email client. Remember to optimize your images for size to ensure smooth delivery and a positive recipient experience. By following these guidelines, you can effectively share your photos with others via email.