Moving your Photos library to an external hard drive is a great way to free up space on your Mac. This guide provides a step-by-step process on how to safely transfer your photo library to an external drive, ensuring your precious memories are preserved while reclaiming valuable storage space.
 macOS Photos app Choose Library window
Preparing Your External Hard Drive
Before transferring your Photos library, it’s crucial to prepare your external hard drive correctly. This ensures compatibility and prevents potential data loss.
Formatting for Mac
Your external drive must be formatted for macOS. The recommended formats are:
- APFS (Apple File System): Apple’s modern file system optimized for SSDs and hard drives.
- Mac OS Extended (Journaled): A reliable file system with built-in journaling for data integrity.
You can format your drive using Disk Utility, a built-in macOS application. Avoid using storage devices formatted for other operating systems or used for Time Machine backups.
Choosing the Right Drive
For optimal performance, consider using a fast external drive, such as a USB-C or Thunderbolt drive. Avoid using slow drives like USB flash drives or SD cards for storing your Photos library. Also, avoid network or cloud-based storage for your primary photo library due to potential performance and data loss issues.
Moving Your Photos Library
Once your external drive is ready, follow these steps to move your Photos library:
- Quit Photos: Ensure the Photos application is completely closed before proceeding.
- Locate Your Photos Library: In Finder, go to your Pictures folder. Your Photos library (named “Photos Library.photoslibrary”) is usually located here.
- Drag and Drop: Drag the “Photos Library.photoslibrary” file onto your external hard drive. This process may take some time depending on the library size and drive speed.
 External Drive Info window with
- Open from New Location: After the transfer is complete, double-click the “Photos Library.photoslibrary” file on your external drive to open it in Photos.
- Designate as System Photo Library (Optional): If you use iCloud Photos, designate this new library as the System Photo Library in Photos preferences. This ensures iCloud Photos syncs with the library on your external drive.
Deleting the Original Library (Optional)
After confirming your library has been successfully moved and is working correctly, you can delete the original library from your Mac’s internal drive to free up space. Drag the original “Photos Library.photoslibrary” file to the Trash and then empty the Trash.
Troubleshooting
Error When Moving Library
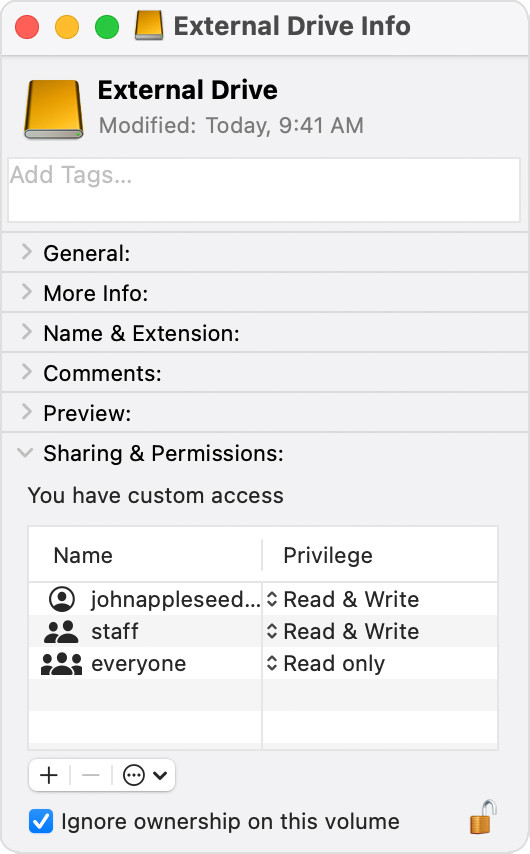
If you encounter an error while moving your library, check the permissions on your external drive. In Finder, select the drive, go to “File” > “Get Info,” and ensure “Ignore ownership on this volume” is checked under “Sharing & Permissions.” You might need to click the lock icon and enter your administrator password to make changes.
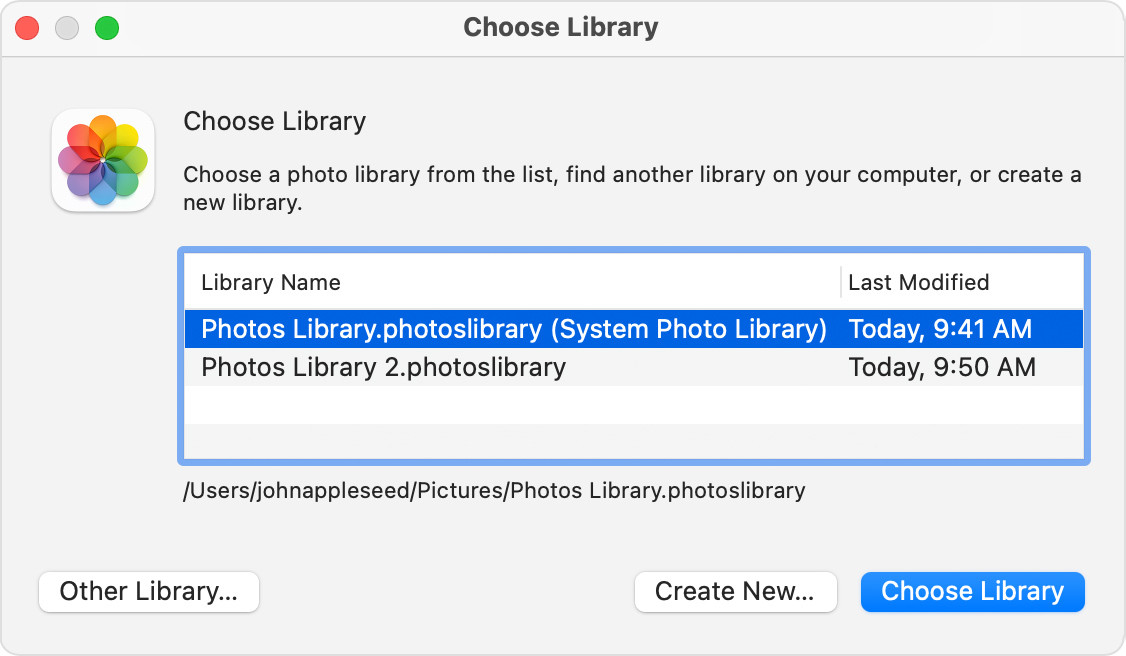
Opening a Different Library
To switch between different Photos libraries, hold down the Option key while opening the Photos app. A window will appear allowing you to choose which library to open.
Conclusion
Moving your Photos library to an external hard drive is a simple yet effective way to manage storage space on your Mac. By following these steps, you can safely transfer your photos and ensure they remain accessible while freeing up valuable space on your computer’s internal drive. Remember to always back up your data regularly.