Being a wedding photographer for almost a decade has taught me a fundamental truth: capturing the perfect shot in-camera is only half the battle. The real magic happens in post-production. Editing photos like a professional is where you transform good images into breathtaking, client-worthy art. Whether you’re just starting your photography journey or you’re a seasoned pro, mastering professional photo editing techniques is essential to elevate your work.
I’m Paul Waring, a wedding photographer based in the UK. In this guide, I’ll share the crucial steps and tools you need to edit photos like a professional photographer. We’ll cover everything from selecting the right software to leveraging cutting-edge AI tools to streamline your workflow and achieve stunning results. Let’s dive into the world of professional photo editing and unlock the full potential of your images.
 Professional photo editing techniques for stunning results
Essential Pre-Editing Steps for Professional Results
Before you even open your editing software, there are critical steps to ensure a smooth and efficient editing process. These pre-editing tasks are the foundation of professional photo editing.
1. Secure Your Memories: Image Backups
In wedding photography, we’re entrusted with capturing one of the most significant days in our clients’ lives. The stakes are incredibly high, making a robust backup strategy absolutely vital. For me, losing client photos is unthinkable – it could severely damage a photographer’s reputation and career.
From the instant you press the shutter, image safety should be your priority. My cameras are set to write every photo to dual memory cards simultaneously. Once I’m at my computer, my goal is to have three copies of each file: the working files, a dedicated backup drive for photographers, and an off-site backup, which for me is cloud storage for photographers. This triple-layered approach ensures that your precious images are safe from any unforeseen data loss.
2. Curate Your Collection: The Art of Photo Culling
With backups secured, it’s time for culling. At weddings, it’s common to shoot thousands of photos, but not all of them will make the final cut for your client. Culling is the process of carefully selecting the best photos from a large set. This can be time-consuming, so an efficient culling workflow is essential to save valuable hours.
There are several effective methods for culling your images:
a) Lightroom Culling: All-in-One Approach
Lightroom is a powerful tool for both culling and editing, ideal if you prefer to manage your entire workflow within a single program. You can quickly flag, star, or color-code your photos to identify your keepers and immediately begin editing your favorites.
A pro tip for faster Lightroom culling is to utilize Smart Previews. These smaller, proxy files allow for quicker browsing and selection. However, be aware that Lightroom can be slower than dedicated culling software, especially when dealing with the large volumes of images typical of wedding photography.
 Culling wedding photos efficiently in Lightroom
b) Dedicated Culling Software: Speed and Efficiency
If you find Lightroom’s culling speed limiting, external culling programs can significantly accelerate the process. Photo Mechanic is a long-standing favorite among wedding photographers, renowned for its speed in handling large image libraries. Newer alternatives are also available. These programs excel at quickly sorting through numerous images without lag, allowing you to import only your selected photos into Lightroom or your preferred editor.
c) AI-Powered Culling: The Future of Efficiency
The latest advancement in culling is AI-driven tools. AI culling software, like Aftershoot, analyzes your images using artificial intelligence to help identify the best shots. This has become my preferred method. AI drastically reduces culling time while still allowing me to retain final say over image selection.
 Using AI culling software like Aftershoot to streamline photo selection
3. Structure for Success: Photo Organization
Let’s briefly discuss photo organization. For your future self (and potentially your team), establishing a clear organizational system is paramount. Create a folder structure that makes sense to you, whether it’s based on date, event type, or client name. Consistency is key.
My personal system involves a main folder for each year, subdivided into client folders named like “01. Client Name Wedding” and “02. Another Client Wedding”. Within each client folder, I have subfolders for RAW files, culled images, and exported JPEGs after editing.
A well-organized photo library saves time in the long run and allows you to focus on the creative aspects of editing, rather than getting lost in file management.
4. Optimize Your Editing Environment: Workspace Setup
Creating an efficient and comfortable workspace is crucial for both productivity and the quality of your edits. I believe in making my office a welcoming and inspiring space.
Invest in an ergonomic chair, a spacious desk, and proper, color-accurate lighting to minimize eye strain and ensure accurate color perception. A clutter-free physical workspace minimizes distractions, allowing for focused editing sessions.
Within Lightroom, customize your digital workspace by collapsing panels you don’t frequently use. I prefer using the Develop module in “Solo Mode,” which keeps only the tools you’re actively working with visible, promoting focused attention.
Finally, investing in a computer with sufficient processing power and RAM is essential to handle large image files smoothly, ensuring a fast and responsive editing experience.
Expanding Your Professional Photo Editing Toolkit
To further enhance your professional photography workflow, consider incorporating additional software and physical tools.
Plugins can provide advanced filters, effects, and AI-driven enhancements, saving time and expanding your creative possibilities. These plugins often integrate seamlessly with Lightroom, offering greater control and flexibility in achieving your desired aesthetic.
Physical tools like the TourBox and Loupedeck controllers can dramatically improve editing efficiency. These devices offer customizable dials, buttons, and knobs that provide tactile control over Lightroom’s functions, enabling faster and more intuitive adjustments. I personally use the TourBox, which has significantly sped up my photo editing workflow and reduced strain from repetitive mouse movements.
Software Choices of Professional Photo Editors
Professional photographers rely on a range of powerful photo editing software to refine their images. Adobe Lightroom remains a cornerstone in the photography industry, excelling in batch editing, color correction, and fundamental retouching. Capture One, Affinity Photo, and Skylum Luminar are also popular choices among professionals, each offering unique strengths and features.
Lightroom Alternatives: Exploring Your Options
While this guide primarily focuses on Lightroom, it’s important to acknowledge that it’s not the only option for professional photo editing. Lightroom is the most widely used RAW editing software by professionals, including myself, but Capture One and Affinity Photo are strong contenders. My direct experience with these alternatives is less extensive, but most professional editing programs share core functionalities and can achieve similar results through different approaches.
7 Steps to Edit Photos Like a Pro in Lightroom
Now, let’s get into the practical steps of How To Edit Photos Like A Professional using Adobe Lightroom.
1. Image Import: Setting the Stage
The first step in any editing workflow is importing and organizing your photos within Lightroom. I prefer to import only after images are backed up and culled. During import, you can add valuable metadata, keywords, and copyright information. This not only aids in future image searches but also protects your intellectual property.
You can also select preview sizes during import. I find “Standard” previews to be a good balance of speed and detail. Enabling Smart Previews at this stage further accelerates the editing process.
2. Basic Adjustments: Building Your Foundation
Basic adjustments (found in the Basic panel in Lightroom) are the bedrock of your editing process. Start with the Exposure slider to correct overall image brightness, followed by Contrast to add depth and dimension. Next, use Highlights and Shadows to recover detail in overly bright or dark areas, and fine-tune Whites and Blacks to establish the full dynamic range.
The Clarity slider adds midtone contrast, giving your image more punch, but use it judiciously to avoid an overly harsh look. These basic adjustments set the stage for more refined editing, ensuring a balanced and polished starting point.
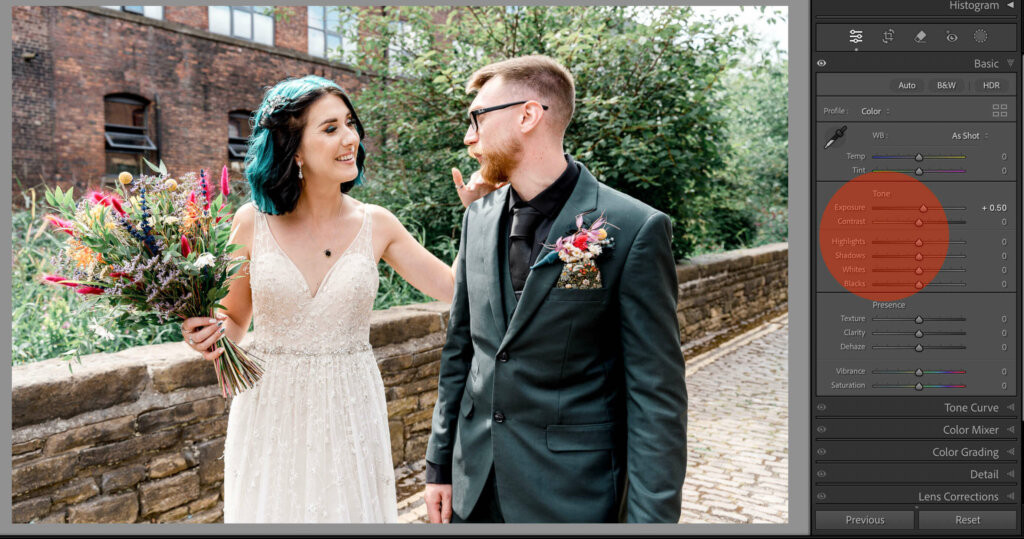 Performing basic adjustments in Lightroom for professional photo editing
3. Cropping and Straightening: Perfecting Composition
Cropping and straightening are essential for refining your image composition. In Lightroom, the Crop Overlay tool allows you to eliminate distracting elements or emphasize your subject. Consider using composition guidelines like the rule of thirds to improve framing and visual appeal.
If the horizon line is tilted, use the Straighten tool to correct it. You can manually adjust the angle, or use the Auto function for Lightroom to automatically straighten the image. Cropping and straightening not only enhance the composition but also contribute to visual consistency across a set of images.
Pro tip: Press the “R” key to quickly access the crop tool.
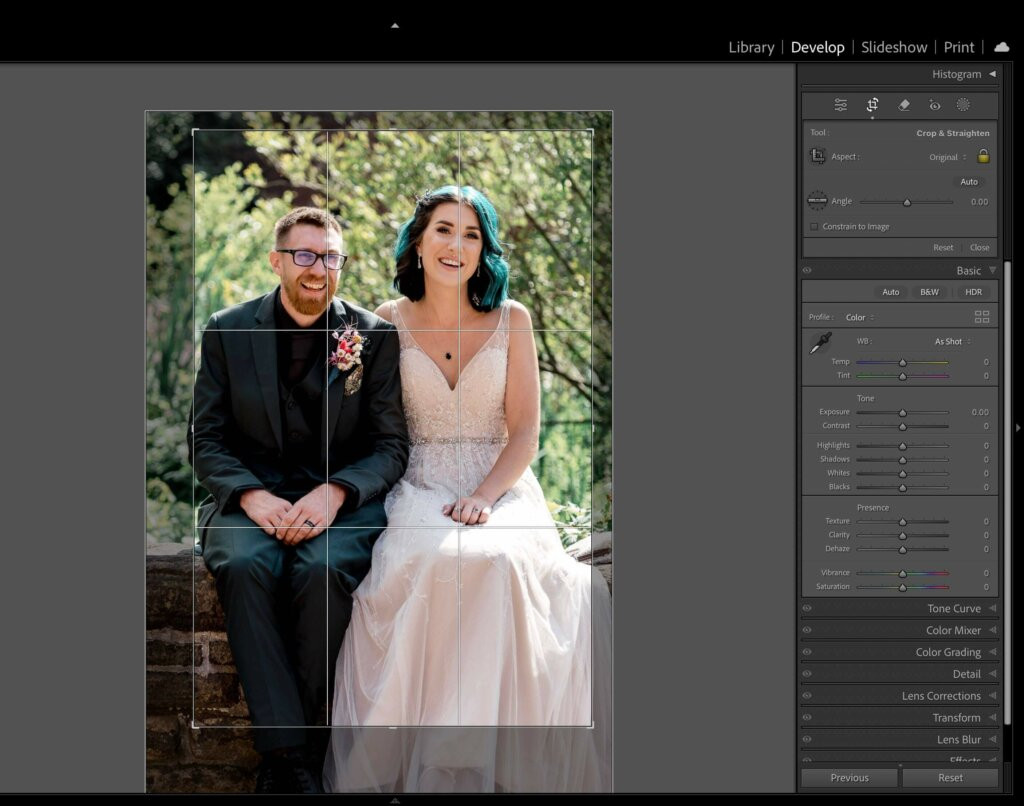 Cropping and straightening photos for improved composition in Lightroom
4. Color Correction and Enhancement: Achieving the Right Mood
Color correction is vital for creating a consistent and visually appealing style throughout your photos. Begin by adjusting the Temperature and Tint sliders to achieve the desired warmth or coolness in your image. Experiment with White Balance presets like “Daylight” or “Shade” (as shown below) for a quick starting point.
Next, use the Vibrance and Saturation sliders to enhance colors, but be careful not to oversaturate, which can look unnatural. If needed, use the HSL (Hue, Saturation, Luminance) panel to selectively adjust individual colors, paying particular attention to ensuring natural and pleasing skin tones.
 Color correction and white balance adjustments in Lightroom for professional results
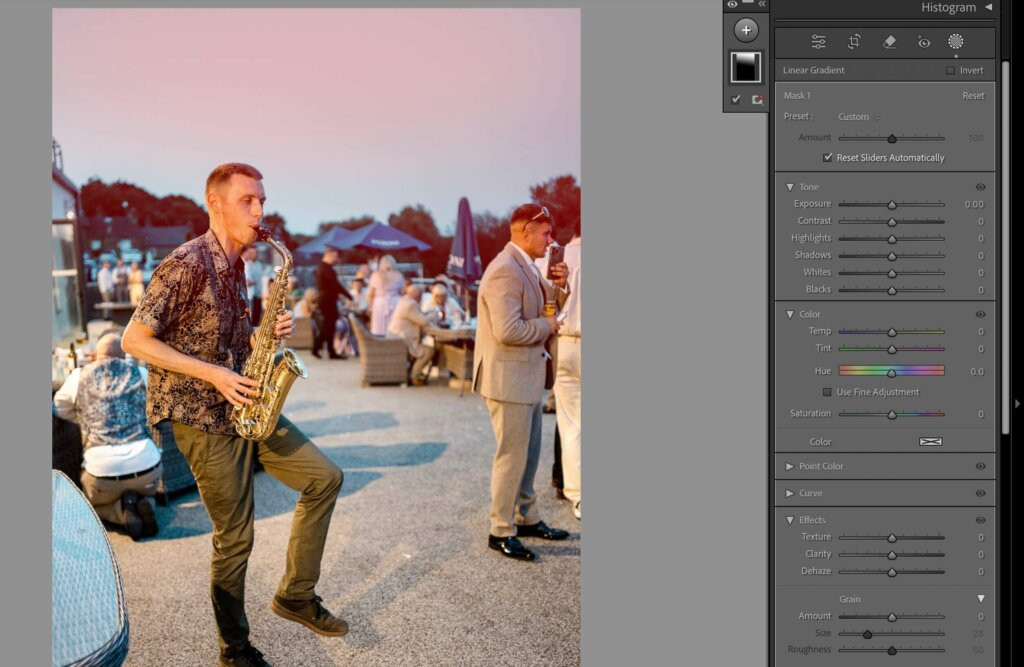
5. Fine-Tuning with Masks and Local Adjustments: Targeted Precision
Once global adjustments are complete, it’s time for fine-tuning with local adjustments. Lightroom’s Adjustment Brush, Radial Filter, and Graduated Filter tools allow you to target specific areas for enhancement. Whether it’s brightening a bride’s face or darkening a sky for more drama, these tools offer precise control.
Utilize Masking to apply adjustments with even greater selectivity, ensuring only intended areas are affected. As with all editing, moderation is key. The goal is a refined, polished image, not an over-processed one.
 Using masking and local adjustments for targeted edits in Lightroom
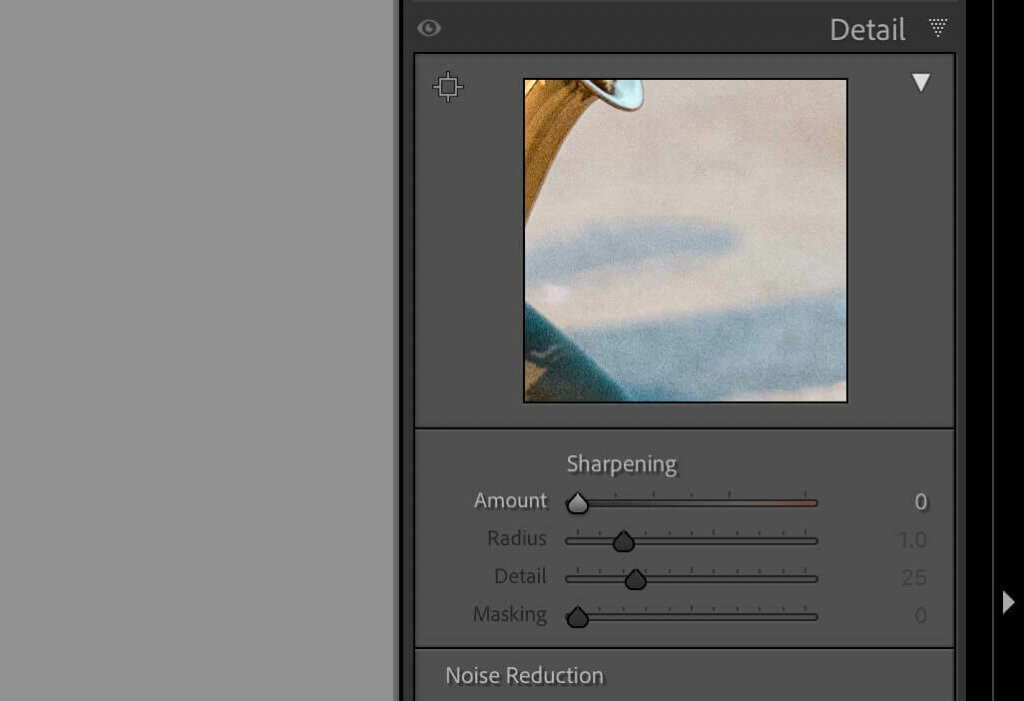
6. Sharpening and Noise Reduction: Enhancing Image Quality
Sharpening and noise reduction are the finishing touches that significantly impact image quality. In Lightroom’s Detail panel, apply sharpening to bring out fine details without creating an overly crisp or artificial look.
Adjust the Radius and Detail sliders to control the sharpening application, and use the Masking slider to protect areas that don’t require sharpening, like smooth skin. For noise reduction, especially in low-light photos, increase the Luminance slider to reduce grain. Balance these adjustments carefully to maintain a natural and clean look.
 Sharpening and noise reduction techniques in Lightroom for professional quality
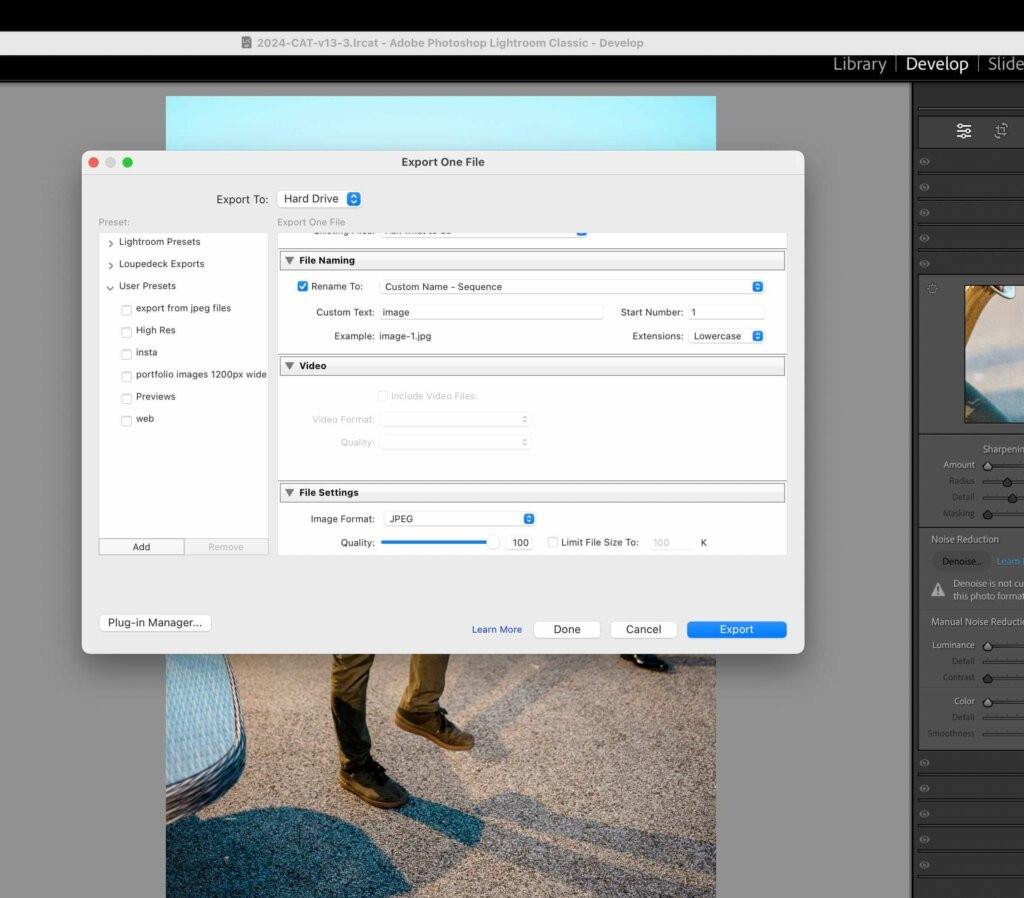
7. Final Touches and Export: Preparing for Delivery
The final touches bring your edit together and prepare your image for export. Review your image at full screen (press the “F” key) to check for any remaining distractions or blemishes, using the Spot Removal tool if needed.
Consider adding a subtle vignette using the Effects panel to gently draw the viewer’s eye towards the center of the image. If the image is intended for print, ensure it’s in the correct color profile and consider soft proofing to preview how it will appear in print.
Finally, export your images with appropriate settings for their intended use, whether for web display, print, or client delivery.
 Exporting professionally edited images from Lightroom for various uses
Lightroom Presets: Streamlining Your Style
Lightroom presets are a powerful tool to accelerate your workflow and maintain a consistent visual style across your images. Presets are essentially saved sets of editing adjustments that you can apply to photos with a single click, instantly adjusting exposure, contrast, color balance, and more.
Also explore Lightroom wedding presets for photographers to find styles tailored to wedding photography.
Whether you use custom presets you’ve created or presets from other photographers, they can be a game-changer in your editing process.
As a wedding photographer, I utilize presets to ensure a cohesive aesthetic across an entire wedding set. For instance, if I want a warm and slightly desaturated feel for a wedding, applying a preset designed for that look quickly sets the tone for all the images.
Lightroom allows you to further fine-tune presets after application, making minor adjustments to suit each individual photo. This flexibility makes presets an excellent starting point, saving time on repetitive edits while still allowing for creative customization.
Experimenting with different presets on the same image is a great way to explore various looks and refine your personal editing style.
I have a collection of personalized presets that I use in different shooting scenarios. While presets shouldn’t replace manual adjustments entirely, they are invaluable for efficient and consistent professional photo editing.
AI Photo Editing: The Modern Professional Approach
Understanding AI in Photo Editing
AI editing has become indispensable for me and many photographers in the industry, offering unprecedented efficiency and consistency. AI editing leverages machine learning algorithms to analyze and adjust images based on learned patterns and stylistic preferences, often requiring minimal setup and user input. AI is revolutionizing photo editing by saving countless hours of manual work.
AI Tools Integrated into Lightroom
Adobe Lightroom has embraced AI technology with powerful features designed to optimize your workflow.
Tools like Enhance Details and AI Noise Reduction use advanced algorithms to automatically refine image quality. AI Noise Reduction has been transformative for improving low-light wedding photos, effectively reducing noise while preserving detail.
The Enhance Details feature helps me achieve sharper, more defined images with a single click, particularly beneficial for capturing intricate details in subjects like bridal gowns.
Standalone AI Editing Software: Aftershoot
Beyond Lightroom’s built-in AI, standalone AI editing software like Aftershoot has fundamentally changed my editing process. Aftershoot’s AI-driven culling and editing features enable me to quickly sort through thousands of wedding photos, automatically selecting the best images and applying consistent edits without manual review of every single shot. This has significantly reduced my culling and basic editing time, freeing me to focus on the more creative and nuanced aspects of post-production.
Here’s how I integrate Aftershoot into my workflow:
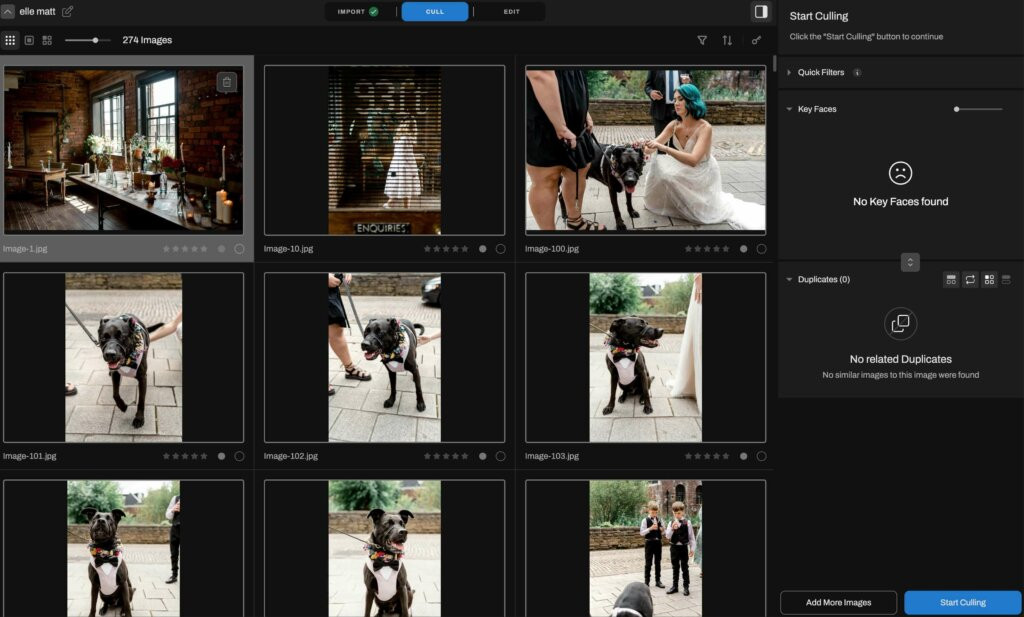
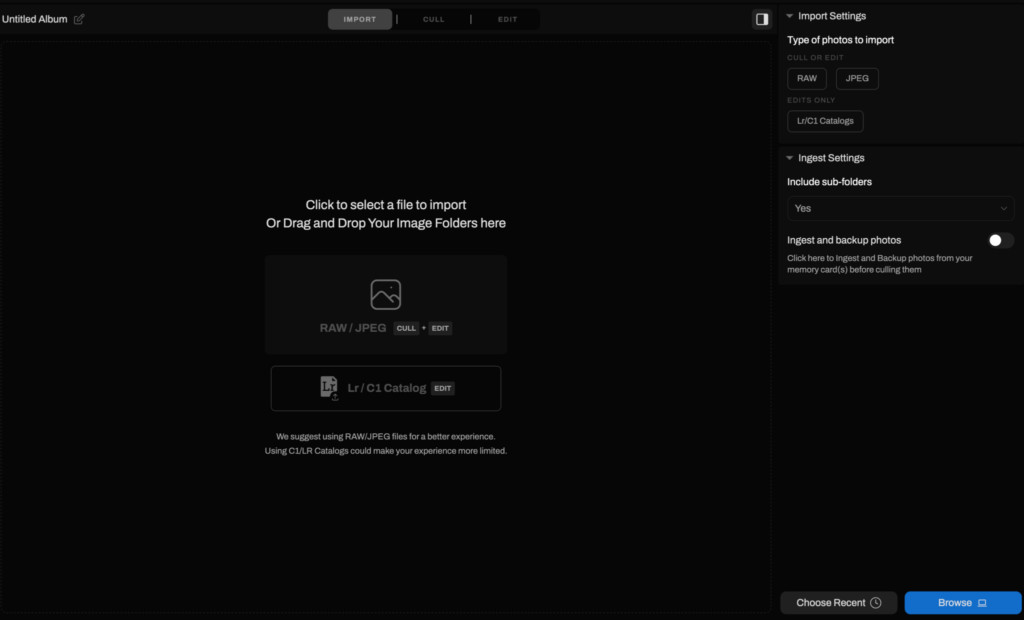
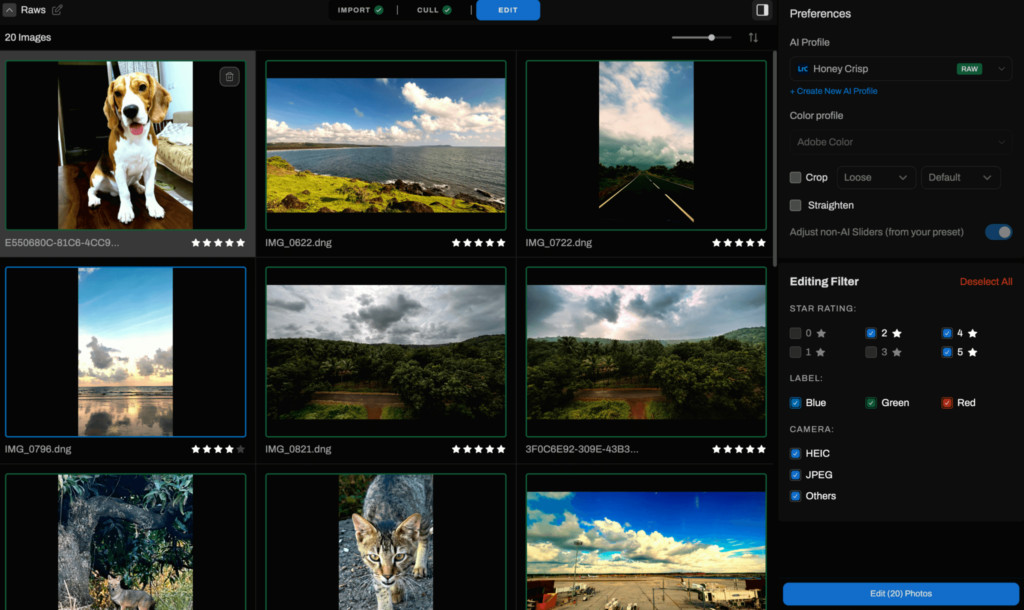
Step 1: Import to Aftershoot
I begin by importing all my RAW photos directly into Aftershoot. The AI intelligently analyzes and sorts the entire gallery, selecting and grouping images based on criteria like sharpness, composition, and even facial expressions. It acts like an untiring assistant, pre-selecting the strongest images. I then review and make the final selection of images for delivery.
 Importing wedding images into Aftershoot AI editing software
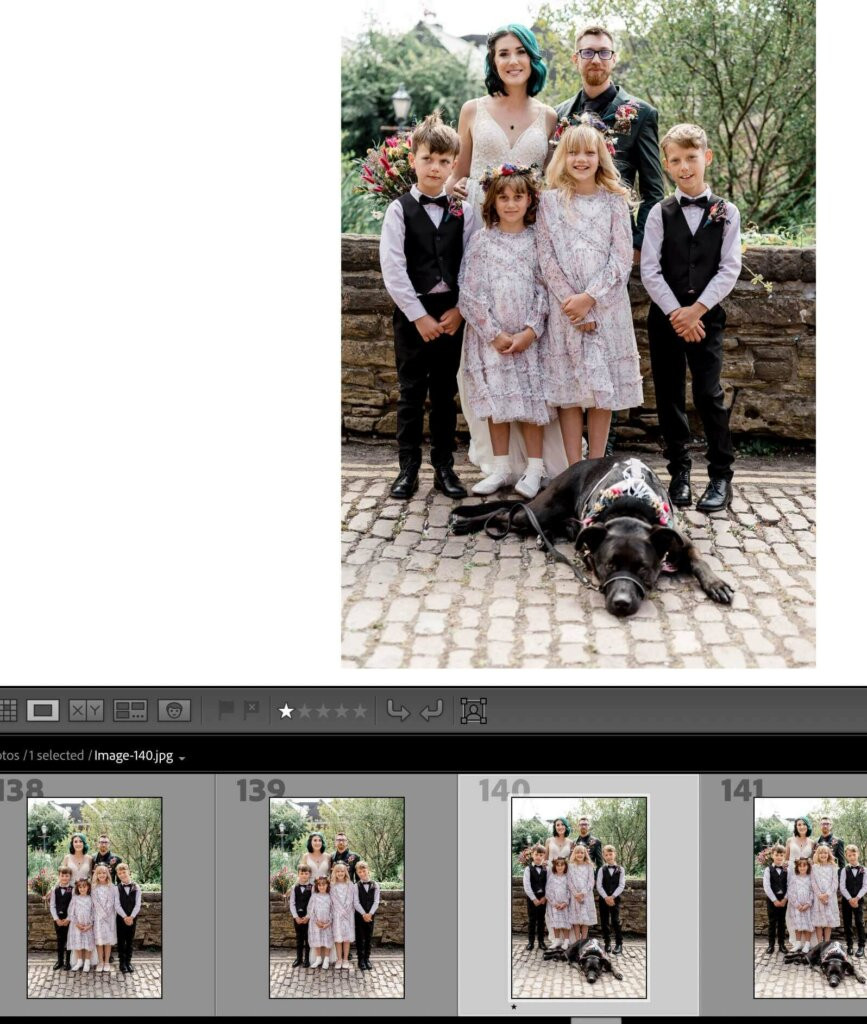
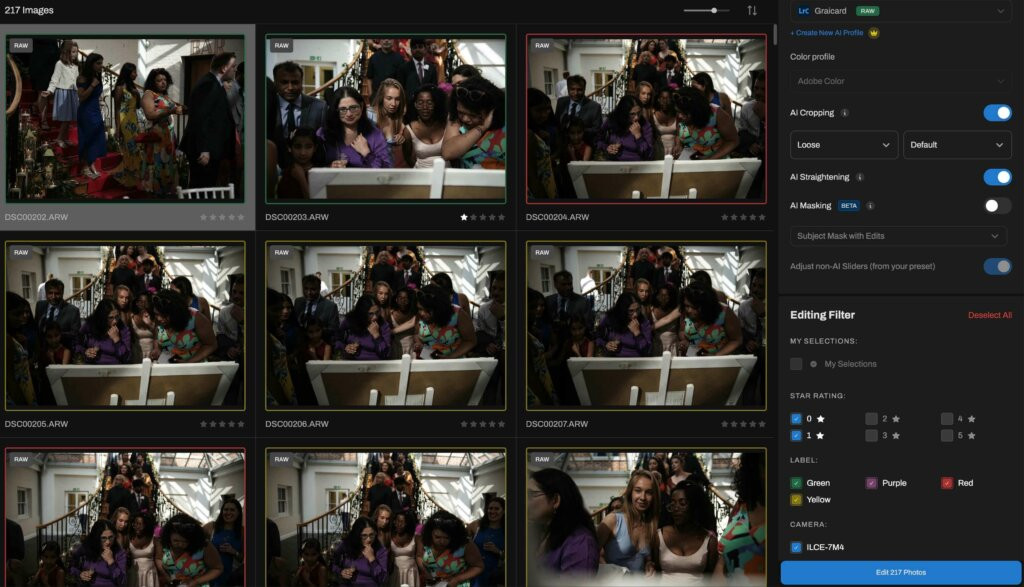
Step 2: Image Selection and Refinement
Next, I refine the AI’s selections, using Star Ratings and Color Labels within Aftershoot to confirm the images I want to move forward with for editing.
 Refining AI culling selections in Aftershoot
Step 3: AI-Powered Editing Application
After culling, I instruct Aftershoot to apply my personalized editing style. The software learns my typical adjustments and replicates those edits across the selected photos in batches.
The example below demonstrates the difference between a RAW image straight out of camera and the same image after AI-powered editing in Aftershoot.
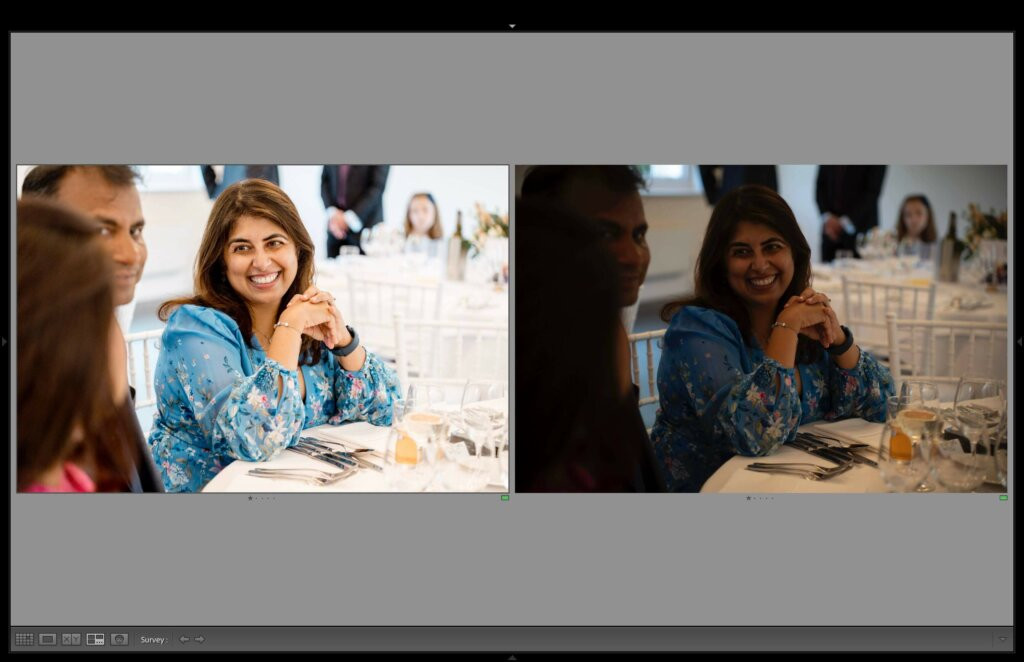 Comparison of original RAW image vs AI-edited image from Aftershoot
Step 4: Final Touches in Lightroom
Once Aftershoot has completed the bulk of the editing, I import the AI-edited photos into Lightroom for final adjustments. Since Aftershoot has already applied my core style, I only need to make minor tweaks, such as fine-tuning color balance or adding creative enhancements. With the heavy lifting done by AI, these final adjustments are quick and efficient, especially when using my Tourbox controller.
This streamlined process has revolutionized my workflow. With Aftershoot handling repetitive tasks, I can deliver consistently high-quality results without spending excessive hours editing.
The Art of Balance: AI and Manual Editing
While AI tools offer incredible efficiency, it’s crucial to maintain a balance with manual editing to retain full creative control and address any nuances the AI might miss. I view AI as a powerful editing assistant, capable of handling time-consuming and repetitive tasks, but ultimately leaving artistic decisions in my hands.
By combining Aftershoot’s efficiency with my own manual adjustments, I ensure that every image reflects my unique style and meets my professional standards. AI enhances your workflow, but your creative vision remains the defining element of your final product.
 AI photo editing workflow in Aftershoot for professional photographers
Elevate Your Photo Editing Workflow Today
AI photo editing tools are transforming professional photography workflows, enhancing efficiency and image quality. However, remember that these tools are most effective when used to augment, not replace, your creative expertise.
I encourage you to explore how AI can complement your editing process. If you’re seeking to optimize your workflow and edit photos like a professional, I highly recommend trying Aftershoot. Like it has for me, it might just become your indispensable editing assistant.
Try Aftershoot free for 30 days