Recreating the classic look of film in digital photography is a popular trend. The nostalgic, timeless aesthetic of film photos appeals to many, driving the desire to achieve this look with digital images. While film cameras offer a unique charm, they can be costly and inconvenient. Fortunately, achieving a film-like aesthetic is possible with digital editing software like Lightroom Mobile. This guide provides a step-by-step tutorial on How To Make A Photo Look Like Film using Lightroom Mobile.
 Alt text: A man standing in a river with mountains in the background, edited to look like a film photo
Step 1: Adjust the Lighting for a Film Look
Film photos often exhibit a slightly overexposed appearance, lending a dreamy and ethereal quality. To replicate this, begin by adjusting the light settings in Lightroom Mobile. Increase the exposure, contrast, highlights, and whites subtly. Lift the shadows slightly while decreasing the blacks to maintain depth and prevent a washed-out look. The specific adjustments will depend on the individual image, but these serve as a good starting point.
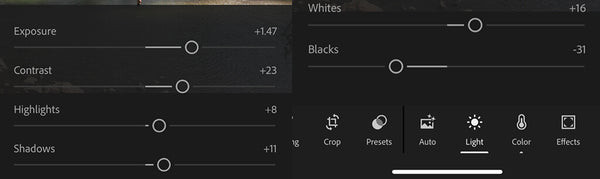 Alt text: Lightroom mobile screenshot showing the light adjustment panel with increased exposure, contrast, highlights, shadows and whites, and decreased blacks.
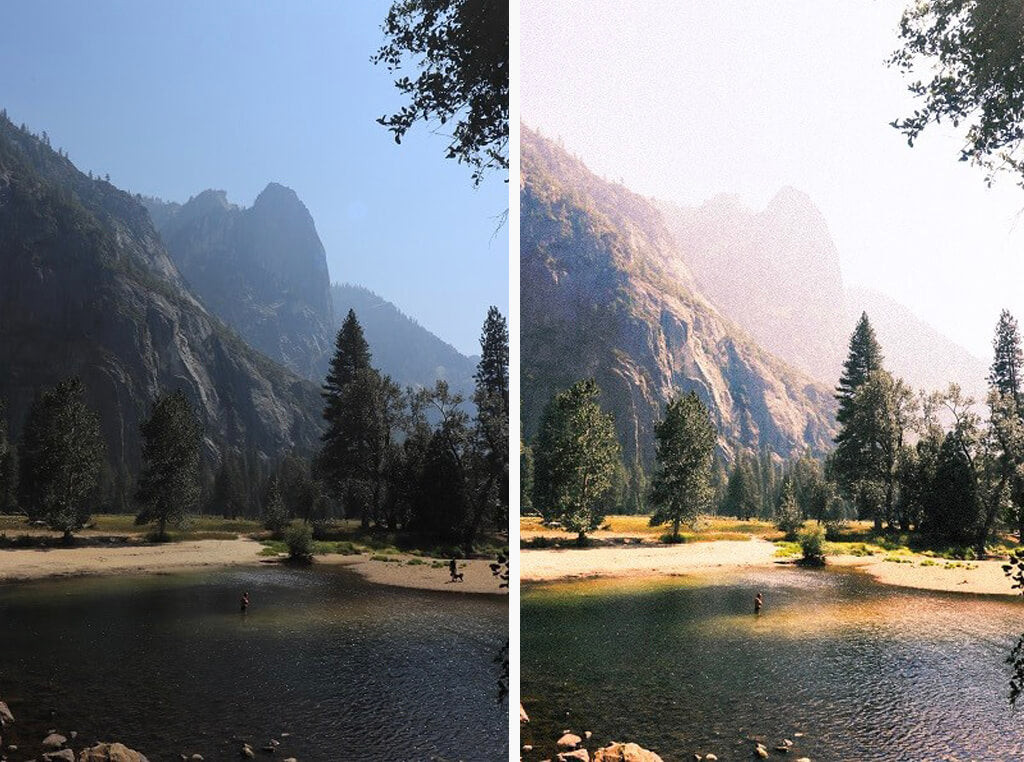
 Alt text: Before and after comparison of a photo edited to look like film, showcasing the impact of light adjustments.
Step 2: Incorporate Film Grain for Texture
Unlike the sharp focus often sought in digital photography, film photos possess a characteristic grain that adds texture and a sense of imperfection. This grain contributes to the nostalgic feel. In Lightroom Mobile, adjust the grain settings. Experiment with the amount and size of the grain. Larger grain reduces detail, while smaller grain adds a subtler texture. Finding the right balance is crucial.
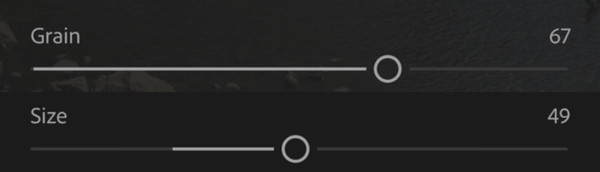 Alt text: Lightroom mobile screenshot showing the effects panel with adjustments to grain amount, size, and roughness to mimic film grain
 Alt text: Before and after comparison highlighting the addition of film grain to a digital photo in Lightroom mobile.
Step 3: Fine-Tune Color for Authenticity
Adjusting the color temperature and vibrancy contributes to the film aesthetic. Increasing the temperature adds warmth. To balance excessive warmth, introduce a slight purple tint. Increase vibrance and saturation moderately for a subtle color boost. These adjustments enhance the overall mood and color palette, mimicking the characteristics of film.
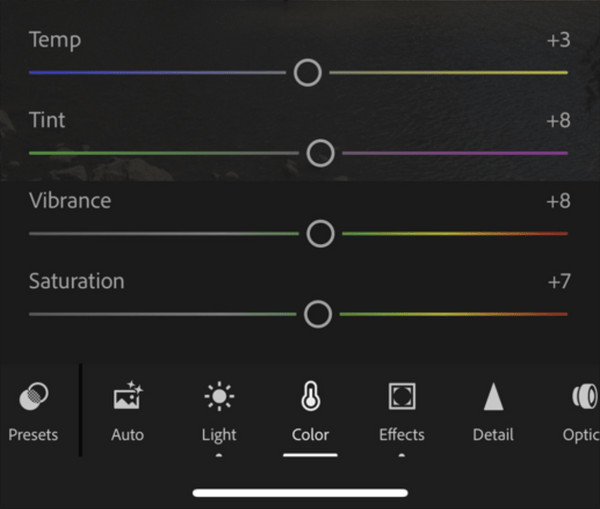 Alt text: Lightroom mobile screenshot displaying adjustments to temperature, tint, vibrance, and saturation to create a film-like color palette.
 Alt text: Before and after image demonstrating the impact of color adjustments in achieving a film aesthetic in Lightroom mobile.
Step 4: Refine Individual Colors for Depth
Further enhance the film look by adjusting individual color settings. Increase the saturation of blues, reds, oranges, and yellows to make specific elements stand out. Fine-tune the hue and luminance of each color for nuanced control. This step adds depth and complexity to the colors, replicating the unique color rendering of film.
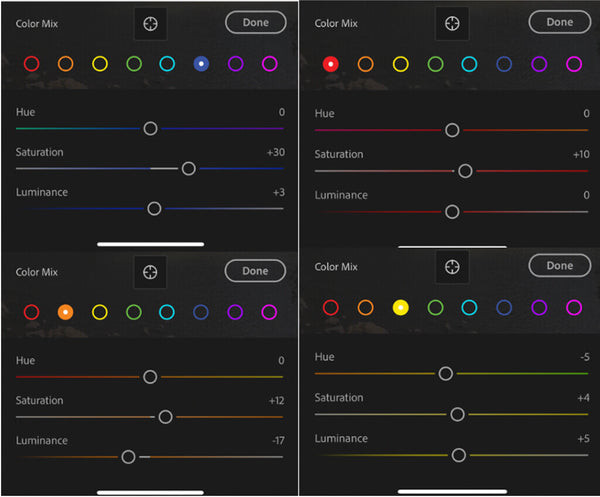 Alt text: Screenshot of Lightroom Mobile interface showcasing adjustments to individual color hues, saturation, and luminance to enhance the film effect.
 Alt text: Comparison of a photo before and after individual color adjustments, demonstrating a more pronounced film-like appearance.
Step 5: Reduce Contrast and Add Color Grading
Film photos often exhibit less contrast than digital images. To achieve this, increase the shadows in the S-curve of the light settings. Utilize the color grading panel to introduce subtle color shifts in the shadows, midtones, and highlights. Adding warmth to the shadows and highlights while introducing a cool tone to the midtones can further enhance the film aesthetic.
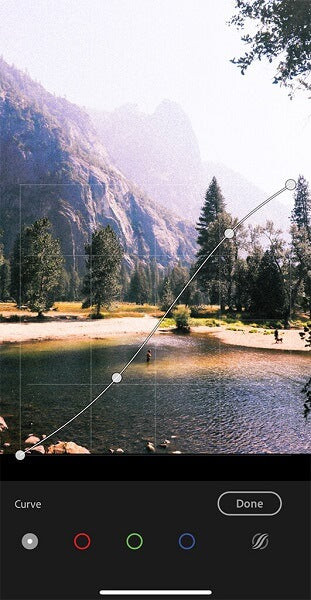 Alt text: Lightroom mobile screenshot demonstrating adjustments to the tone curve (S-curve) and split toning to achieve a film-like contrast and color grading.
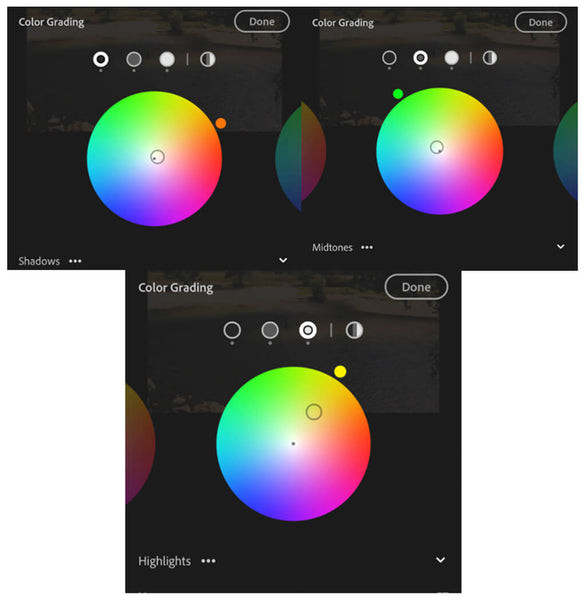 Alt text: Lightroom Mobile screenshot showing color grading adjustments to shadows, midtones, and highlights to further enhance the film look.
 Alt text: Before and after comparison illustrating the final effect of contrast reduction and color grading in emulating a film aesthetic.
Final Touches: Healing Brush (Optional)
For a cleaner look, consider using the healing brush to remove distractions. This step is optional but can significantly improve the final image.
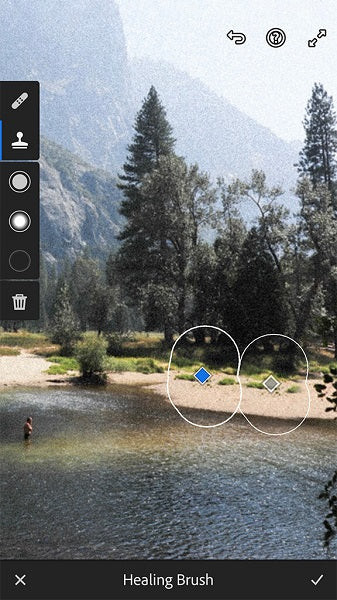 Alt text: Screenshot of Lightroom Mobile demonstrating the use of the healing brush tool to remove unwanted elements from a photo.
Conclusion: Achieving the Film Look with Digital Tools
By following these steps, you can transform your digital photos into captivating images reminiscent of classic film. Lightroom Mobile provides the tools to emulate the unique characteristics of film, allowing you to achieve a nostalgic and timeless aesthetic without the need for a film camera.
