Transferring photos from iCloud to your PC is a straightforward process. Whether you want to download your entire photo library or just select images, this guide provides step-by-step instructions for seamless photo transfer.
Setting Up iCloud Photos on Your PC
Before transferring photos, ensure iCloud Photos is enabled on your PC. Download and install iCloud for Windows. Log in with your Apple ID and ensure “Photos” is checked. Click “Options” next to Photos and choose your preferred download settings: “Download High-Efficiency format photos and videos” for optimized storage or “Download HDR videos” for high quality. Click “Done” to save your settings.
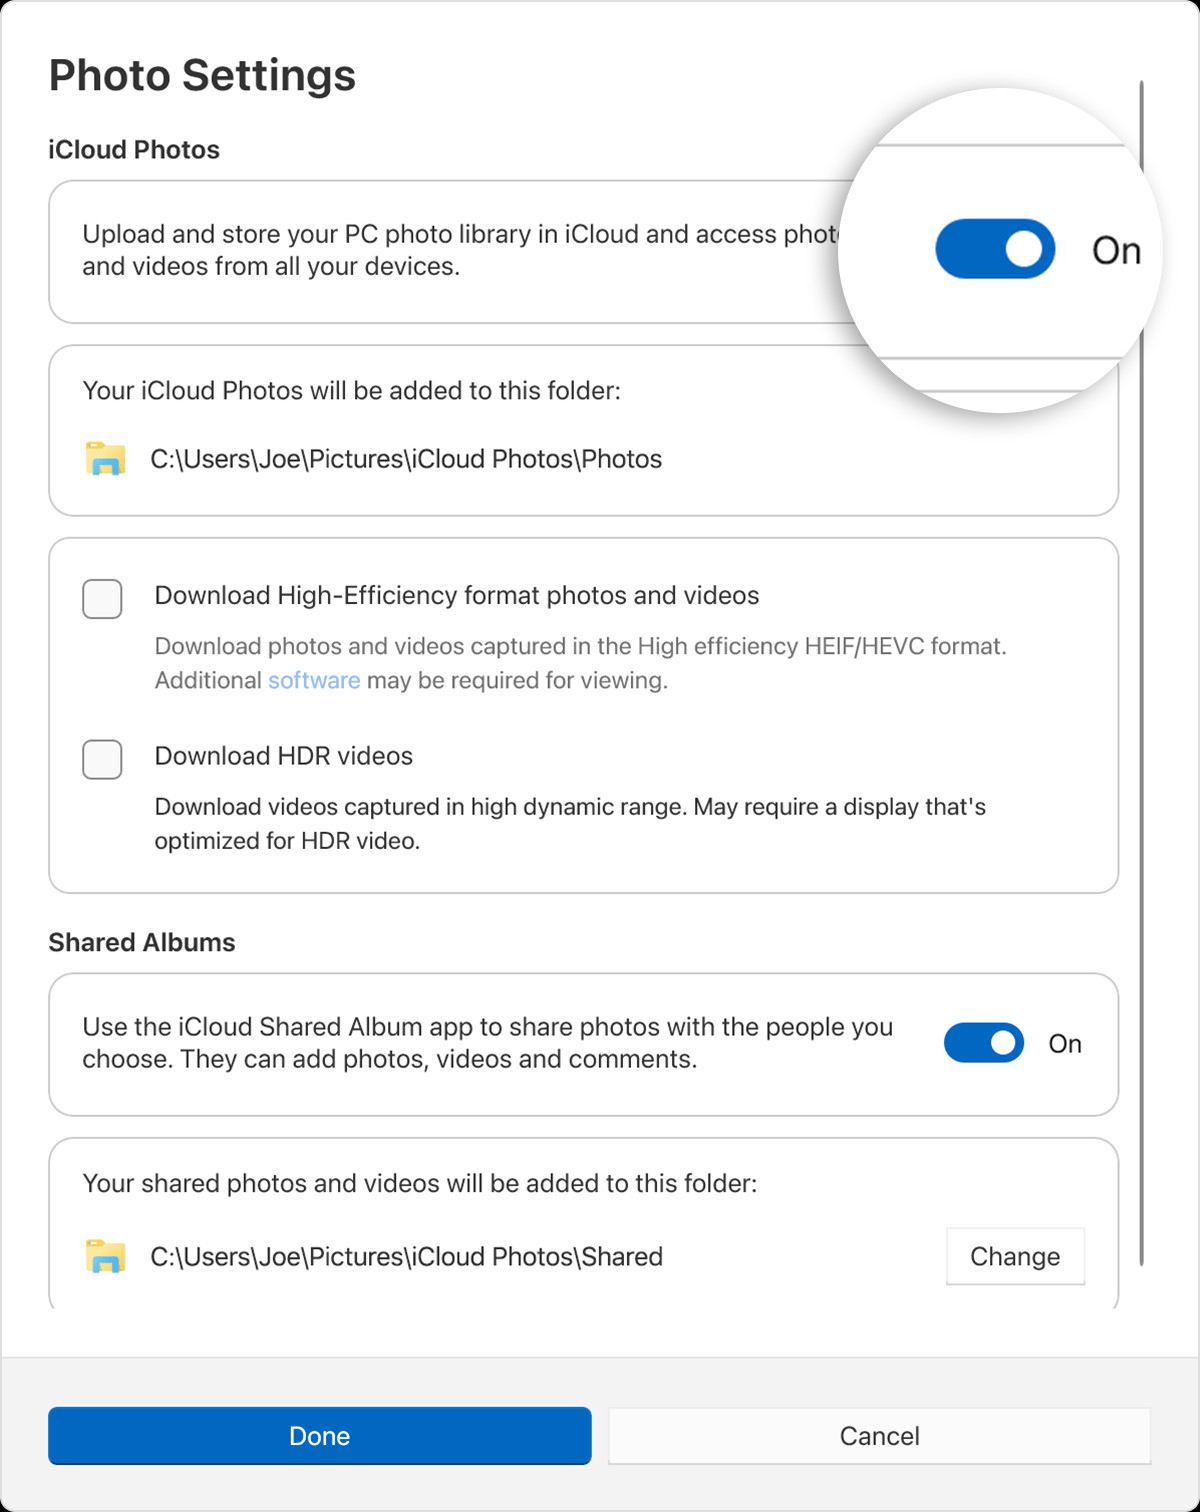 iCloud Photos settings on Windows PC.
Locating Your iCloud Photos on Your PC
Once iCloud Photos is set up, your photos and videos are stored in a dedicated folder: C:\Users\[user name]\Pictures\iCloud Photos\Photos. You can access them directly through File Explorer. For easier navigation:
- Windows 11: Open the Microsoft Photos app and select “iCloud Photos” from the left pane.
- Windows 10 or later: Open File Explorer and click “iCloud Photos” in the Navigation pane.
Downloading Photos and Videos from iCloud
New photos and videos added to iCloud Photos automatically appear on your PC as thumbnails. To download the full-resolution file:
- Double-click the thumbnail of the photo or video you want. This downloads the full-resolution file to your PC.
Keeping Photos and Videos Permanently on Your PC
You can also choose to keep specific photos and videos permanently downloaded to your computer:
- Open File Explorer and navigate to the “iCloud Photos” folder.
- Select the photos and videos you want to keep.
- Right-click the selection and choose “Always keep on this device.” This ensures the selected files remain on your PC, even if you’re offline.
Any changes made to photos or videos on other devices or iCloud.com will automatically update on your PC.
Uploading Photos and Videos to iCloud from Your PC
Transferring photos and videos from your PC to iCloud is equally simple:
- Open File Explorer and navigate to the “iCloud Photos” folder.
- Open a separate File Explorer window and locate the photos and videos you want to upload.
- Select the desired files and drag them into the “iCloud Photos” folder. Your photos and videos will then upload to iCloud and be accessible on your other Apple devices.
Deleting Photos and Videos
Deleting photos and videos in File Explorer or the Microsoft Photos app will automatically sync the deletions to iCloud Photos. This ensures your photo library remains consistent across all your devices.
By following these steps, you can easily transfer photos and videos between your iCloud account and your PC, ensuring your precious memories are accessible wherever you need them.
