Image resolution is crucial for high-quality prints and digital displays. Understanding and checking your photo’s resolution ensures your images look their best. This guide provides a simple walkthrough on How To Check Photo Resolution on both Windows PCs and Mac computers.
Resolution is measured in dots per inch (DPI) for printing and pixels per inch (PPI) for screens. A higher DPI/PPI means more detail and sharper images. For printing, aim for at least 300 DPI for crisp results. Lower resolutions (around 72 DPI) are suitable for web use but may appear pixelated when printed.
Checking Image Resolution on Windows
Finding the resolution of an image on a Windows PC is straightforward:
- Locate the Image: Find the image file you want to examine in File Explorer.
- Right-Click: Right-click on the image file.
- Select “Properties”: Choose “Properties” from the context menu.
- Navigate to “Details”: In the Properties window, click on the “Details” tab.
- Find Resolution: The image dimensions (in pixels) and resolution (in DPI) will be displayed under the “Image” section. You’ll see entries for “Horizontal resolution” and “Vertical Resolution”.
 alt text: checking resolution of an image on a windows computer by right clicking and selecting properties
Checking Image Resolution on macOS
On a Mac, checking image resolution is equally simple:
- Find the Image: Locate the image file in Finder.
- Right-Click or Control-Click: Right-click or hold down the Control key and click on the image file.
- Select “Get Info”: Choose “Get Info” from the context menu.
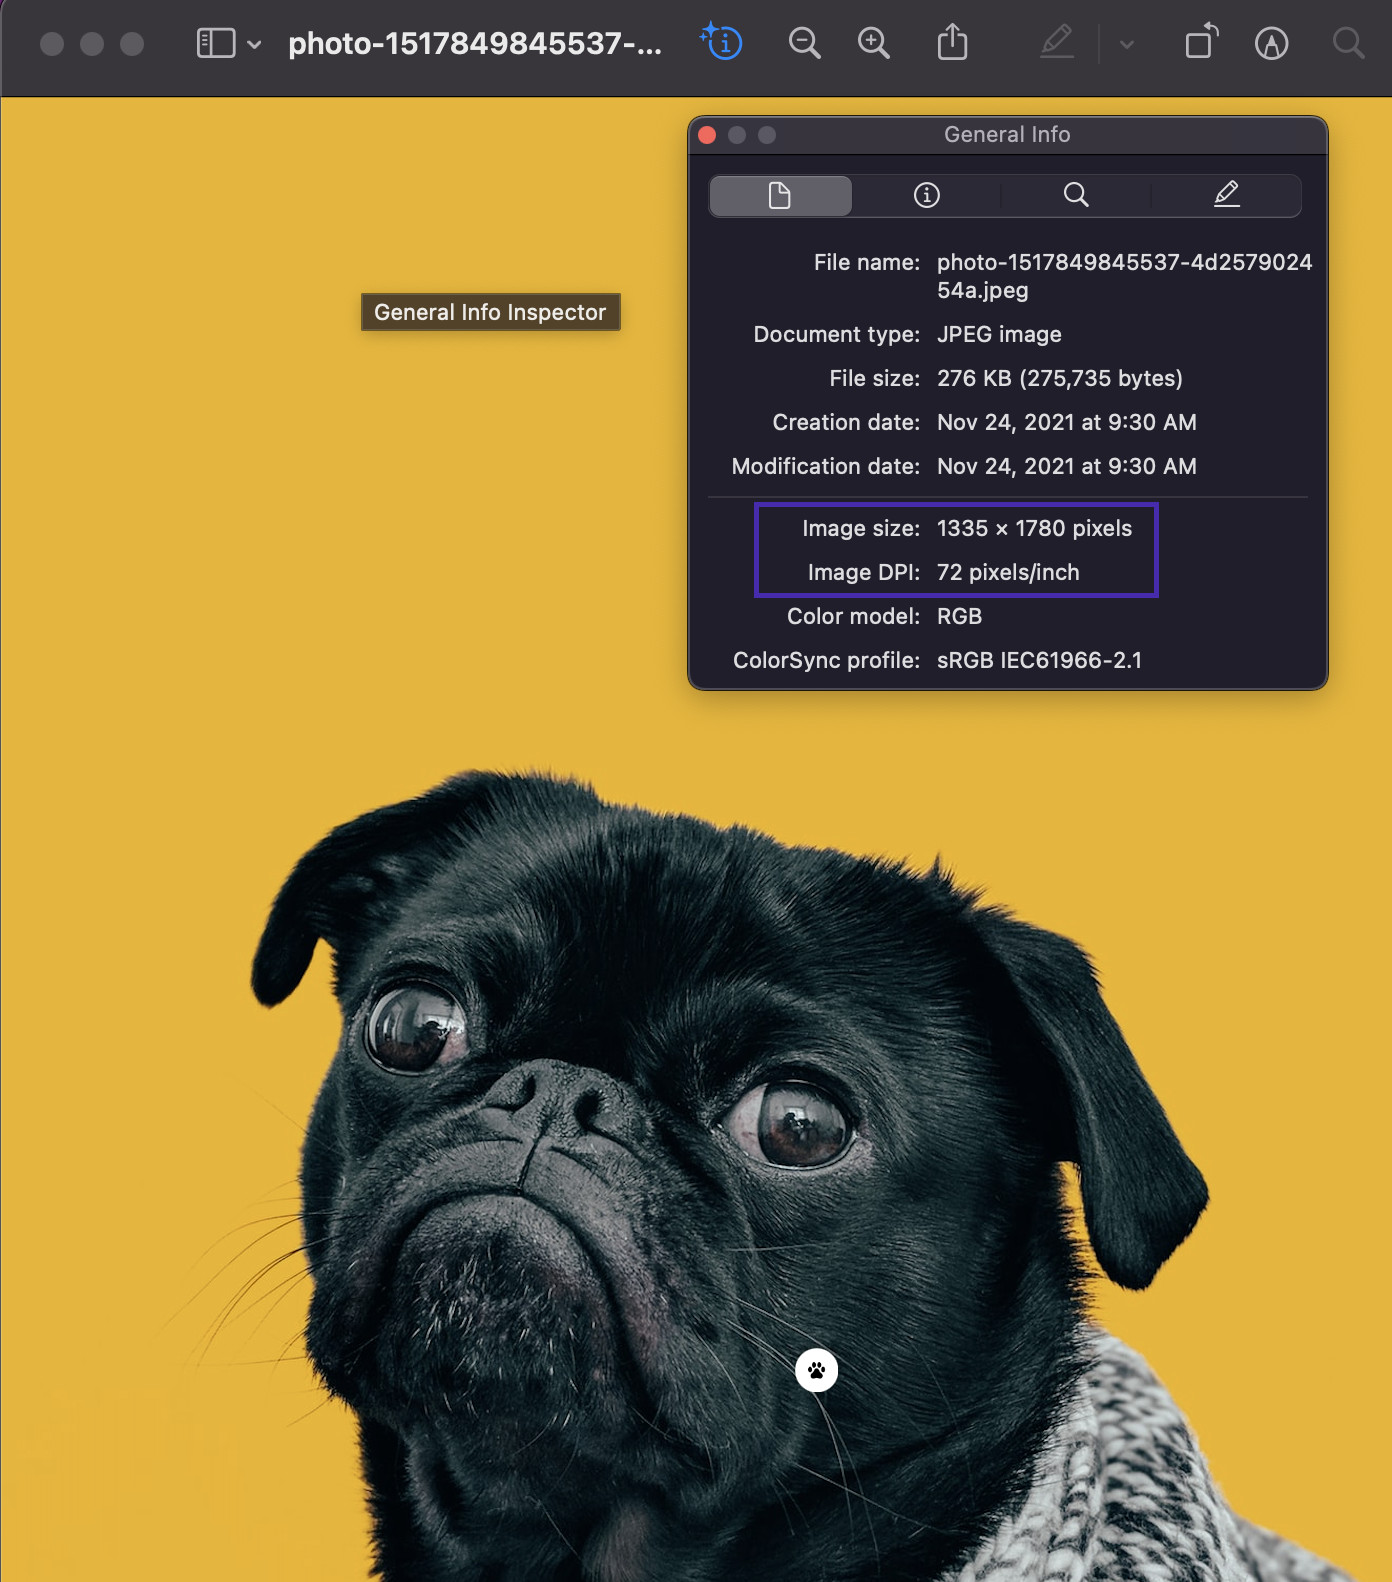
- Find Resolution: In the “Get Info” window, look under the “More Info” section for “Dimensions.” This will show the pixel dimensions. While macOS doesn’t directly display DPI, you can calculate it if you know the intended print size. You can also use the Preview app; open the image in Preview, go to Tools > Show Inspector, and look for the resolution information.
 Checking image resolution on mac os. Right click and select Get Info
Understanding Image Resizing and DPI
Enlarging an image doesn’t increase its resolution. Stretching a low-resolution image only makes the pixels larger, resulting in a blurry or pixelated appearance. Conversely, reducing an image’s size can effectively increase its DPI for printing purposes.
To calculate the necessary size for a specific DPI, use this formula:
New Height = (Original Height * Original DPI) / Desired DPI
Recommended Dimensions for 300 DPI Printing
Here’s a handy table outlining minimum image dimensions for common print sizes at 300 DPI:
| Printed Size | Minimum Image Dimensions (pixels) | Image Resolution (DPI) |
|---|---|---|
| 2″ x 1.60″ | 640 x 480 | 300 |
| 2″ x 2″ | 600 x 600 | 300 |
| 2.67″ x 2″ | 800 x 600 | 300 |
| 4″ x 4″ | 1200 x 1200 | 300 |
| 8.5″ x 11″ | 2550 x 3300 | 300 |
By understanding how to check and manage your photo resolution, you can ensure your images always look sharp, whether on screen or in print. If you need higher resolution images, consider using a higher-resolution camera or sourcing stock photos.