In today’s visually driven world, photos are more than just memories; they’re a key part of how we present ourselves. Whether it’s for social media, professional profiles, or cherished family albums, feeling comfortable and confident in front of the camera is a valuable skill. It’s completely normal to feel awkward or dislike how you look in photos – many people, including myself in the past, have been there. The good news is, looking great in pictures isn’t about being a professional model. It’s about understanding a few simple posing techniques that can transform your photos from stiff and unflattering to natural and fabulous.
As a content creator for dfphoto.net, I’ve spent years exploring the nuances of photography, both behind and in front of the lens. Through my experience and insights from other photography professionals, I’ve compiled seven essential posing adjustments that will help you love every photo you’re in. These are your “tools of the trade” to unlock your photogenic potential.
7 Simple Posing Adjustments for Picture-Perfect Photos
These adjustments are game-changers. They are the subtle shifts that professional photographers and models use, and they’re easy for anyone to learn and implement. Let’s dive into how you can instantly improve your poses and boost your confidence in front of the camera.
1. Extend Your Ears Forward: Banish the Double Chin
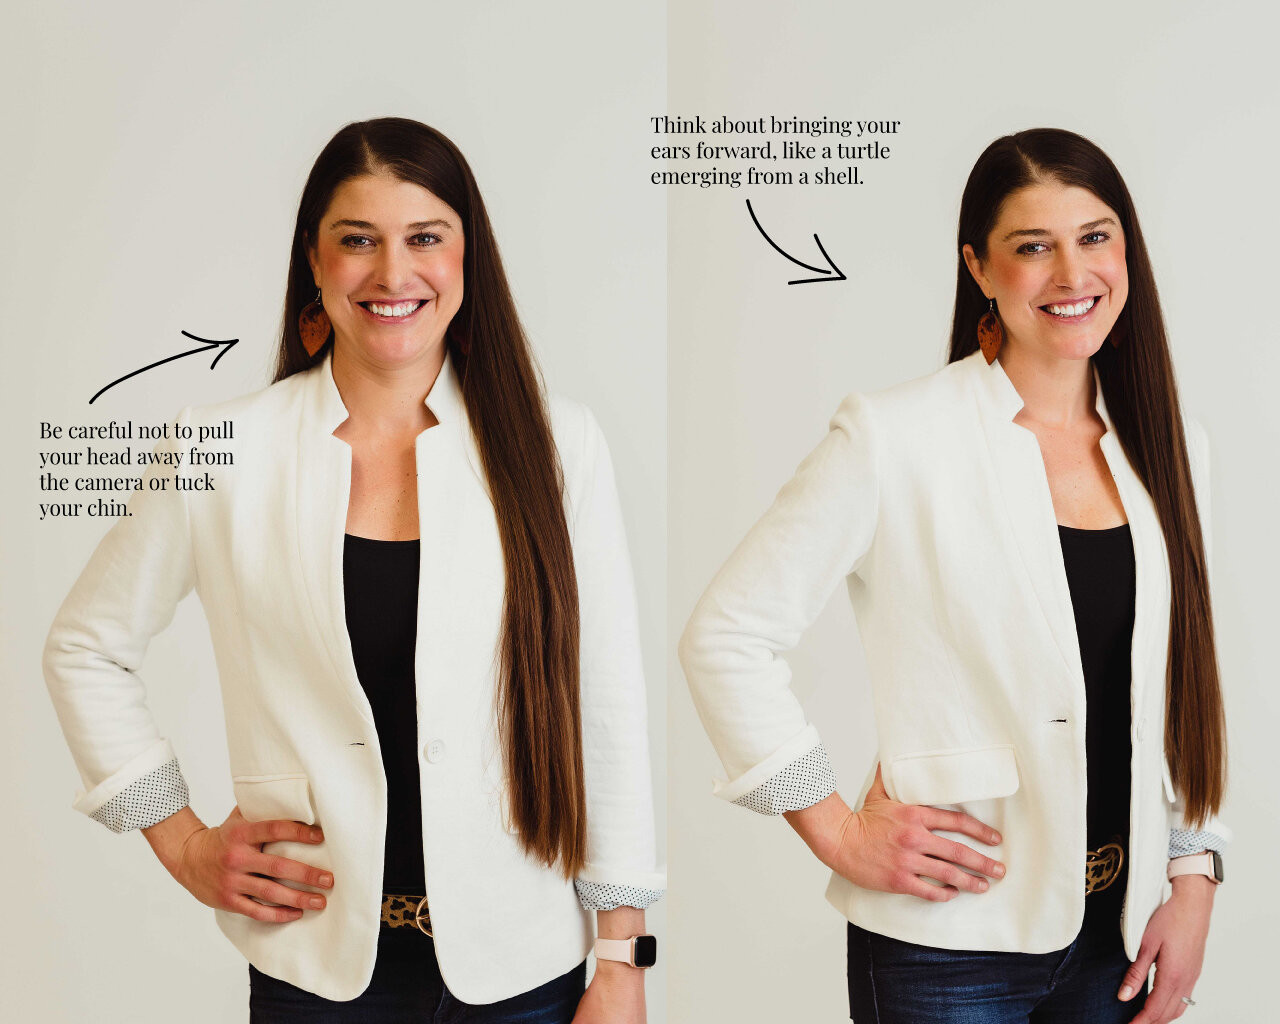
The dreaded double chin – a common concern in photos. But before you blame genetics, consider your posture. Often, a double chin appears simply because of how we position our head. Nerves in front of the camera can lead to unconsciously pulling our head back, leaning away, or tucking our chin down. These subtle movements can create skin folds under the chin, even if they aren’t normally there.
The solution? Think of bringing your ears slightly forward, like a turtle gently emerging from its shell, moving them towards the camera. It might feel strange and unnatural at first, but this slight forward motion effectively tightens your jawline, giving you a smoother, more defined look. This is a key trick in how to pose to avoid a double chin and achieve a more sculpted appearance in your photos.
 How to pose to eliminate double chin, chin placement for photos
 Posing tips to avoid double chin, improve photo poses
2. Shift Your Weight: Create a Flattering Body Line
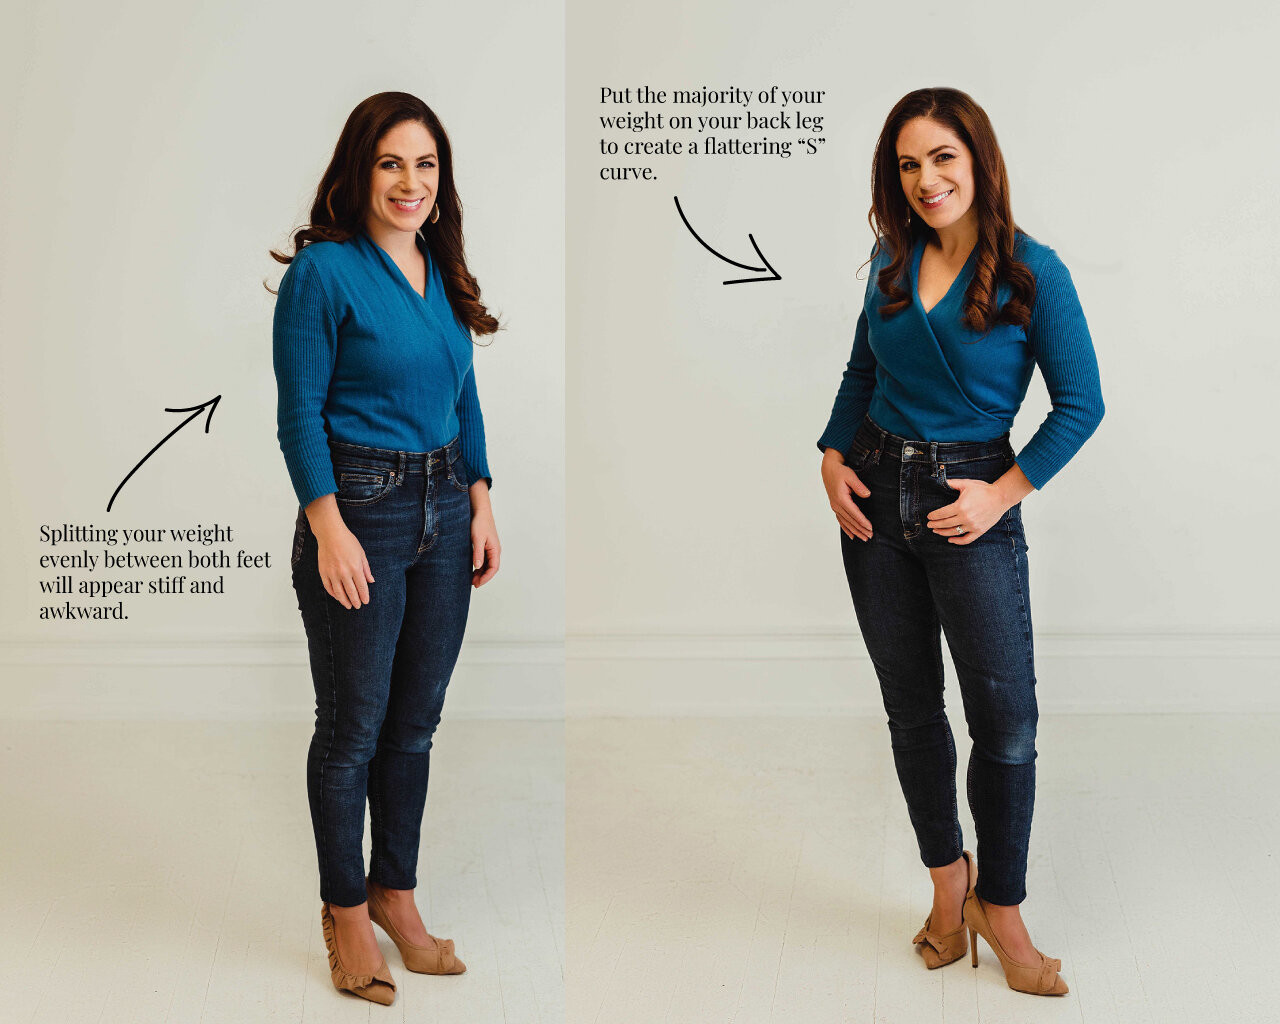
Now, let’s consider weight distribution. Are you standing with your weight evenly balanced on both feet? If so, it’s time to shift! Placing the majority of your weight onto your back leg instantly creates a subtle and incredibly flattering “S curve” in your body. This slight shift in weight naturally enhances your body shape in photos.
However, be mindful not to lean too far back or away from the camera, as this can appear stiff and awkward. The aim is a natural, relaxed stance that highlights your best features. This weight shift is a fundamental technique in how to pose for full body shots and achieve a more dynamic and visually appealing silhouette.
 Posing dos and don'ts, weight shifting for better poses, how to look slimmer in pictures
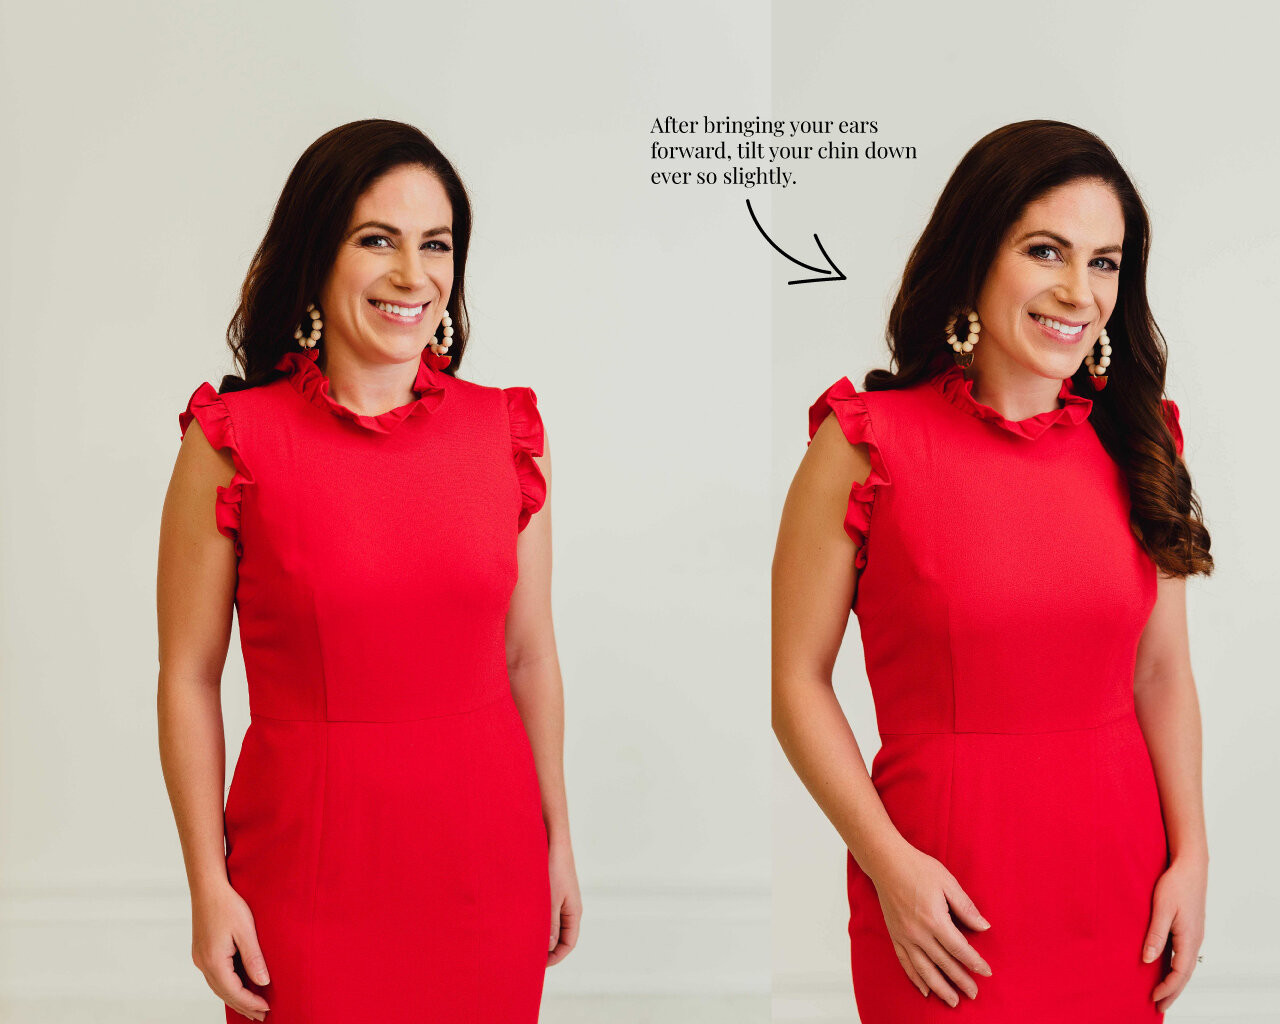
3. Lean Forward Slightly from the Waist: The Instant Slimming Pose
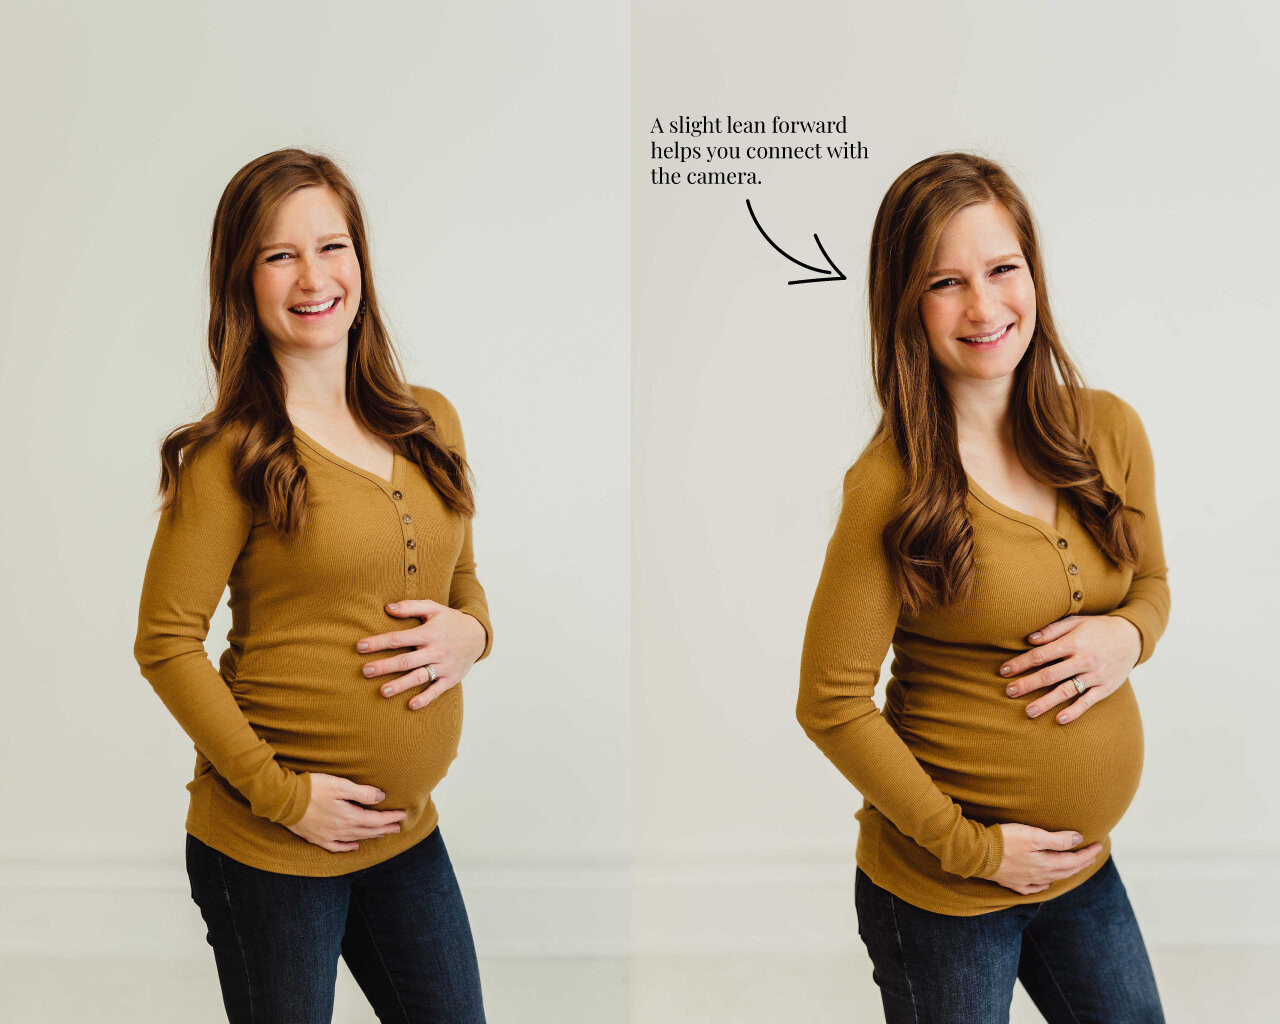
Building on the previous point, a slight lean forward from your waist towards the camera can work wonders. This is an instant body slimming technique and a go-to pose for anyone wanting to look more slender in photos. By leaning slightly forward, your waist, hips, and legs will appear more streamlined – no gym required!
This movement also naturally assists in correct chin placement, helping you bring your ears forward and further eliminate any potential double chin. This subtle lean is a powerful tool in how to pose to look thinner and achieve a more polished and confident look in your photographs.
 Photography posing tips, slight lean forward pose
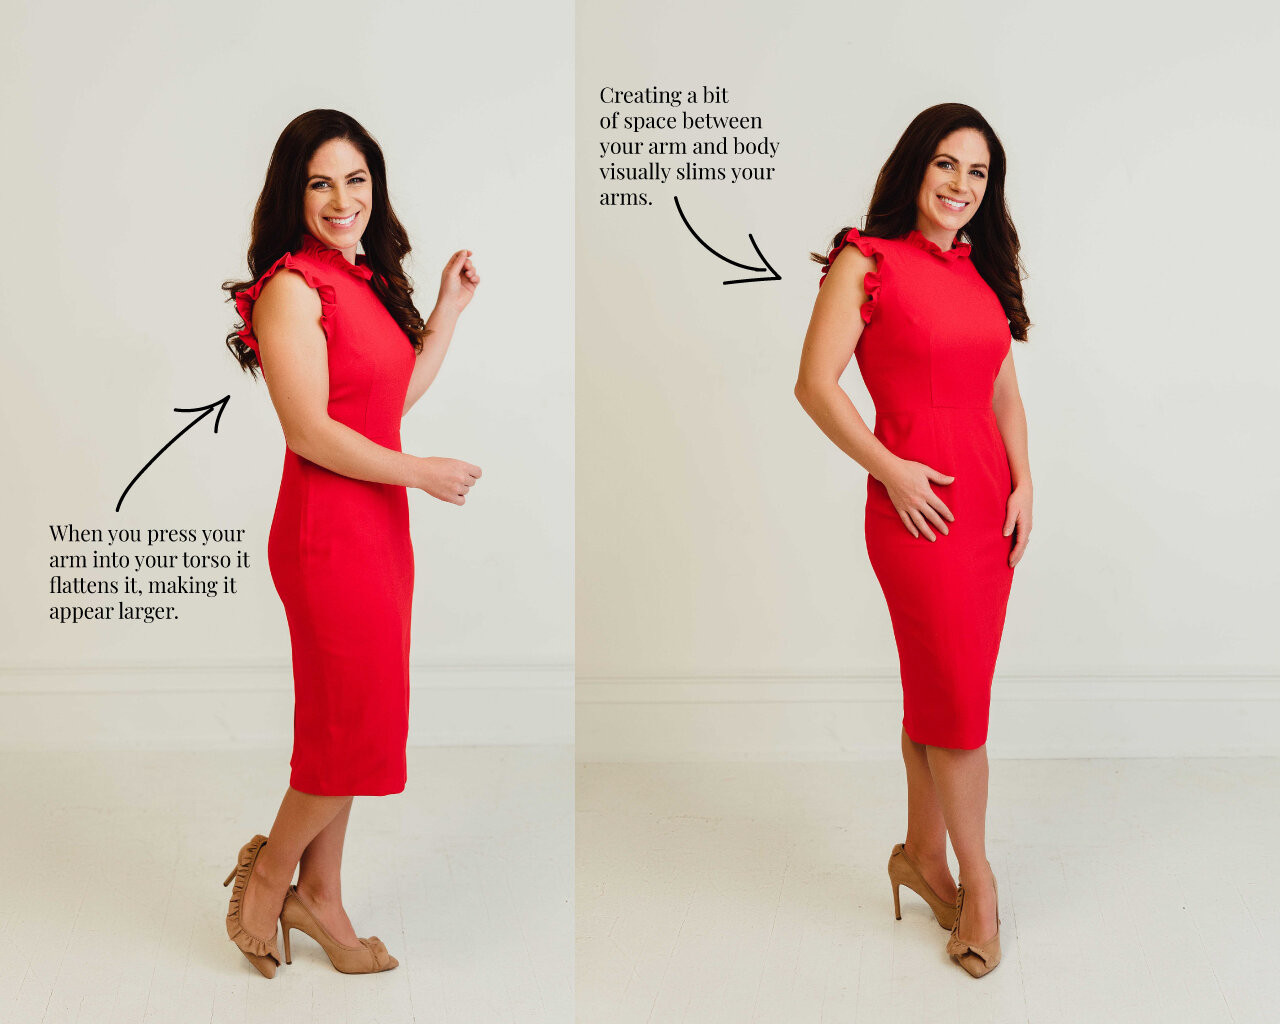
4. Create Space Between Your Torso and Arm: Avoid Unflattering Arm Squishing
It’s a common instinct: when posing, people often press their arms tightly against their torso. In reality, when we stand naturally, our arms often rest flat against our sides. However, in photos, this can be unflattering. Pressing your arm against your body will squish it outwards, making it appear larger than it is. This can also make you look stiff and uncomfortable.
The fix is simple: create a small gap between your torso and your arm. Lift your arm slightly – just an inch or two – by placing your hand on your hip or upper thigh. Alternatively, you can put a hand in your pocket, or if posing with others, rest your hand on someone’s shoulder or back. This simple adjustment is key in how to pose your arms for photos, creating a more relaxed and natural look while preventing unflattering arm squishing.
 Professional posing tips, flattering arm poses, how to look photogenic
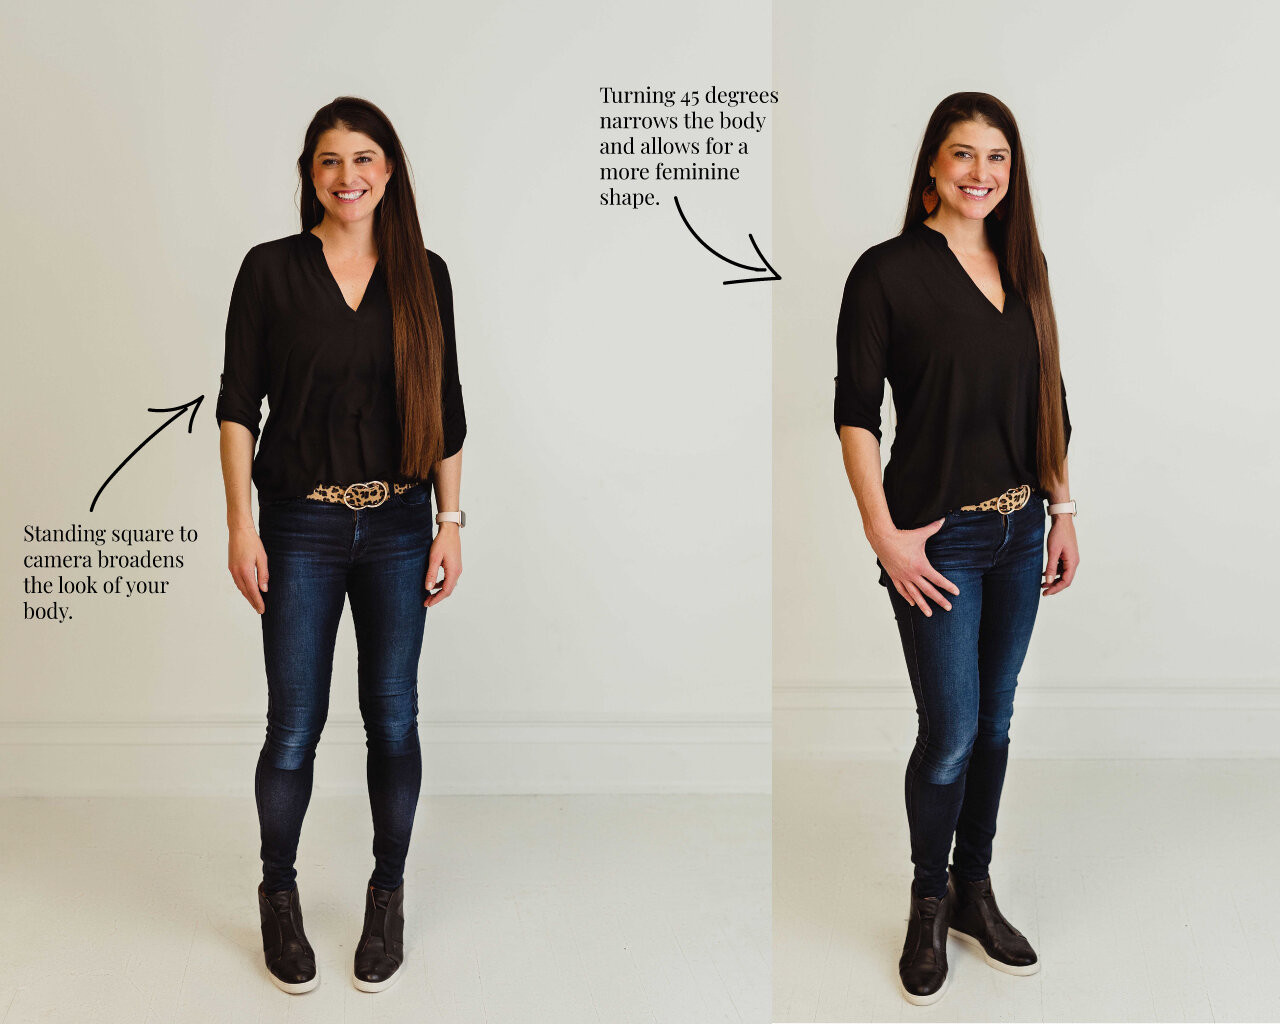
5. Angle Your Body: Embrace the Power of the 45-Degree Pose
This is a fundamental principle for anyone learning how to pose for photos! Flip through any fashion magazine, and you’ll notice a distinct absence of straight-on shots. Exceptional photos are all about angles. Let’s use angles to our advantage.
Instead of facing the camera directly, position your body at a 45-degree angle. This instantly creates a slimming effect and adds significant visual interest to your photos. Angling your body is a core technique in how to pose your body for photos to achieve a more dynamic and flattering composition. Experiment with different angles to find what works best for you.
 Posing tips for photogenic photos, 45 degree angle pose
 Professional posing angles, posing during pregnancy, pregnancy photo poses
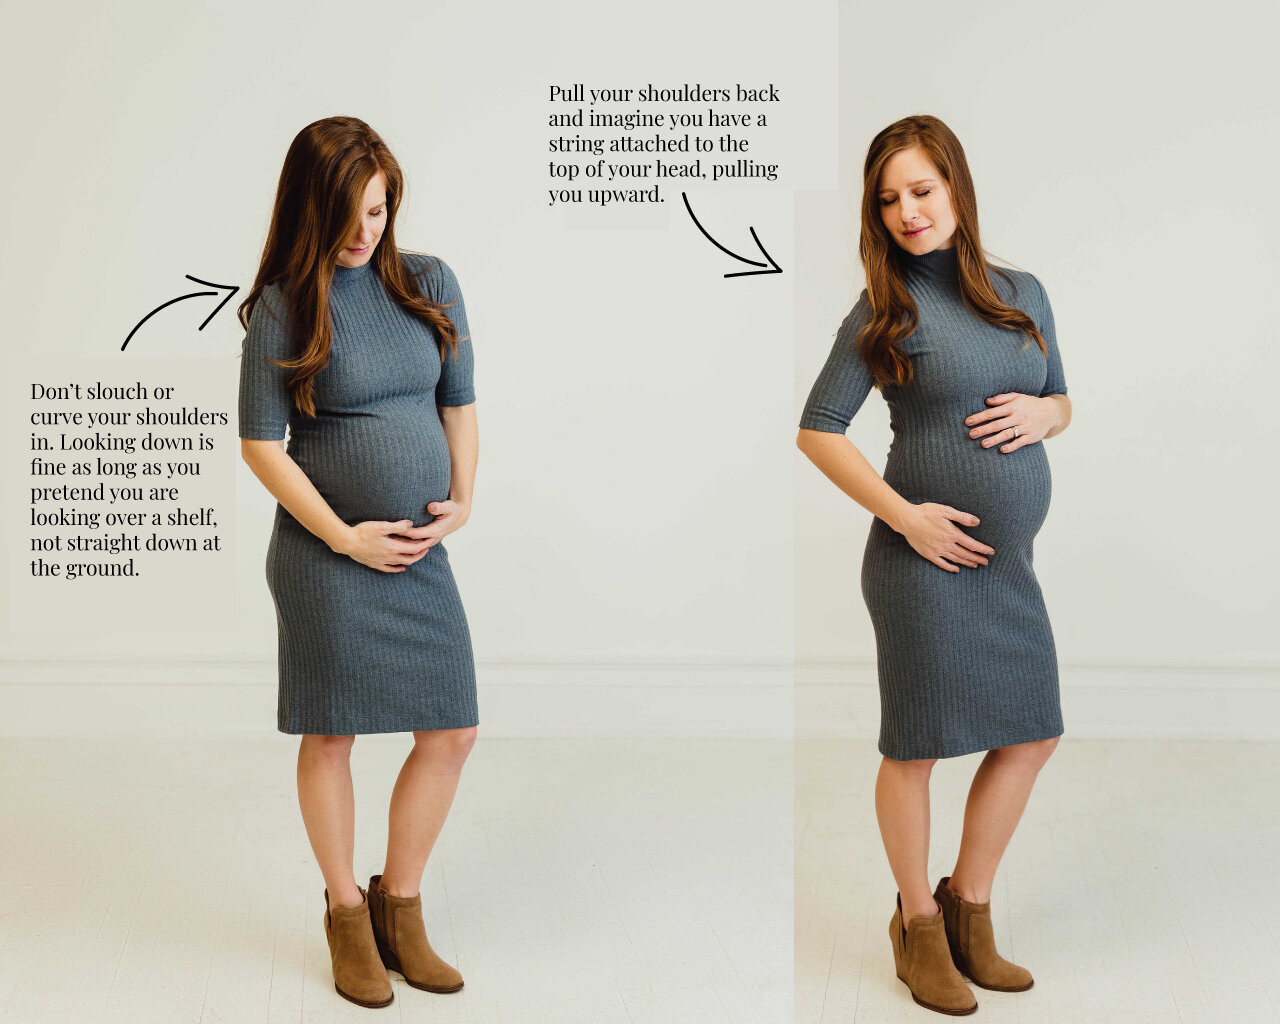
6. Stand Tall: Project Confidence and Elongate Your Body
You don’t need to be tall to appear taller in photos. Even at 5’1″, I know this trick well! The secret is adopting a dancer-like posture. As you practice posing effectively, imagine a string attached to the crown of your head, gently pulling you upwards like a marionette.
Engage your core muscles and lift as you settle into this stance. Your shoulders should be back and down. If you need help adjusting your shoulders correctly, try rolling them forward, then up, then around to settle into that “back and down” position. This posture will elongate your neck and your overall body line, projecting confidence and grace. Mastering this posture is crucial in how to pose to look taller and more poised in your photographs.
 Posing for maternity photos, maternity pose ideas, stand tall pose
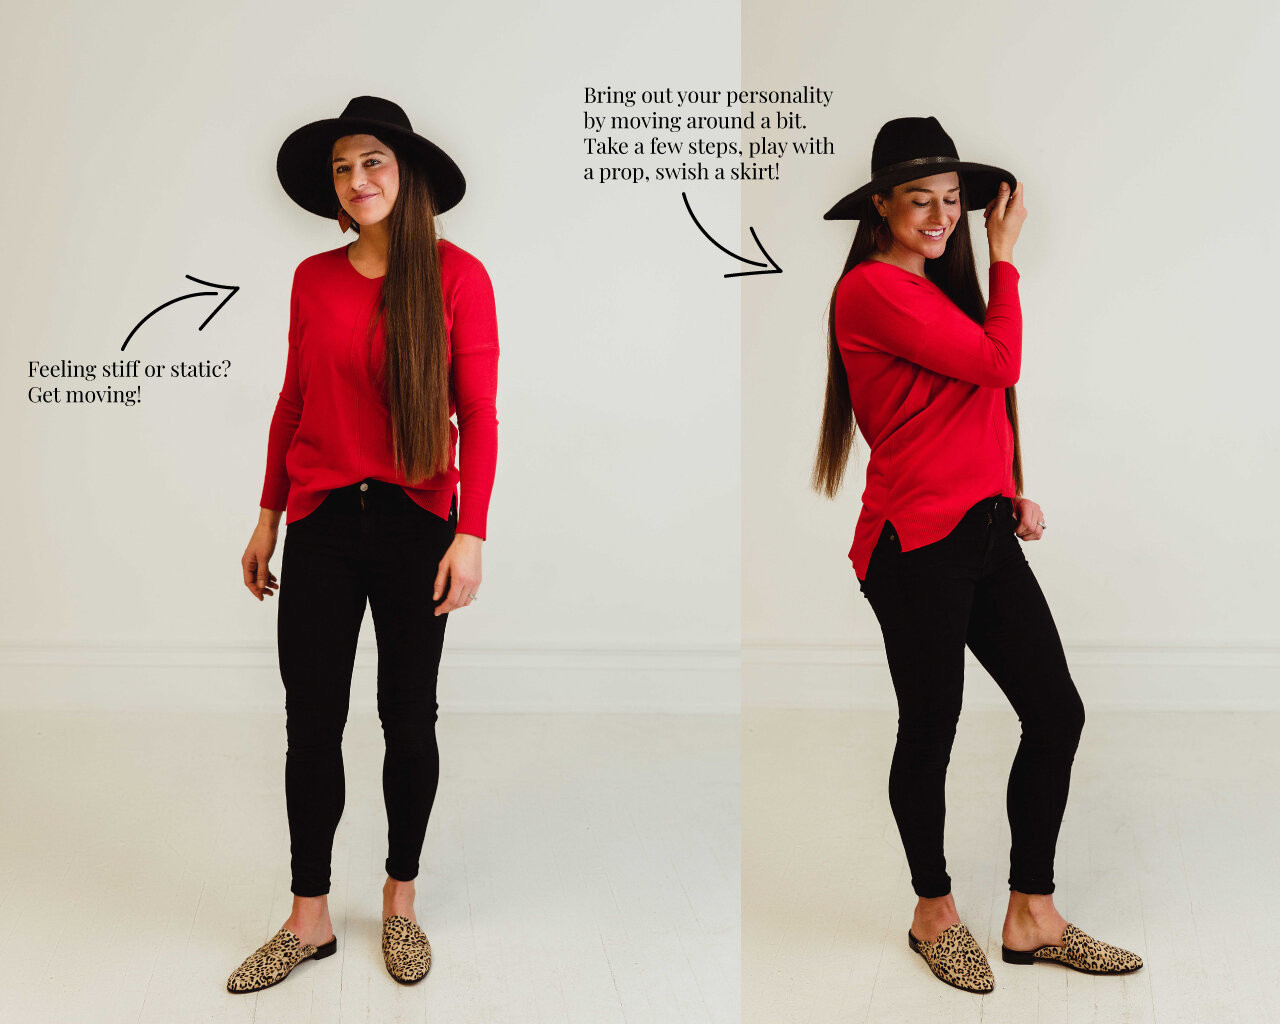
7. Move and Be Natural: Embrace Candid Moments
While this guide focuses on posing techniques, sometimes the best trick to looking great in photos is to forget about posing altogether and let your genuine personality shine through. Relax, take a deep breath, and embrace movement.
Don’t be afraid to walk a little, twirl gently, sway your skirt, or even dance to the music in your head. Movement injects dynamism and spontaneity into your photos, sparking a more natural smile and helping you feel more comfortable in front of the camera. In fact, many people find that their favorite photos are often the candid, spontaneous shots. Learning how to pose naturally by incorporating movement is key to capturing authentic and captivating images.
 How to pose naturally, candid posing tips
Final Thoughts: Practice and Personalize Your Poses
Mastering how to pose for photos is a journey of practice and self-discovery. These seven adjustments are your starting point. Experiment with them, find what feels natural and comfortable for you, and adapt them to your own style. The more you practice, the more confident and photogenic you’ll become. So, step in front of the camera, try these tips, and get ready to love your photos!