SD cards are essential for expanding the storage of our digital devices, particularly for photographers and anyone who loves capturing memories. They offer a convenient way to store a vast number of photos and videos, and their portability allows for easy swapping and organization of your visual library. However, the ease with which we handle SD cards also comes with the risk of accidental photo loss. Whether it’s due to accidental deletion, formatting errors, or card corruption, losing precious photos can be a distressing experience. The good news is that recovering deleted photos from an SD card is often possible, helping you retrieve those cherished moments.
Common Scenarios for SD Card Photo Recovery
Photo loss from SD cards is a surprisingly common issue. Understanding the reasons behind it can help you take preventative measures and know what to do when it happens. Here are some typical situations where you might need to recover deleted photos from an SD card:
- Accidental Deletion: In the rush of reviewing photos on your camera or device, it’s easy to mistakenly tap the delete button. A momentary lapse in concentration can lead to the accidental erasure of valuable images.
- Inadvertent Formatting: Formatting an SD card erases all data on it. Sometimes, users accidentally format their SD cards, especially when devices prompt for formatting due to errors or when navigating menus quickly.
- SD Card Corruption: SD cards, like any digital storage, can become corrupted due to various reasons such as improper removal, power surges, or physical damage. Corruption can make the card inaccessible and your photos seemingly lost.
No matter the cause, the possibility of losing important photos can be stressful. Fortunately, there are effective methods to recover permanently deleted photos from your SD card. This guide will walk you through several proven techniques, tailored to different operating systems and devices:
6 Proven Methods to Recover Deleted Photos From an SD Card
Depending on your operating system and the device you were using with the SD card, different recovery methods are available. Below, we outline six effective ways to recover your lost photos, ranging from simple checks to more advanced software solutions.
Method 1: Utilizing Data Recovery Software for SD Cards
The most reliable and efficient way to recover deleted photos from an SD card is by using specialized data recovery software. These tools are designed to scan your SD card at a low level, identifying and reconstructing deleted files that are still recoverable. A leading example of such software is Disk Drill.
Disk Drill is a user-friendly data recovery application that excels at retrieving deleted photos from SD cards and various other storage media. It supports a wide array of file formats, including all common image formats and RAW camera files.
Let’s explore how to use Disk Drill to recover deleted photos from an SD card on both Windows and Mac operating systems.
Steps to Recover Deleted Photos from an SD Card on Windows using Disk Drill
-
Download and Install Disk Drill for Windows: Begin by downloading Disk Drill from the official website and installing it on your Windows computer. The free version of Disk Drill allows you to scan your SD card and preview recoverable files. It also offers free data recovery up to 500MB.
-
Connect Your SD Card: Insert your SD card into your Windows PC using a card reader or the built-in SD card slot, if available. Ensure your computer recognizes the SD card as a removable drive.
-
Launch Disk Drill and Select Your SD Card: Open Disk Drill and locate your SD card from the list of drives displayed. Select your SD card and click the “Search for lost data” button to initiate the scanning process.
-
Wait for the Scan to Complete: Disk Drill will thoroughly scan your SD card for recoverable files. The duration of the scan depends on the size of the card and the amount of data.
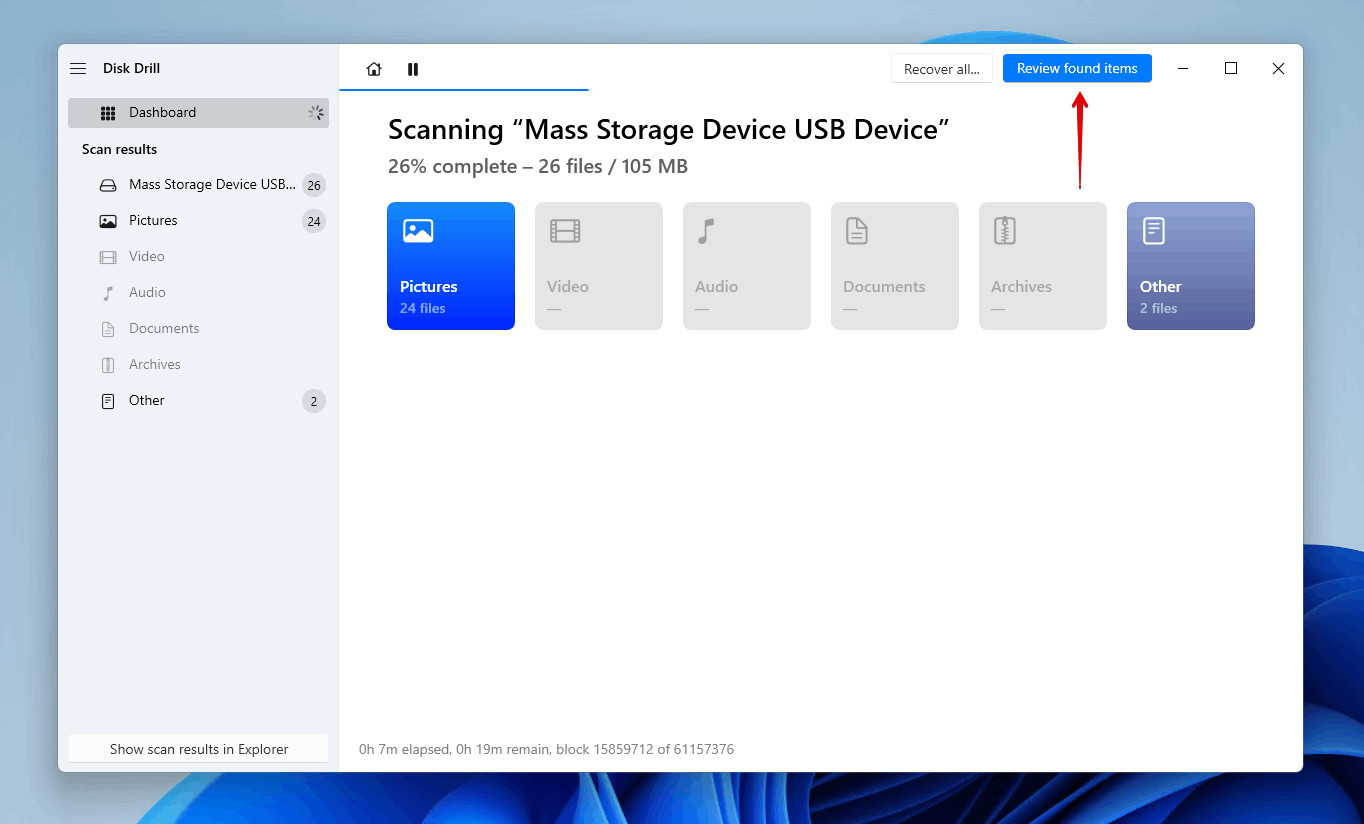 Scanning memory card using data recovery software
 -
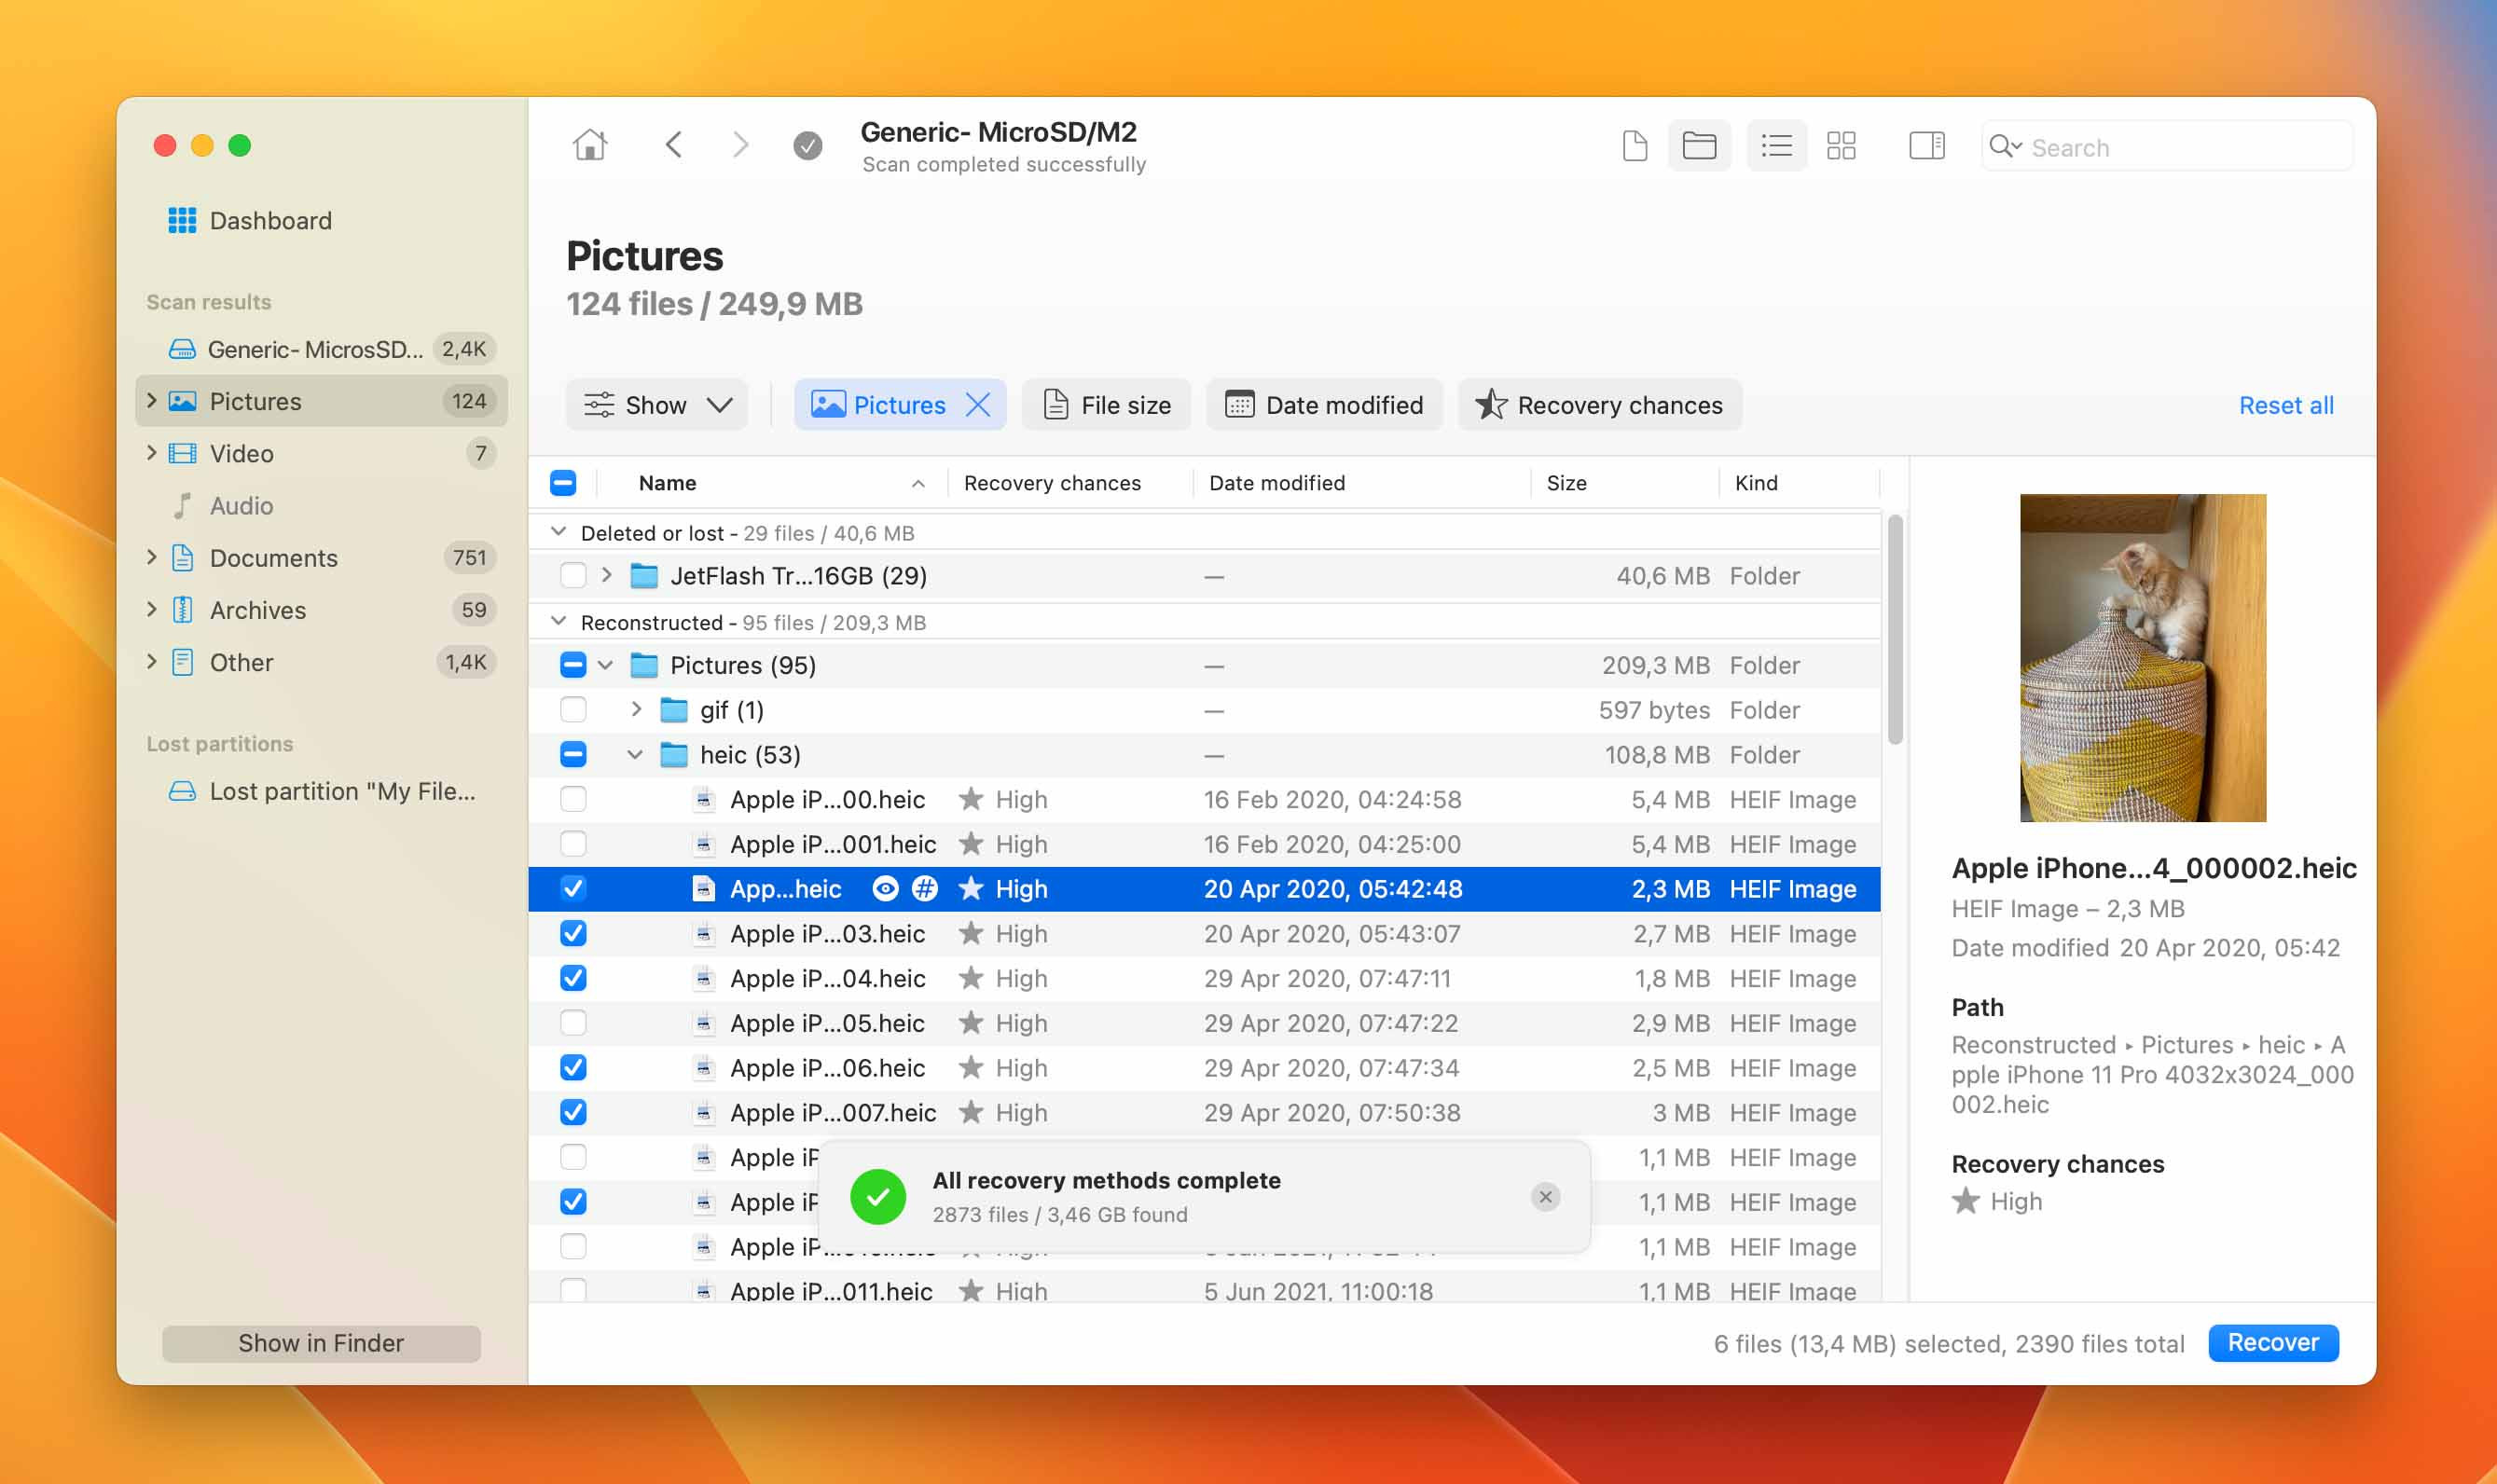
Preview Recoverable Photos: Once the scan is complete, Disk Drill will present a list of found files. You can filter the results to display only photos for easier browsing. Use the Preview function to examine the photos before recovery to ensure they are the ones you need.
-
Select Photos for Recovery and Choose a Recovery Location: Check the boxes next to the photos you want to recover. Click the “Recover” button and choose a safe recovery destination. Crucially, select a different storage device than the SD card itself to avoid overwriting potentially recoverable data.
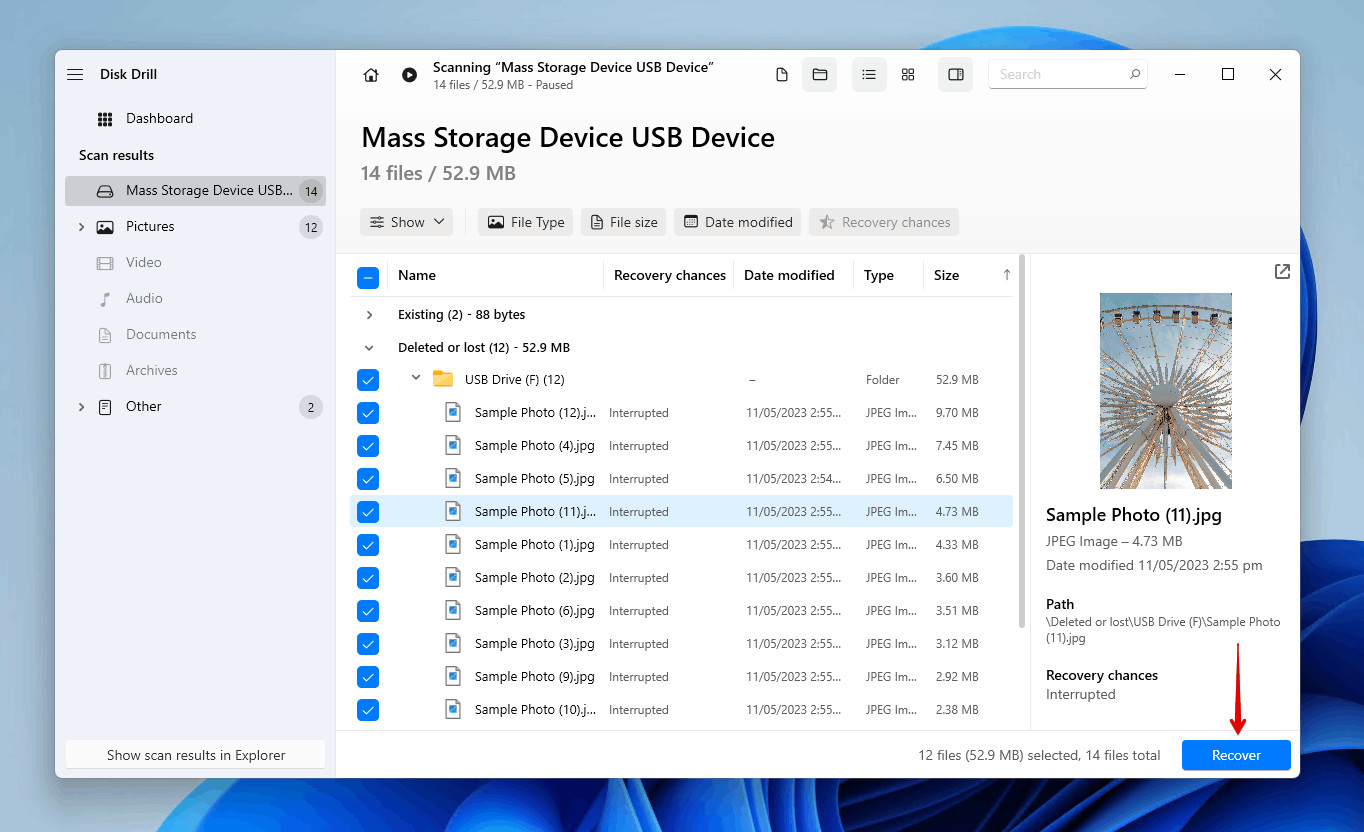 Selecting the SD card photos.
 Choosing a recovery destination.
Steps to Recover Deleted Photos from an SD card on Mac using Disk Drill
Disk Drill for Mac offers a similar intuitive process for recovering deleted photos. The free version lets Mac users preview recoverable files before committing to a purchase.
-
Download and Install Disk Drill for Mac: Download the free version of Disk Drill from the official website and install it on your macOS system.
-
Connect Your SD Card to Your Mac: Connect the SD card containing the deleted photos to your Mac using an SD card reader or the built-in port.
-
Select the SD Card in Disk Drill: Launch Disk Drill and choose your SD card from the list of available storage devices.
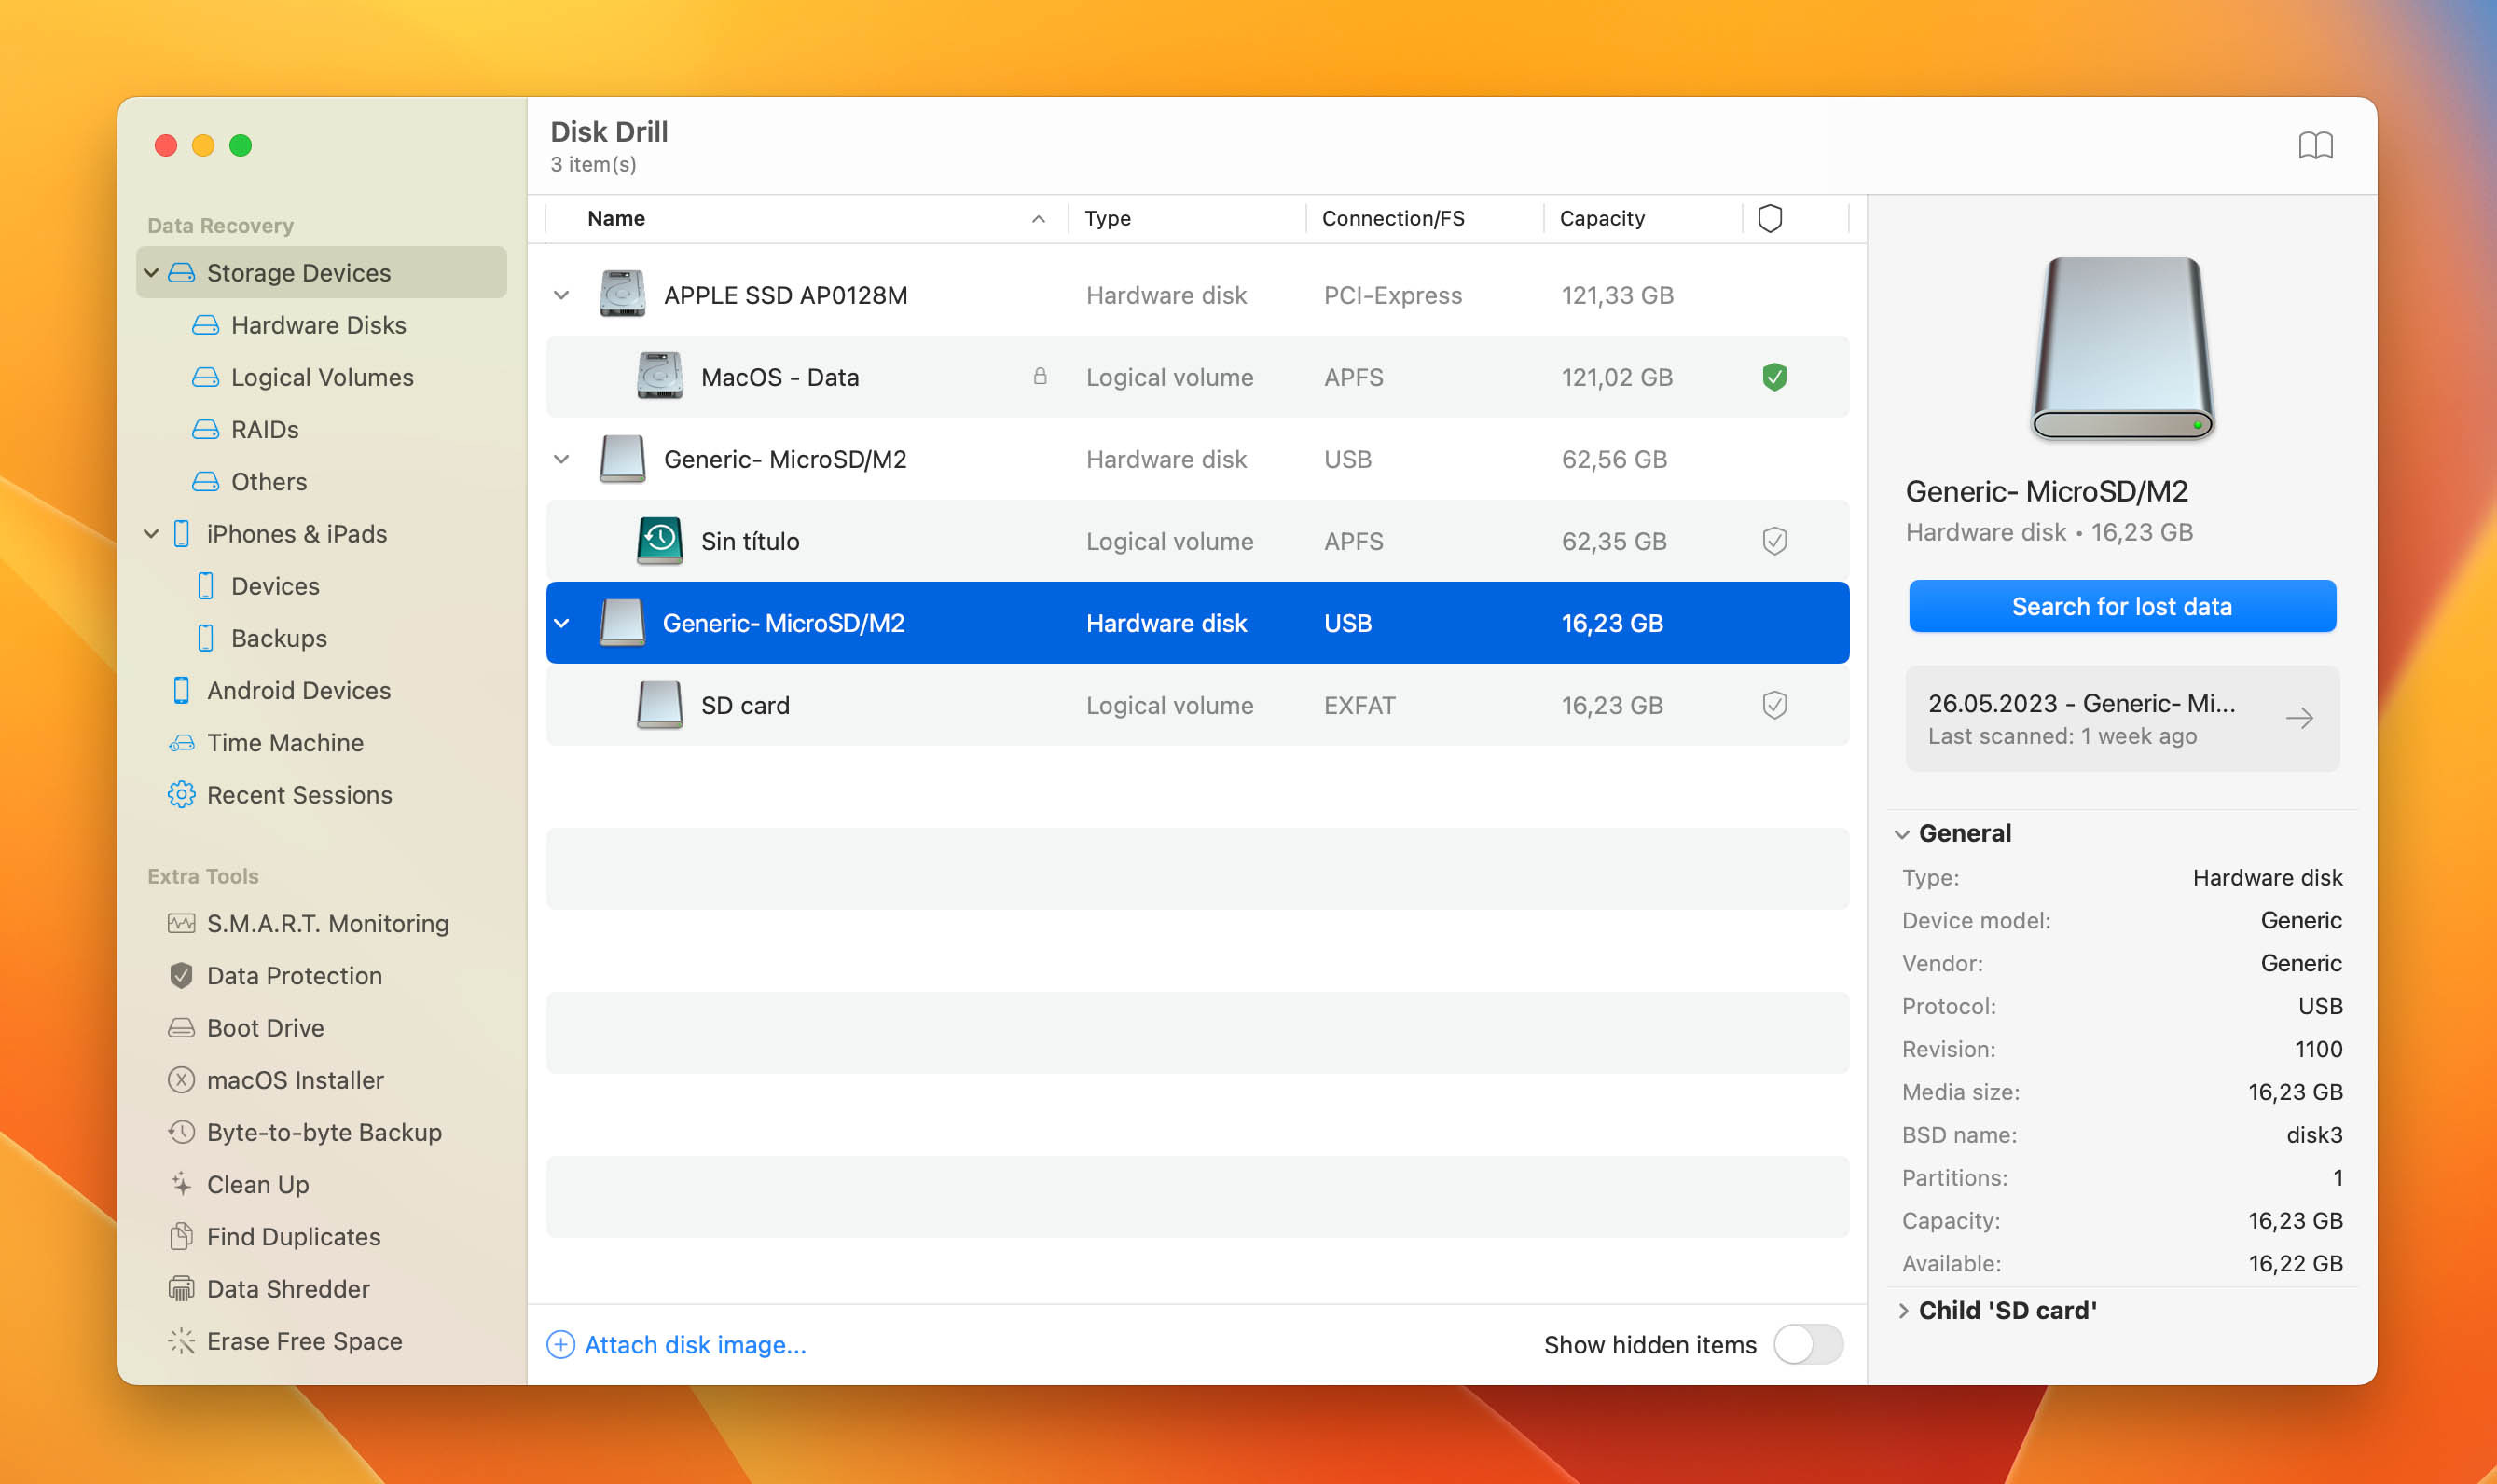 sd card in disk drill
 -
Initiate the Scan: Click the “Search for lost data” button to start scanning your SD card for deleted photos.
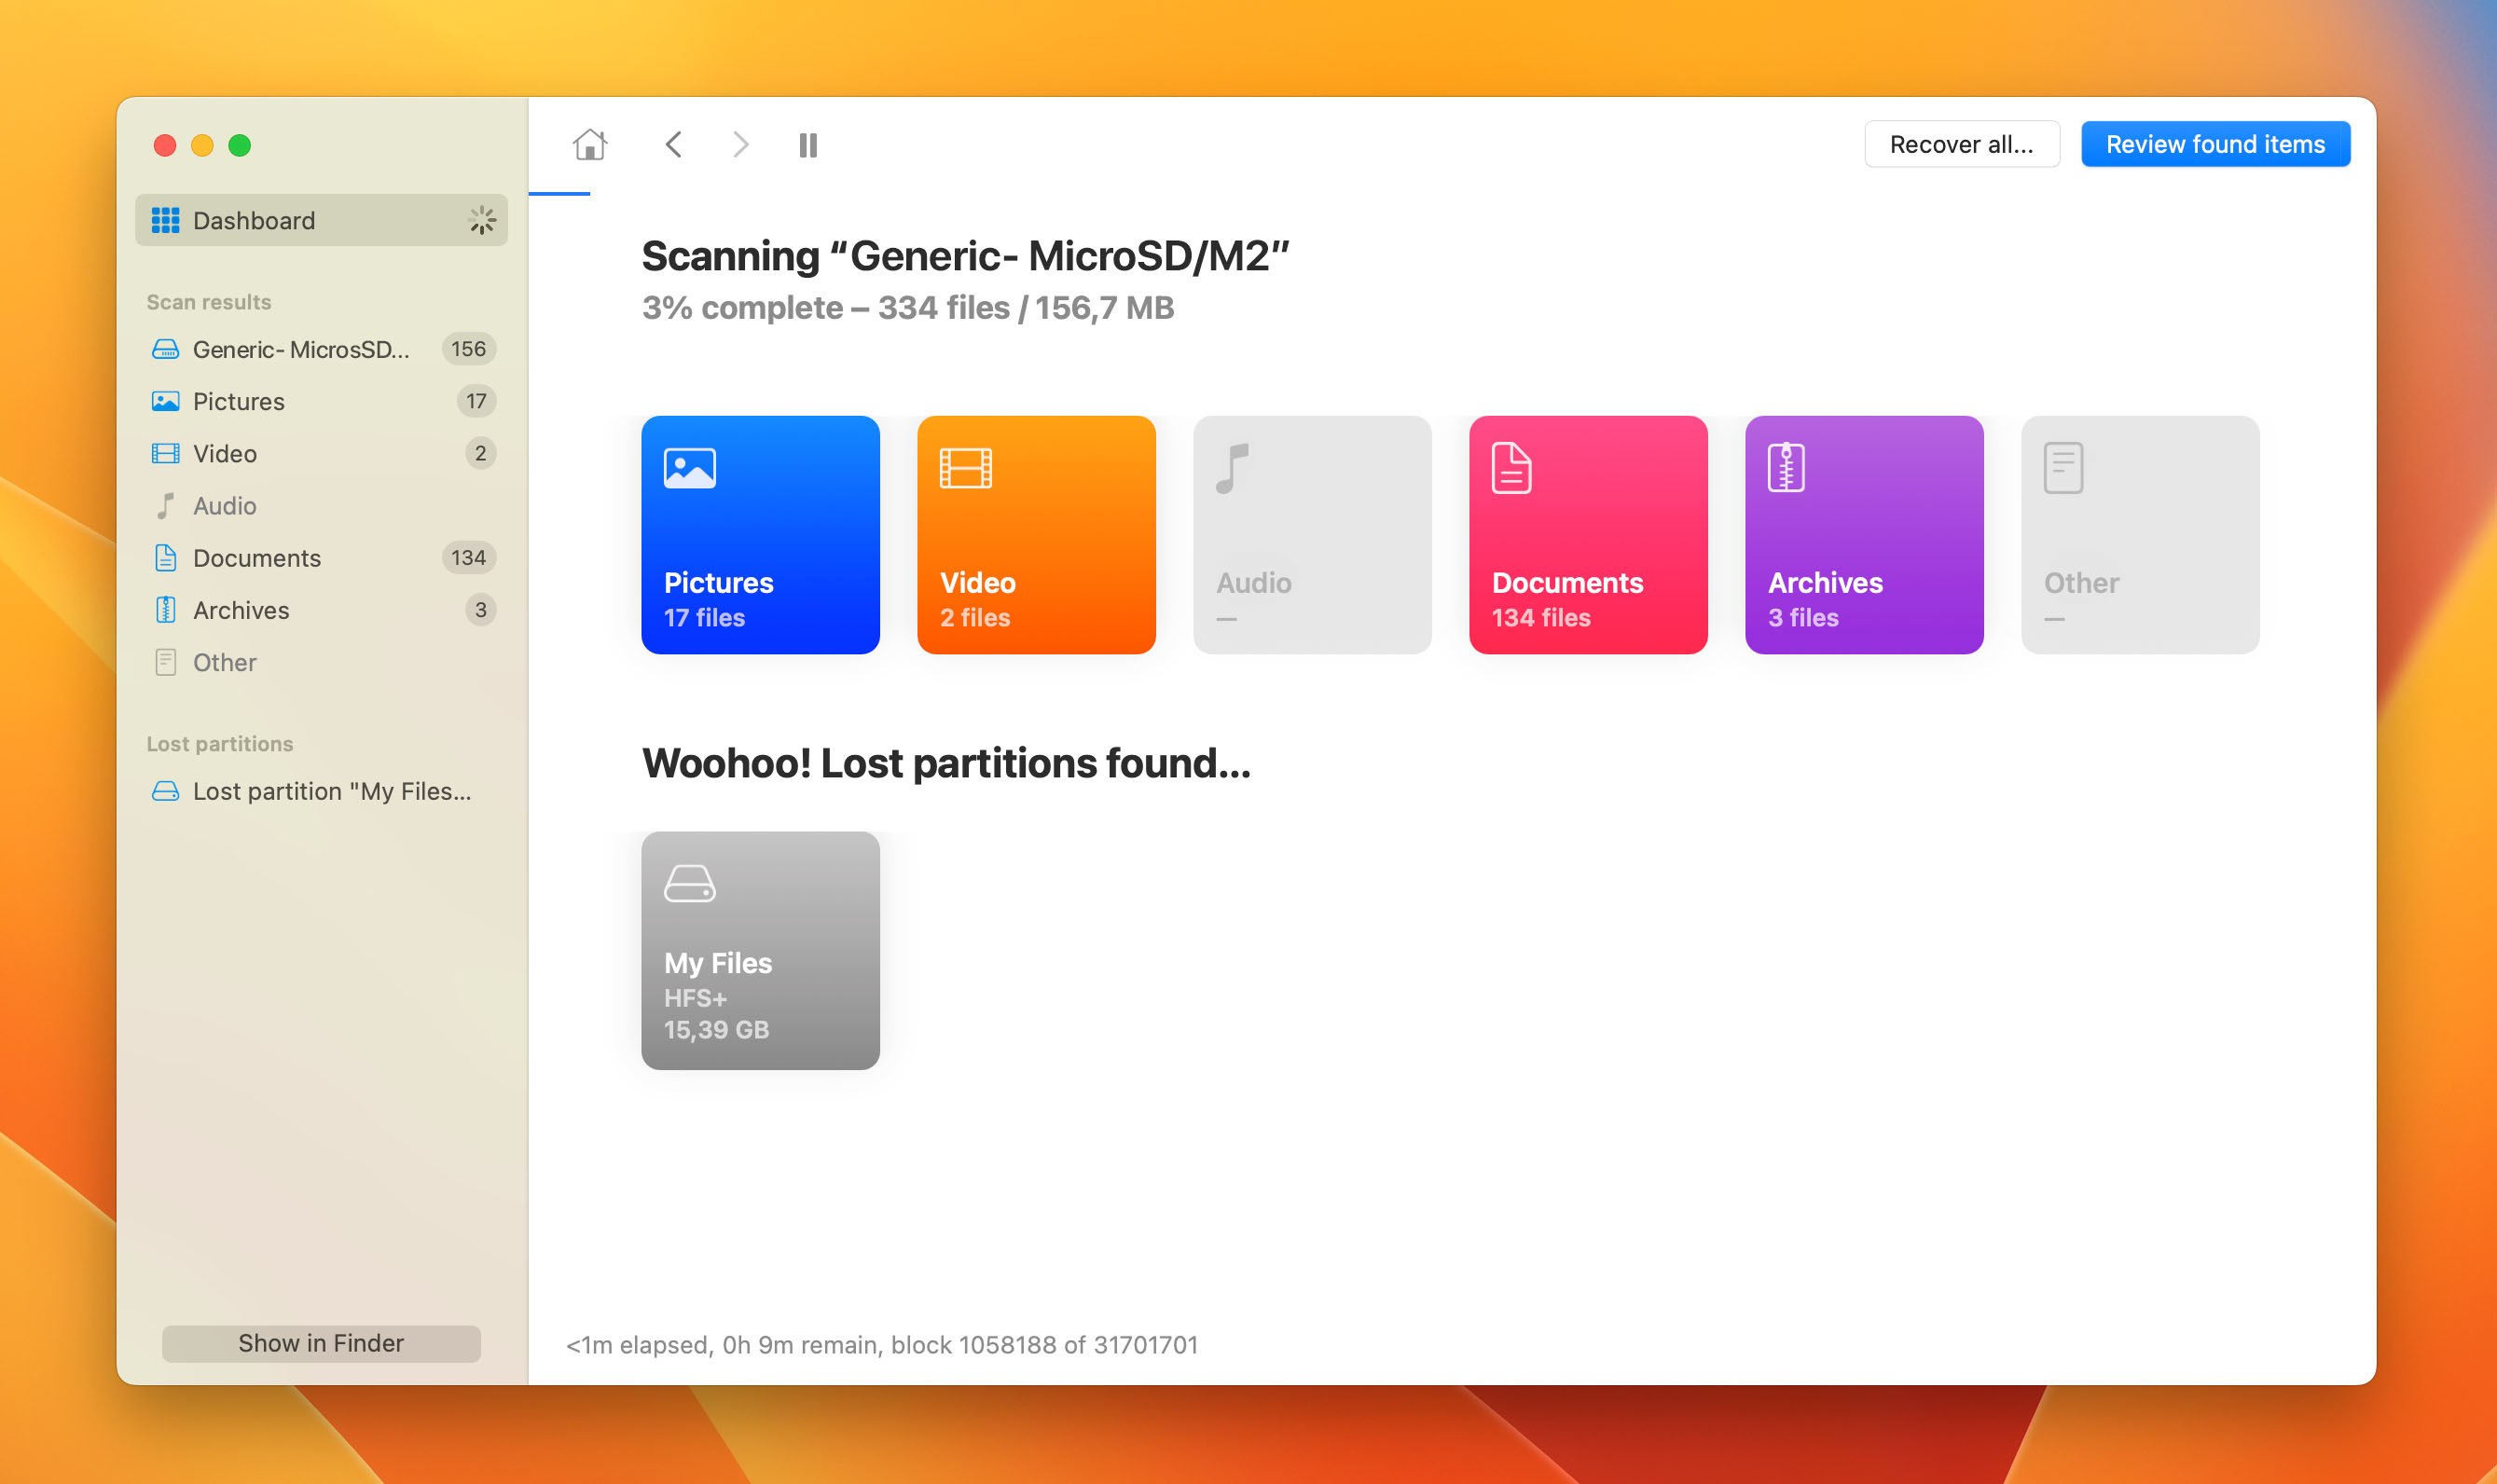 scan in progress
 -
Review and Preview Recoverable Files: After the scan, Disk Drill will display a list of recoverable files. Browse through the files, use the search filter to locate photos, and utilize the Preview feature to verify the photos before recovery.
-
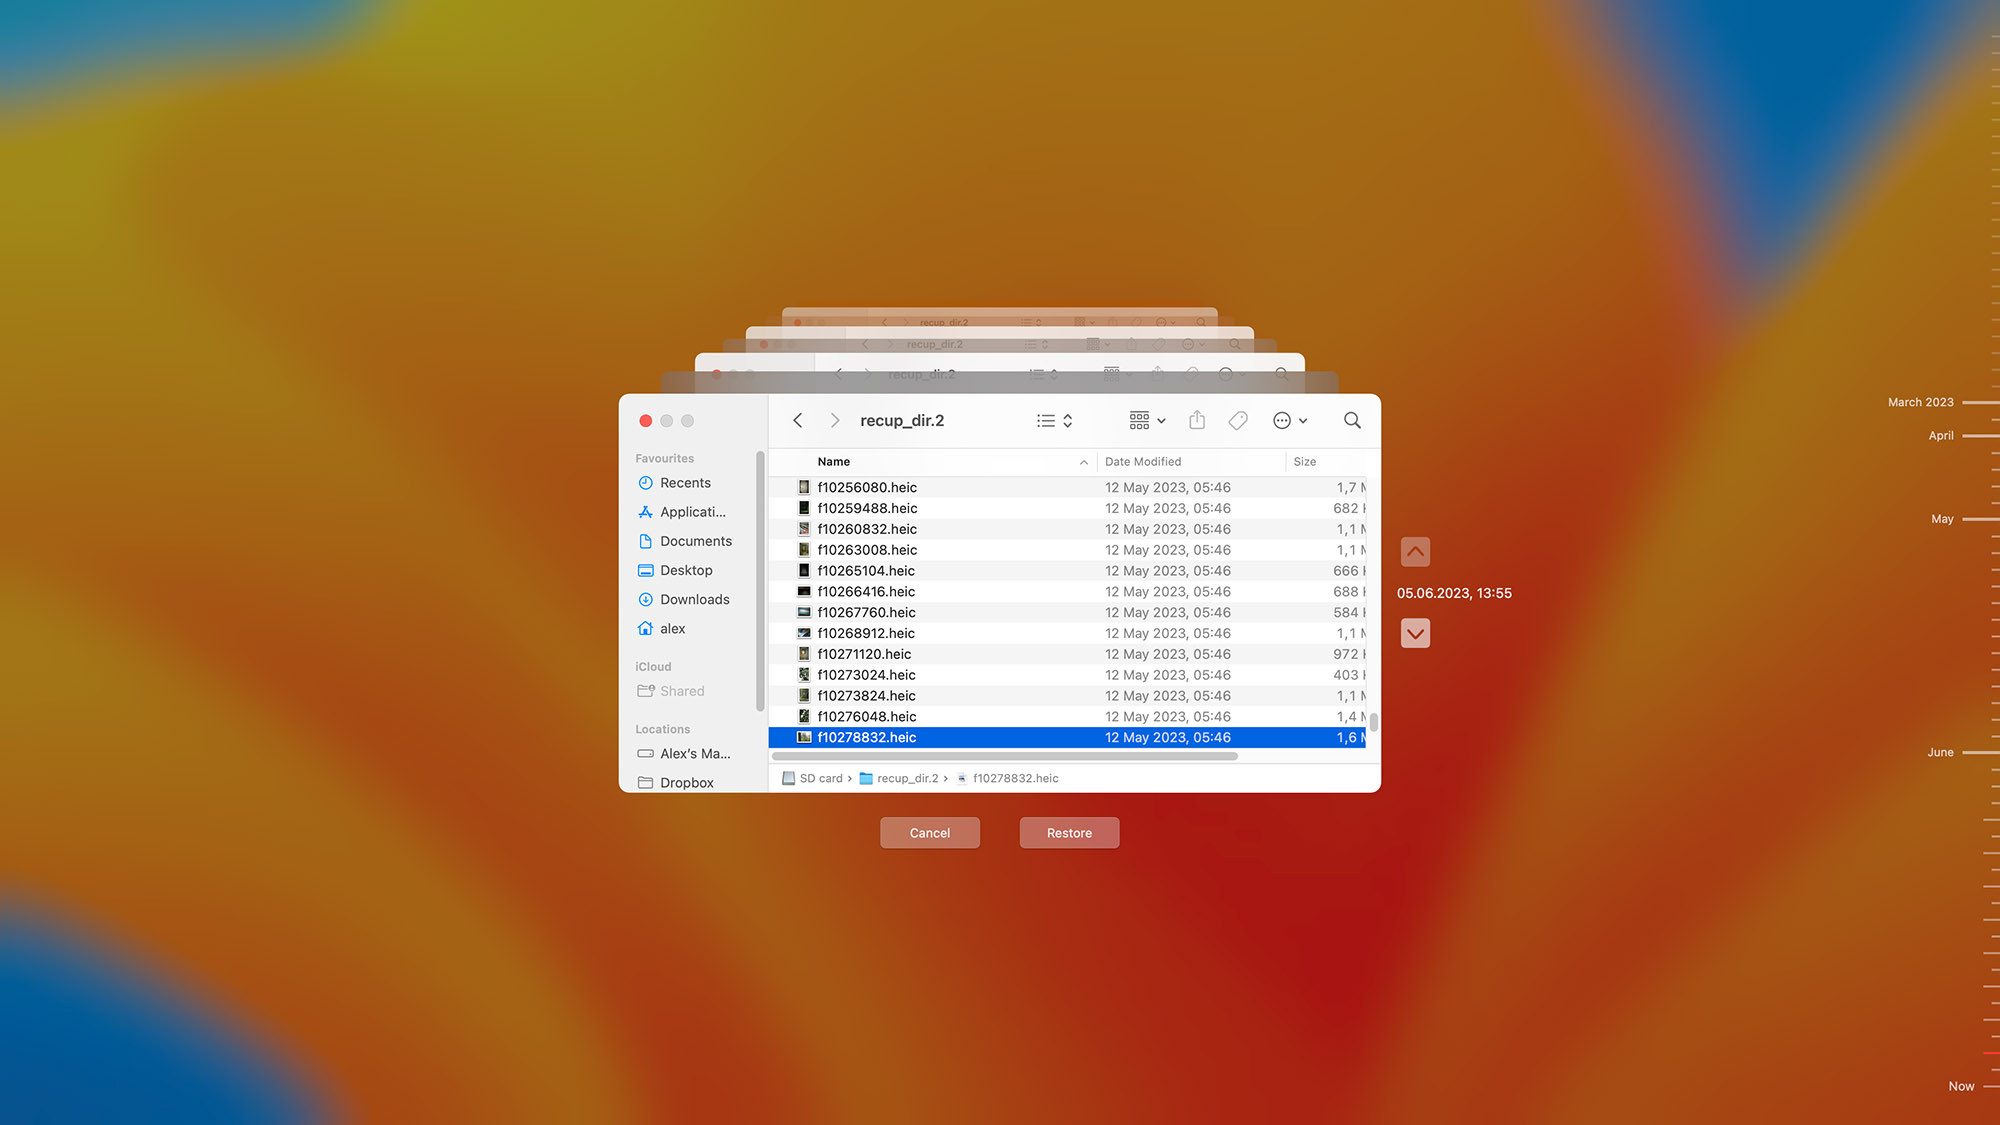
Recover Selected Photos to a Secure Location: Select the photos you wish to recover by checking their boxes. Click the “Recover” button and choose a recovery destination on your Mac, ensuring it is not the original SD card.
 selecting files for recovery in disk drill
Method 2: Android Data Recovery Apps for SD Card Photos
If you need to recover deleted photos from an SD card used in your Android phone or tablet, you can utilize Android data recovery apps directly on your device. DiskDigger photo recovery is a popular app available on the Google Play Store.
Steps to recover deleted photos using DiskDigger:
-
Download and Install DiskDigger: Install the DiskDigger photo recovery app from the Google Play Store.
-
Scan Your SD Card: Launch DiskDigger and select the option to scan your SD card, which is typically labeled as “/mnt/sdcard” or similar.
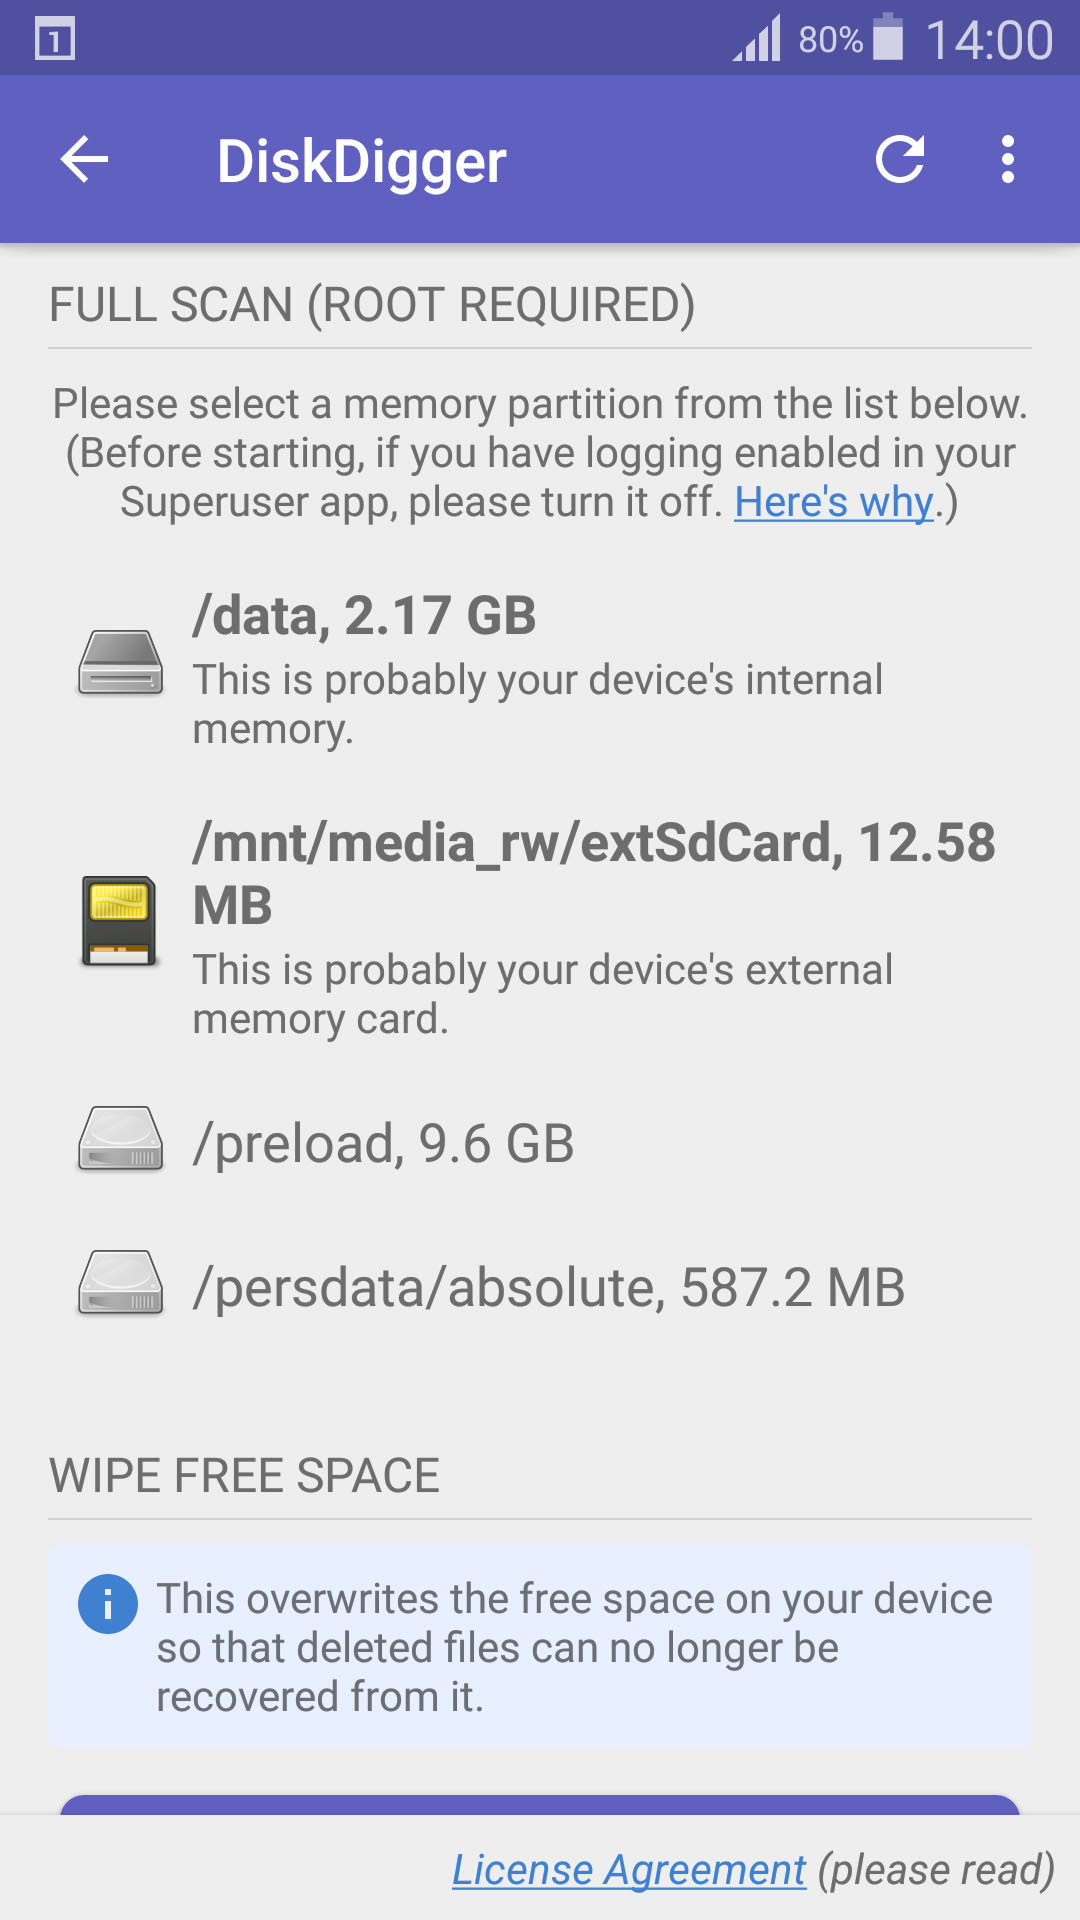 select storage device
 -
Specify File Types (Optional): You can refine the scan by specifying the file types you’re looking for (e.g., JPG, PNG). Tap “OK” to start the scan.
 select file types
 -
Select and Recover Photos: After the scan, DiskDigger will display recoverable photos. Select the photos you want to restore.
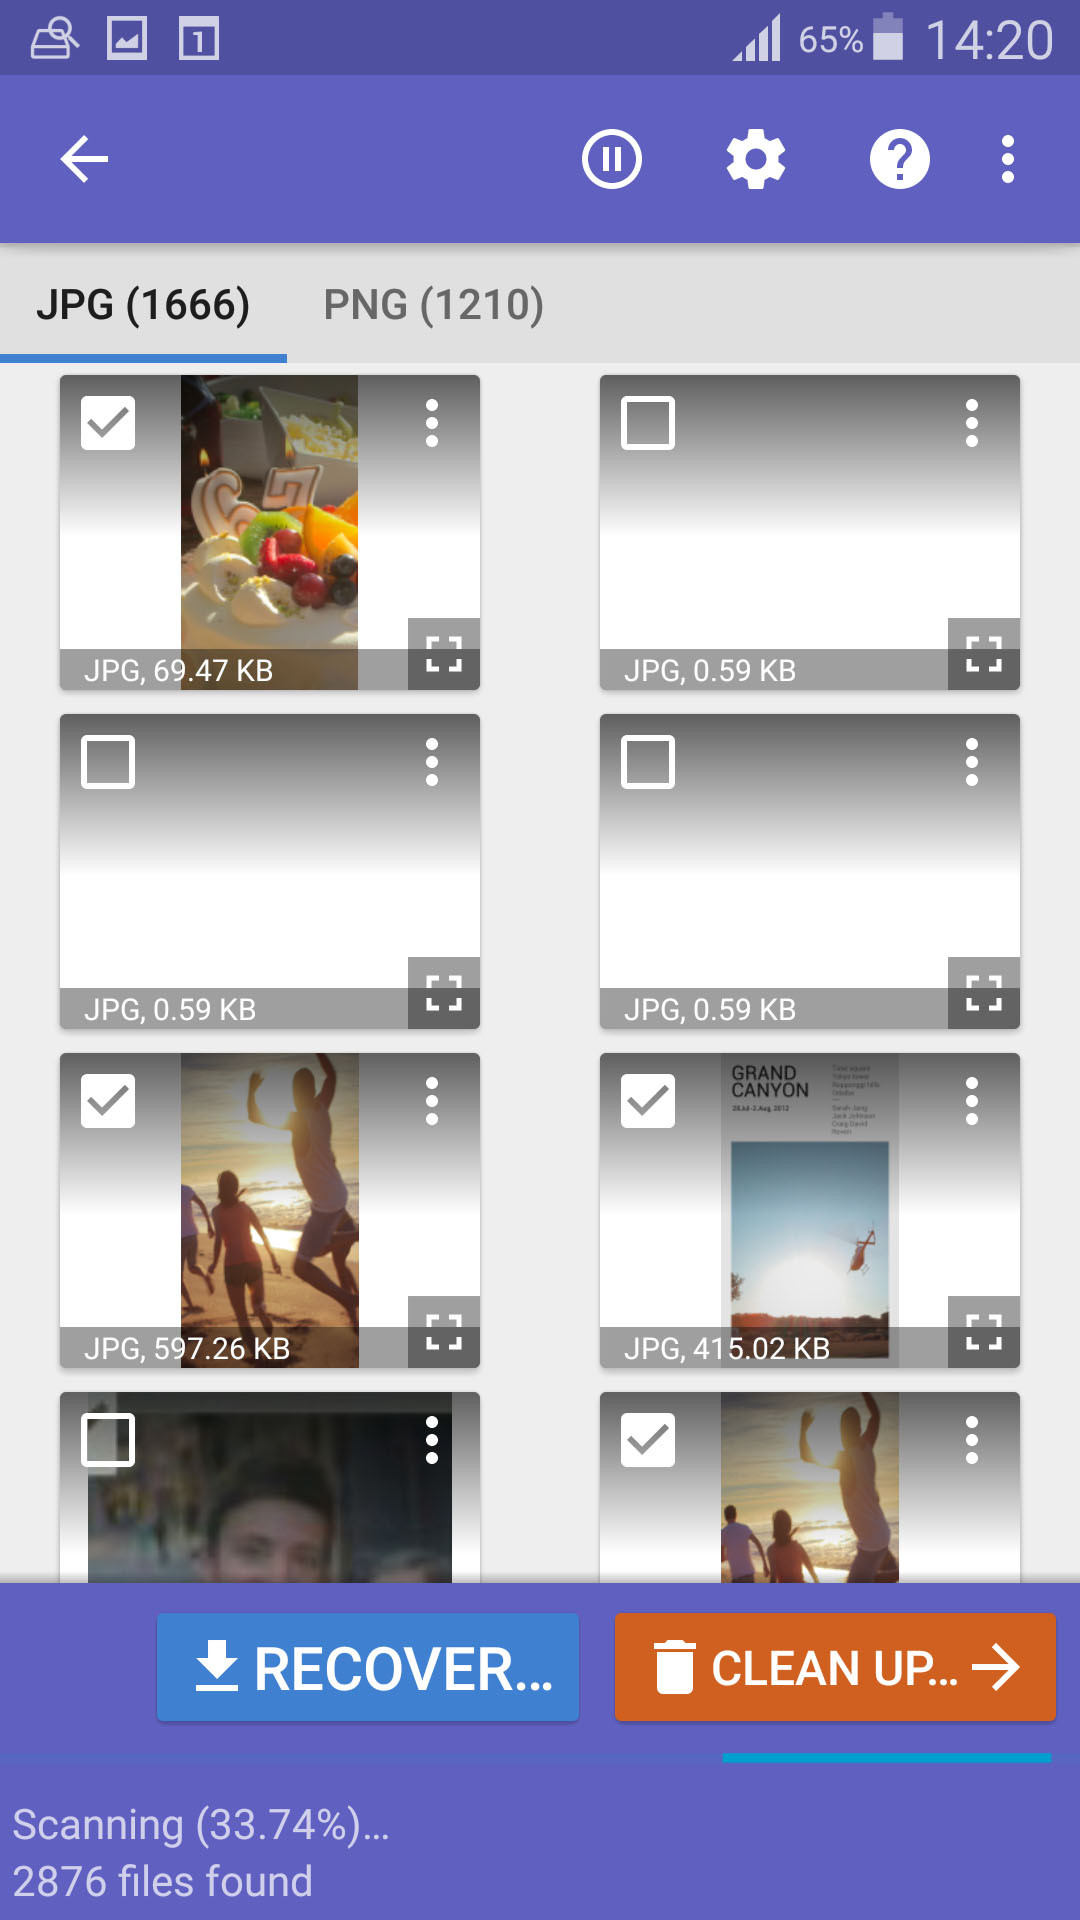 select files for recover
 -
Choose Recovery Destination: Tap the “Recover” button and choose a location to save the recovered photos, ideally on your device’s internal storage or a cloud service.
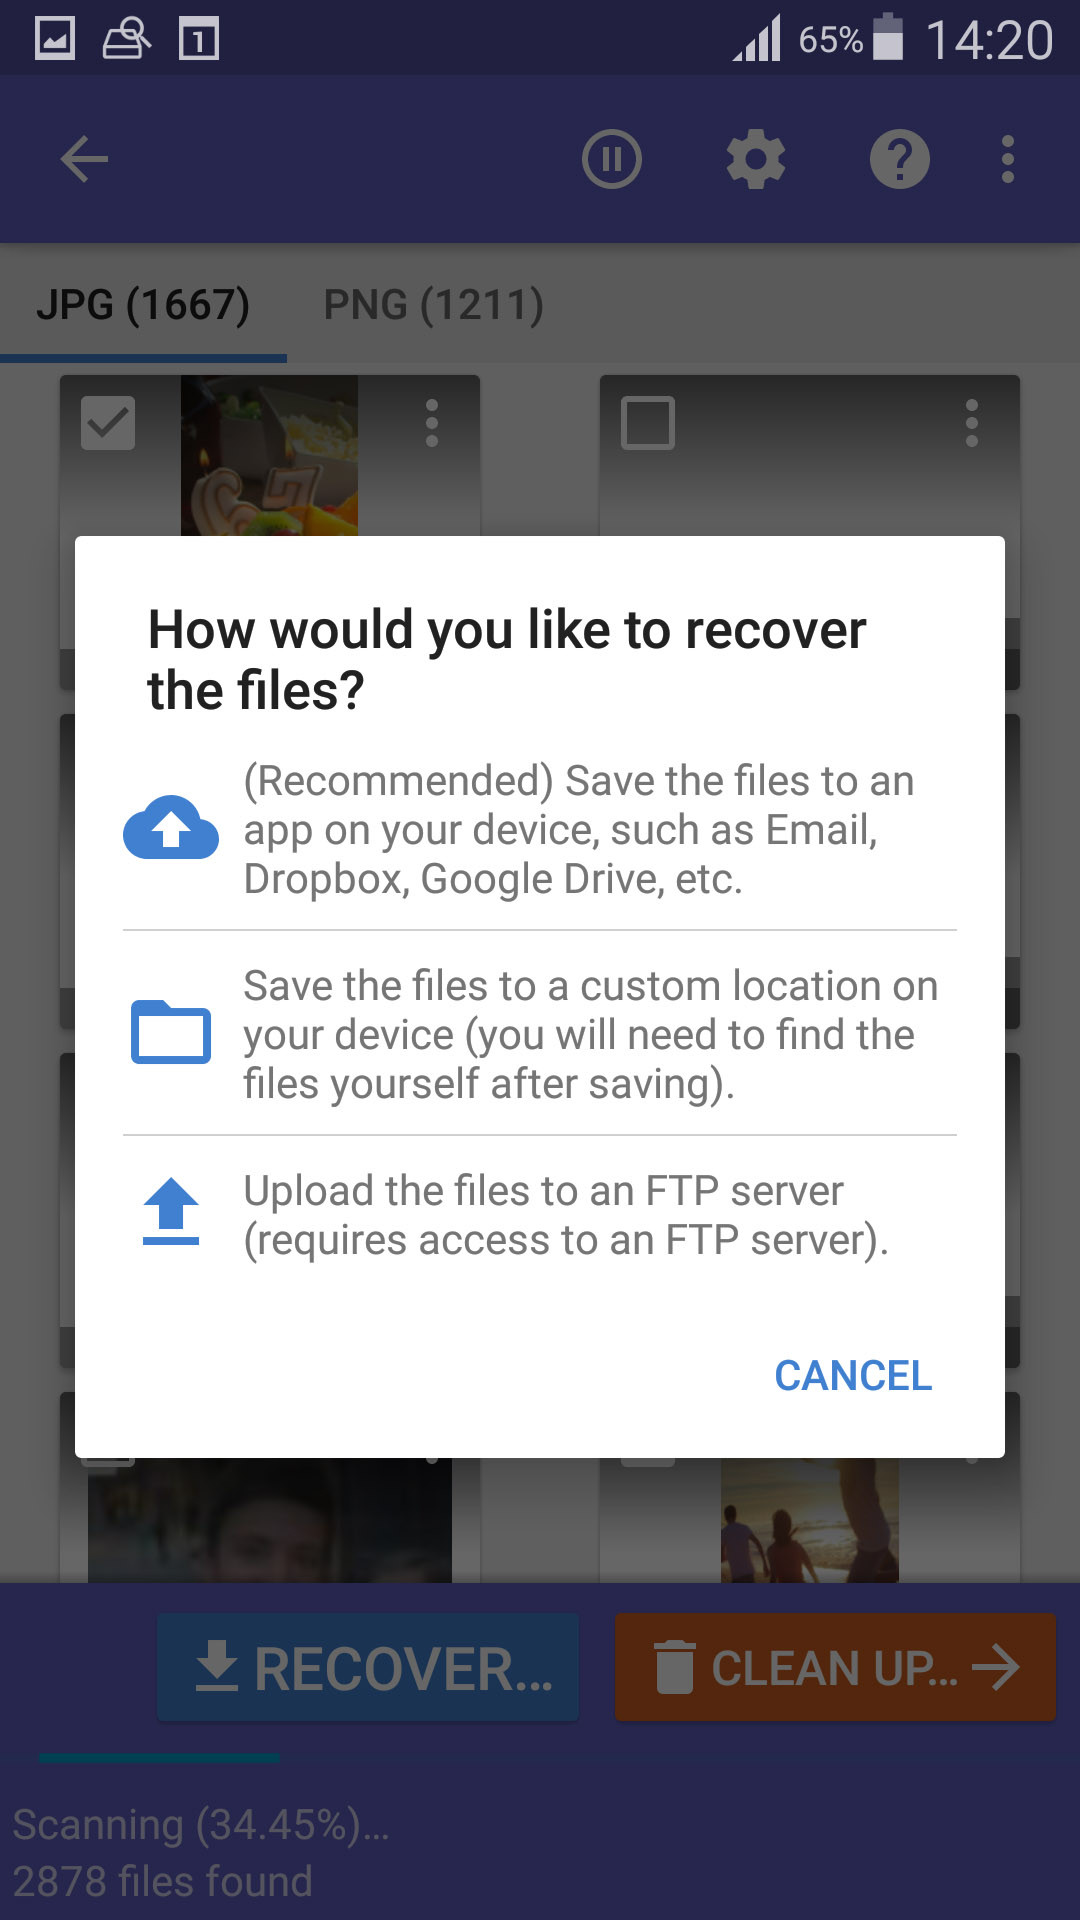 select recover destination
For optimal results with DiskDigger, especially for deeper scans, a rooted Android device and the Pro version of the app are recommended. However, even the free version can be effective for recent photo deletions. Keep in mind that desktop data recovery software like Disk Drill generally provides more robust recovery capabilities.
Method 3: Restoring Photos from a Backup
Regularly backing up your photos is the most proactive measure against data loss. If you have a backup system in place, restoring deleted photos from your SD card becomes a straightforward process.
Retrieving Photos from a Windows Backup
Windows offers the File History feature for automatic backups of your personal files, including those on external drives like SD cards. If you’ve set up File History to back up your SD card photos, you can easily restore them.
-
Open File History: Click the Start button and type “File History,” then select File History.
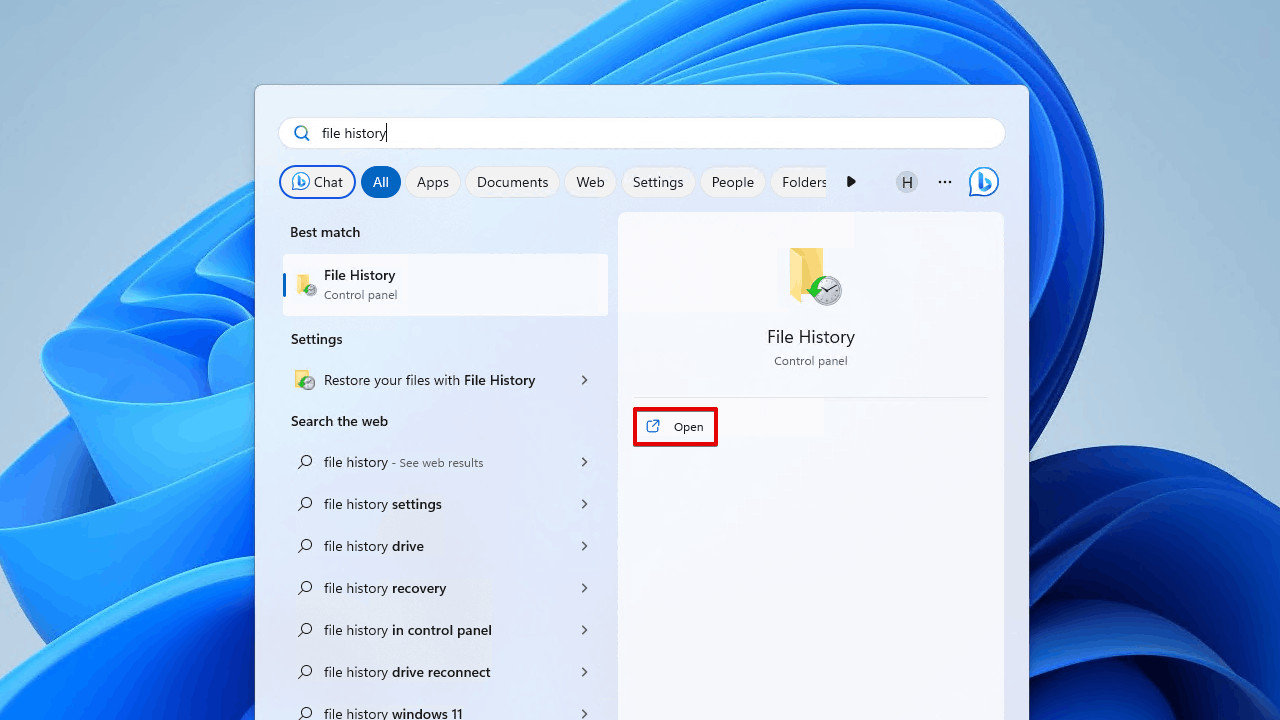 Opening File History.
 -
Restore Personal Files: In the File History window, click “Restore personal files”.
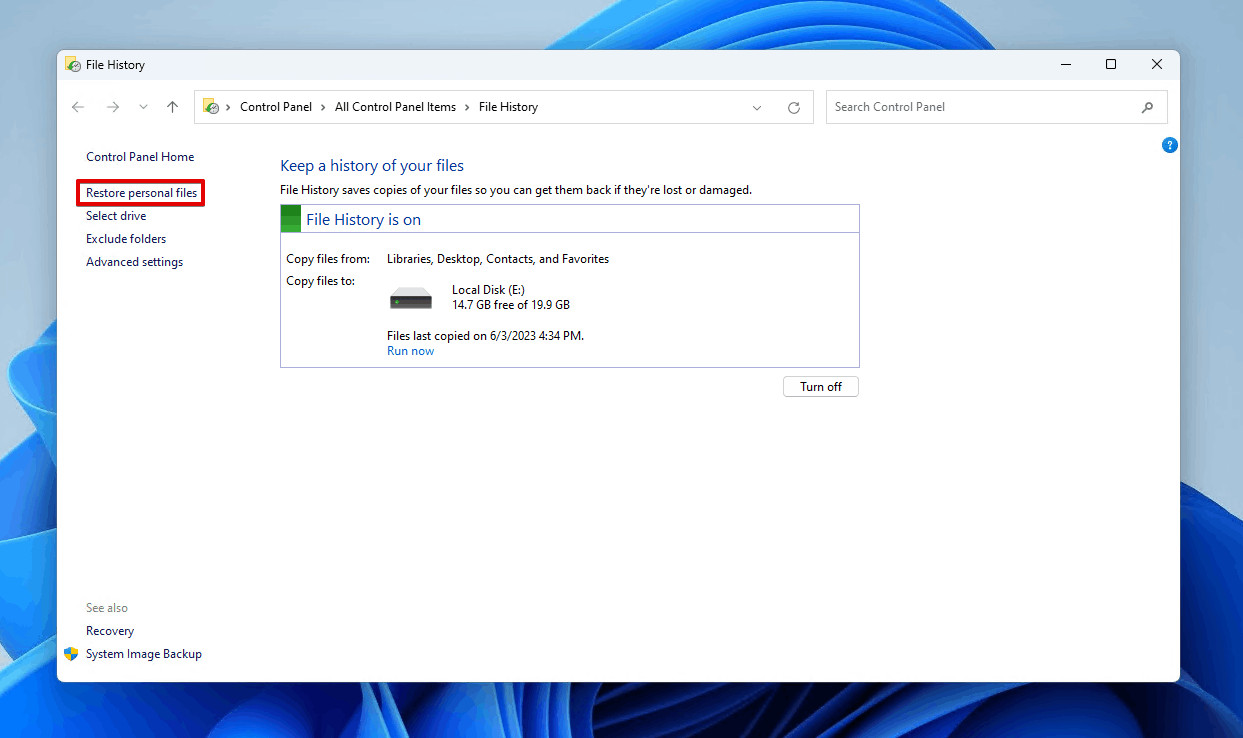 Restoring personal files.
 -
Navigate to Your Photos: Browse through the backed-up folders to find your photos. Use the navigation arrows to go back in time to find versions of your files before deletion. Select the photos you want to restore.
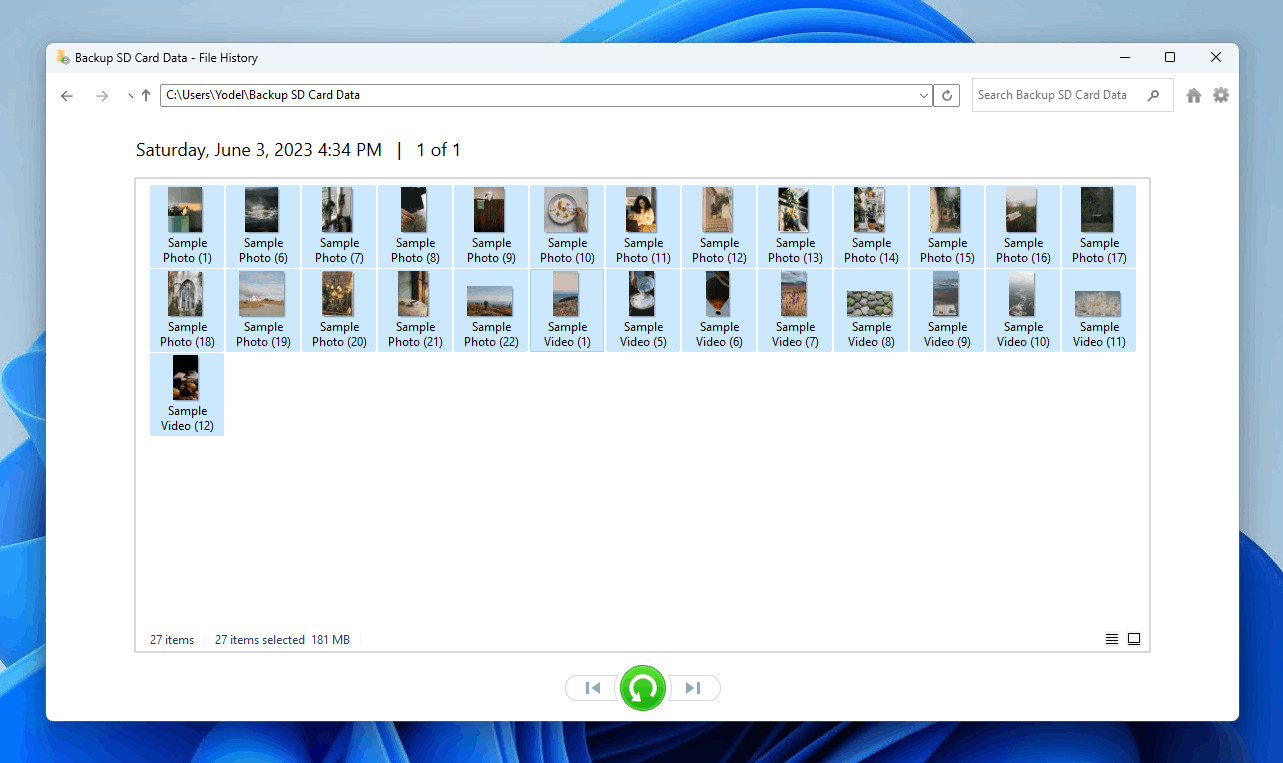 Selecting the SD card photos.
 -
Restore to Original or Custom Location: Click the green “Restore” button. Choose “Restore” to put the photos back in their original location, or “Restore to” to select a different destination.
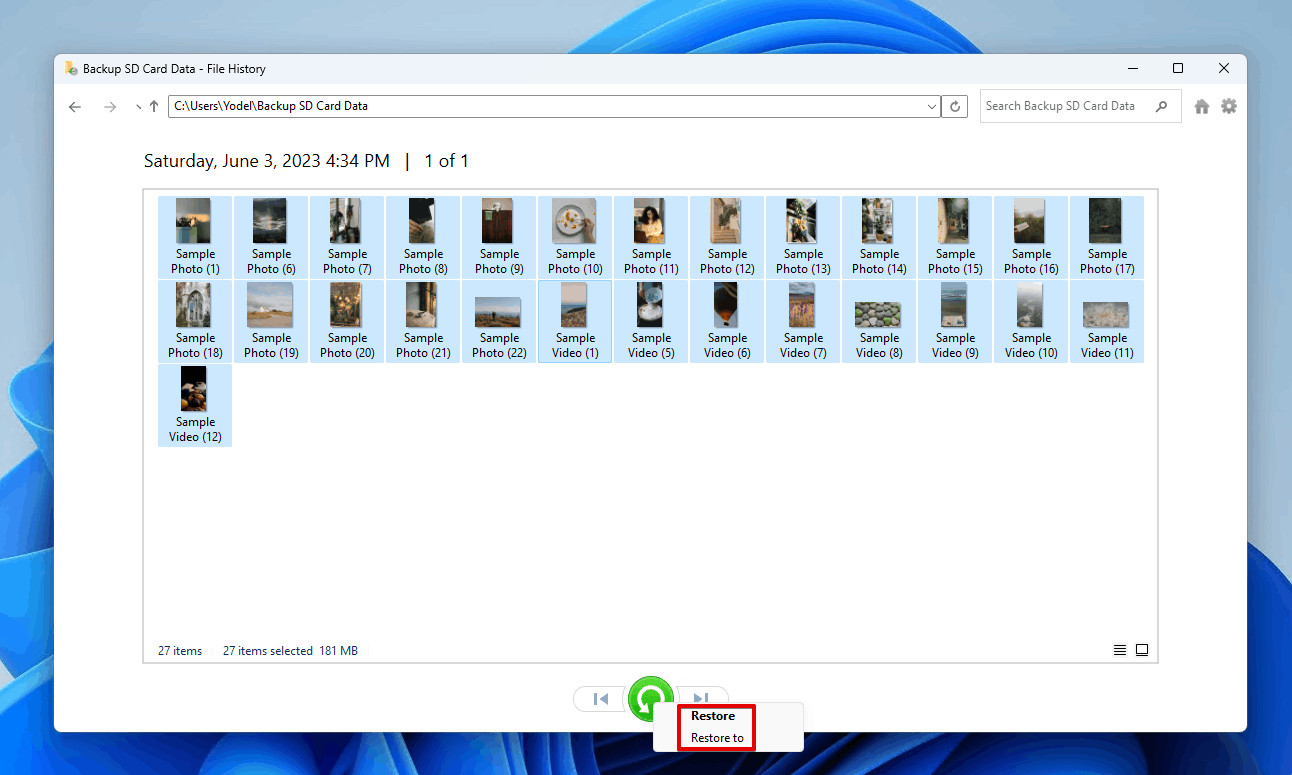 Choosing how to restore the photos.
Alternatively, if you’ve simply copied photos from your SD card to your computer, use File Explorer’s search function to locate them by name or file type.
Retrieving Photos from a Mac Backup
Time Machine is macOS’s built-in backup solution. If you’ve used Time Machine to back up your Mac while your SD card was connected, you can restore deleted photos from the backup.
To restore from Time Machine, you need to have previously connected the SD card to your Mac and included it in your Time Machine backup scope. Refer to Apple’s official guide for detailed steps on using Time Machine.
 time machine
Backups are invaluable, especially in cases of SD card loss or theft, where they might be the only way to recover your photos.
Method 4: Cloud Backup Recovery
Cloud storage services like Google Photos, Dropbox, and OneDrive offer automatic photo backups. If you use these services, your SD card photos might be backed up to the cloud, providing an easy recovery route.
 Recovering from a Cloud Backup
To recover photos from cloud backups, simply access your cloud storage account through a web browser or the service’s app and download the deleted photos. Each service has its own method for file recovery, so consult the service’s help documentation if needed. Cloud recovery is especially convenient as it allows access from any device, even if your original device is lost or damaged.
Method 5: Checking Your Device’s Internal Storage or Temporary Folders
When you delete a photo from an SD card, it’s not instantly physically erased. The space it occupied is simply marked as available for new data. This means the photo might still exist on the SD card until overwritten. Additionally, some devices or apps may create temporary copies of photos in internal storage.
Act quickly: Stop using your device immediately after realizing you’ve deleted photos to prevent overwriting the data.
Check your device’s internal photo storage or “Recently Deleted” folders in photo apps. For example, macOS Photos app and many Android gallery apps have “Recently Deleted” albums where deleted photos are temporarily stored for a period (e.g., 30 days) before permanent deletion.
Method 6: Recovering Photos from the Recycle Bin (Windows) or Trash (macOS)
The Recycle Bin on Windows and Trash on macOS are temporary holding places for deleted files. However, files deleted from external storage devices like SD cards typically DO NOT go to the Recycle Bin or Trash.
Exception (Older macOS): On older macOS versions, deleting files from external drives might have created a hidden .TRASHES folder on the drive itself. To check this, in Finder, navigate to your SD card’s root directory and press CMD + SHIFT + . to show hidden files. If a .TRASHES folder exists, you might find your deleted photos there. This is generally not the case with current macOS versions.
For Windows, data recovery software is generally required for files deleted from SD cards.
Checking the Recycle Bin on Windows (For Files Moved from SD Card to PC)
-
Open Recycle Bin: Double-click the Recycle Bin icon on your desktop.
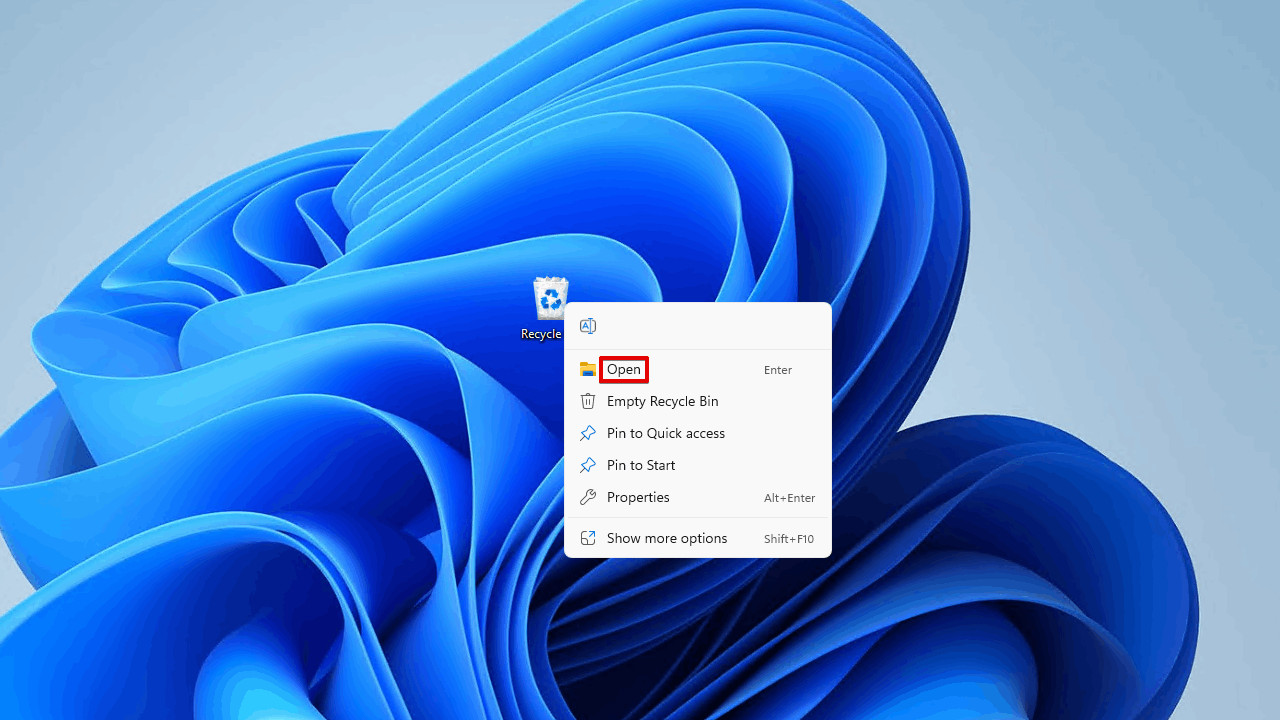 Opening Recycle Bin.
 -
Restore Selected Items: If you find your deleted photos, select them and click “Restore the selected items”.
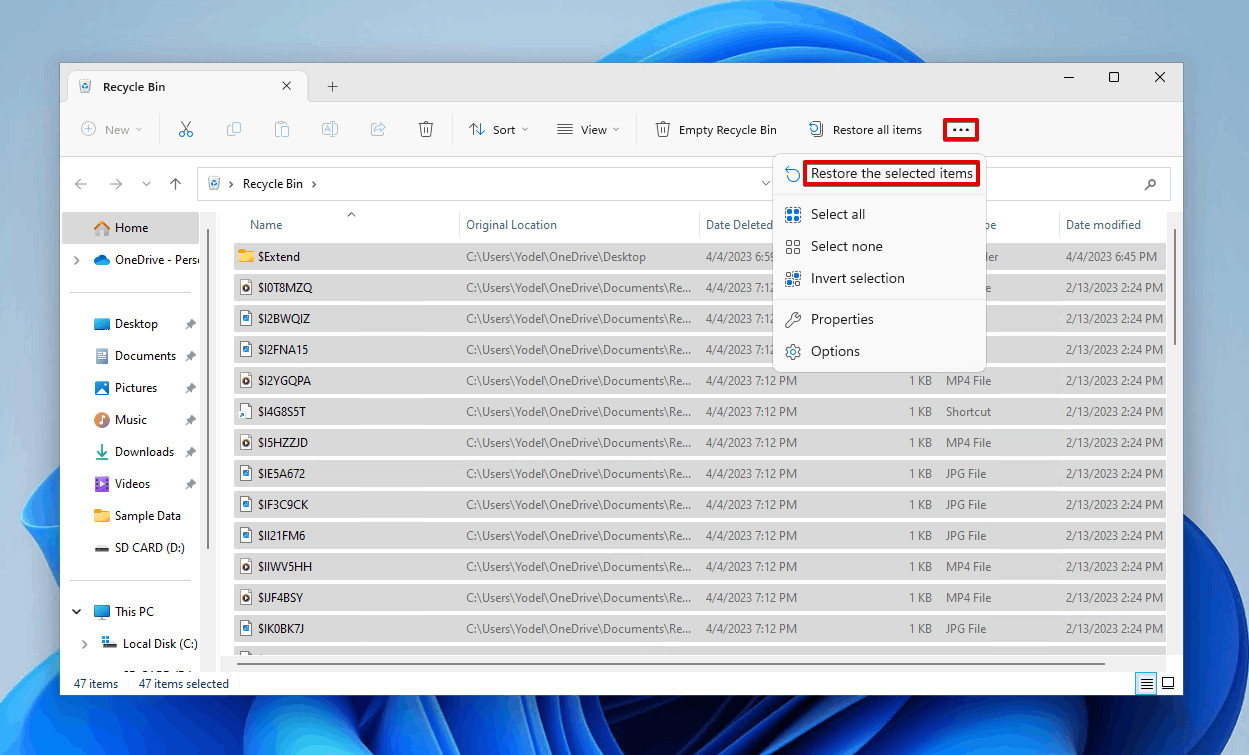 Restoring the selected files.
Checking the Trash on Mac (For Files Moved from SD Card to Mac)
- Open Trash: Open Trash from the Finder dock.
- Drag and Drop to Restore: If you locate your photos, drag and drop them to a desired location on your Mac to restore them.
Conclusion
Recovering deleted photos from an SD card is often achievable using various methods, from data recovery software to backups and temporary storage checks. The best approach depends on the situation and your operating system.
For the most effective recovery, especially in cases of accidental deletion or formatting, data recovery software like Disk Drill is highly recommended. Its free version allows you to preview recoverable files, and Windows users can recover up to 500MB for free. Download Disk Drill for Mac or Disk Drill for Windows to enhance your chances of successful photo recovery.
Further Reading:
- Recover Lost Photos from iPhone
- Recover Permanently Deleted Photos on Mac
- Recover Permanently Deleted Photos From Android
- Best Photo Recovery Software Tools
FAQ
How to recover deleted photos from an SD card?
To recover deleted photos from an SD card:
1. Download and install Disk Drill.
2. Connect the SD card to your computer and launch Disk Drill.
3. Scan the SD card.
4. Select your deleted photos.
5. Recover them to a safe location.
How to recover photos from a corrupted SD card?
That depends on the severity of the corruption. If your computer recognizes the SD card, use SD card recovery software to scan and recover photos. If the SD card is unrecognizable, first attempt to fix the corruption using CHKDSK in Windows or First Aid in macOS.
How can I recover deleted photos from my SD card for free?
You can use free SD card recovery software:
1. Disk Drill (free up to 500 MB on Windows)
2. PhotoRec (Windows, Mac, Linux – command-line)
3. Windows File Recovery (Windows – command-line)
Disk Drill offers a user-friendly interface, while PhotoRec and Windows File Recovery are command-line based.
How to recover deleted photos from memory card without software?
Recovering deleted photos from a memory card without software is generally not possible. Check your backups or device’s internal memory as alternative recovery options.
How to recover deleted photos from an SD card on Android phone?
Download DiskDigger from the Google Play Store and use it to scan your SD card for deleted photos directly on your Android device.
How Do I Recover Photos From a Sandisk SD Card?
1. Download and install Disk Drill on your Mac or Windows PC.
2. Connect the Sandisk SD card and launch Disk Drill. Scan for lost data.
3. Wait for the scan to complete.
4. Preview recoverable files.
5. Select photos to recover.
6. Click “Recover” and choose a safe location.
Can You Recover Photos From a Formatted SD Card?
Yes, photo recovery from a formatted SD card is possible using data recovery software. While full format reduces recovery chances, it’s still worth trying software like Disk Drill. Follow the steps outlined in this guide to scan and recover files.