Transferring photos from your iPhone to your MacBook is a common task for Apple users. Whether you’re a professional photographer, a social media enthusiast, or simply someone who loves capturing memories, knowing how to efficiently move your photos from your iPhone to your MacBook is essential. This guide will walk you through the easiest and most effective methods to get your precious photos onto your MacBook, ensuring they are safe, organized, and ready for editing or sharing.
There are primarily two main methods to transfer your photos: using iCloud Photos for a seamless, wireless experience, or using a USB cable for a direct, manual transfer. Both methods have their advantages, and the best choice for you will depend on your preferences and workflow. Let’s explore each method in detail to help you decide which one suits your needs best.
Method 1: Effortless Wireless Transfer with iCloud Photos
iCloud Photos offers a seamless and automatic way to synchronize your photos and videos across all your Apple devices, including your iPhone and MacBook. When enabled, any photo or video you take on your iPhone is automatically uploaded to iCloud and becomes instantly available on your MacBook, and vice versa. This eliminates the need for manual transfers and ensures your photo library is always up-to-date on all your devices.
Benefits of using iCloud Photos:
- Automatic Synchronization: Photos are automatically uploaded and available on all devices.
- Wireless Convenience: No need for cables or manual transfers.
- Storage Optimization: Option to optimize device storage by keeping full-resolution originals in iCloud and device-optimized versions on your devices.
- Organization and Edits Synced: Any edits or organizational changes you make are reflected across all devices.
How to set up iCloud Photos:
-
On your iPhone: Open the Settings app.
-
Tap on your Apple ID name at the top.
-
Select iCloud.
-
Tap on Photos.
-
Toggle iCloud Photos to the On position.
 Accessory prompt to allow or don’t allow accessory to connect.
 -
On your MacBook: Open the Photos app.
-
From the menu bar at the top of your screen, choose Photos > Settings (or Preferences in older macOS versions).
-
Click the iCloud tab.
-
Select the checkbox next to iCloud Photos to turn it on.
Important Considerations for iCloud Photos:
- iCloud Storage: iCloud Photos uses your iCloud storage. Ensure you have enough storage to accommodate your entire photo and video library. You can check your storage and upgrade your iCloud plan if needed within the iCloud settings on both your iPhone and MacBook.
- Initial Sync Time: The initial synchronization might take some time, especially if you have a large photo library. Ensure both your iPhone and MacBook are connected to Wi-Fi and plugged into power for a smoother process.
Method 2: Manual Import via USB Cable to Your MacBook
For those who prefer a direct and manual approach, or if you have a limited iCloud storage plan, transferring photos using a USB cable is a reliable method. This method allows you to selectively choose which photos and videos to import to your MacBook.
Step-by-step guide for USB transfer:
-
Connect your iPhone to your MacBook: Use a USB cable to connect your iPhone to one of the USB ports on your MacBook.
-
Unlock your iPhone and Trust This Computer: If prompted on your iPhone screen, unlock your device using your passcode and tap Trust to allow your MacBook to access your device’s data.
-
Open the Photos App on MacBook: The Photos app on your MacBook should automatically launch and display an Import screen. If it doesn’t, manually open the Photos app from your Applications folder or Launchpad, and then click on your iPhone’s name in the sidebar.
-
Select Photos to Import: The Import screen will display all the new photos and videos on your iPhone that haven’t been imported yet. You can choose to:
- Import All New Photos: Click the Import All New Photos button to import all new items.
- Import Selected Photos: Select individual photos and videos you want to import by clicking on them, and then click Import Selected.
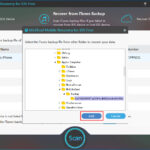
 Mac screen showing the photos available for import
 -
Choose Import Destination (Optional): Before importing, you can choose an album to import your photos into. Next to Album, you can select an existing album from the dropdown menu or create a New Album to organize your imported photos.
-
Wait for Import to Finish: The import process will begin. The time it takes will depend on the number and size of photos and videos you are transferring.
-
Disconnect Your iPhone: Once the import is complete, you can safely disconnect your iPhone from your MacBook.
Conclusion
Transferring photos from your iPhone to your MacBook is a straightforward process, thanks to Apple’s user-friendly ecosystem. Whether you opt for the convenience of iCloud Photos for automatic wireless syncing or the direct control of USB cable import, you can easily get your photos onto your MacBook for editing, backup, or sharing.
For users who want a truly seamless and hands-off approach, iCloud Photos is the recommended method. However, if you prefer manual control over your photo transfers or have concerns about iCloud storage, using a USB cable and the Photos app provides a reliable alternative. Choose the method that aligns best with your workflow and enjoy your photos on your MacBook!