Managing your photo library on a Mac often involves wanting to keep some images private. Whether it’s personal documents, photos you’re not ready to share, or just to declutter your main view, macOS offers a built-in feature to hide photos. This guide will show you exactly How To Access Hidden Photos On Mac, ensuring you know where your private images are stored and how to view them whenever you need to.
Apple’s Photos app provides a straightforward way to hide photos and videos, moving them to a ‘Hidden’ album. For enhanced privacy, especially in macOS Ventura and later, this Hidden album is locked by default, requiring authentication to access. This ensures that your hidden photos remain secure and are not easily viewable by others using your Mac. If you’re wondering how to find hidden photos on your Mac, you’re in the right place. Let’s dive into the steps.
Step-by-Step Guide to Finding Your Hidden Photo Album on Mac
The key to accessing your hidden photos is knowing where to look for the ‘Hidden’ album within the Photos application on your Mac. Here’s a detailed guide:
-
Open the Photos Application: The first step is to launch the Photos app on your Mac. You can find it in your Applications folder or by searching for “Photos” using Spotlight Search (Command + Spacebar).
-
Navigate to the View Menu: Once Photos is open, look at the menu bar at the top of your screen. Click on “View”.
-
Select “Show Hidden Photo Album”: In the dropdown menu under “View”, you will see an option that says “Show Hidden Photo Album”. Click on this.
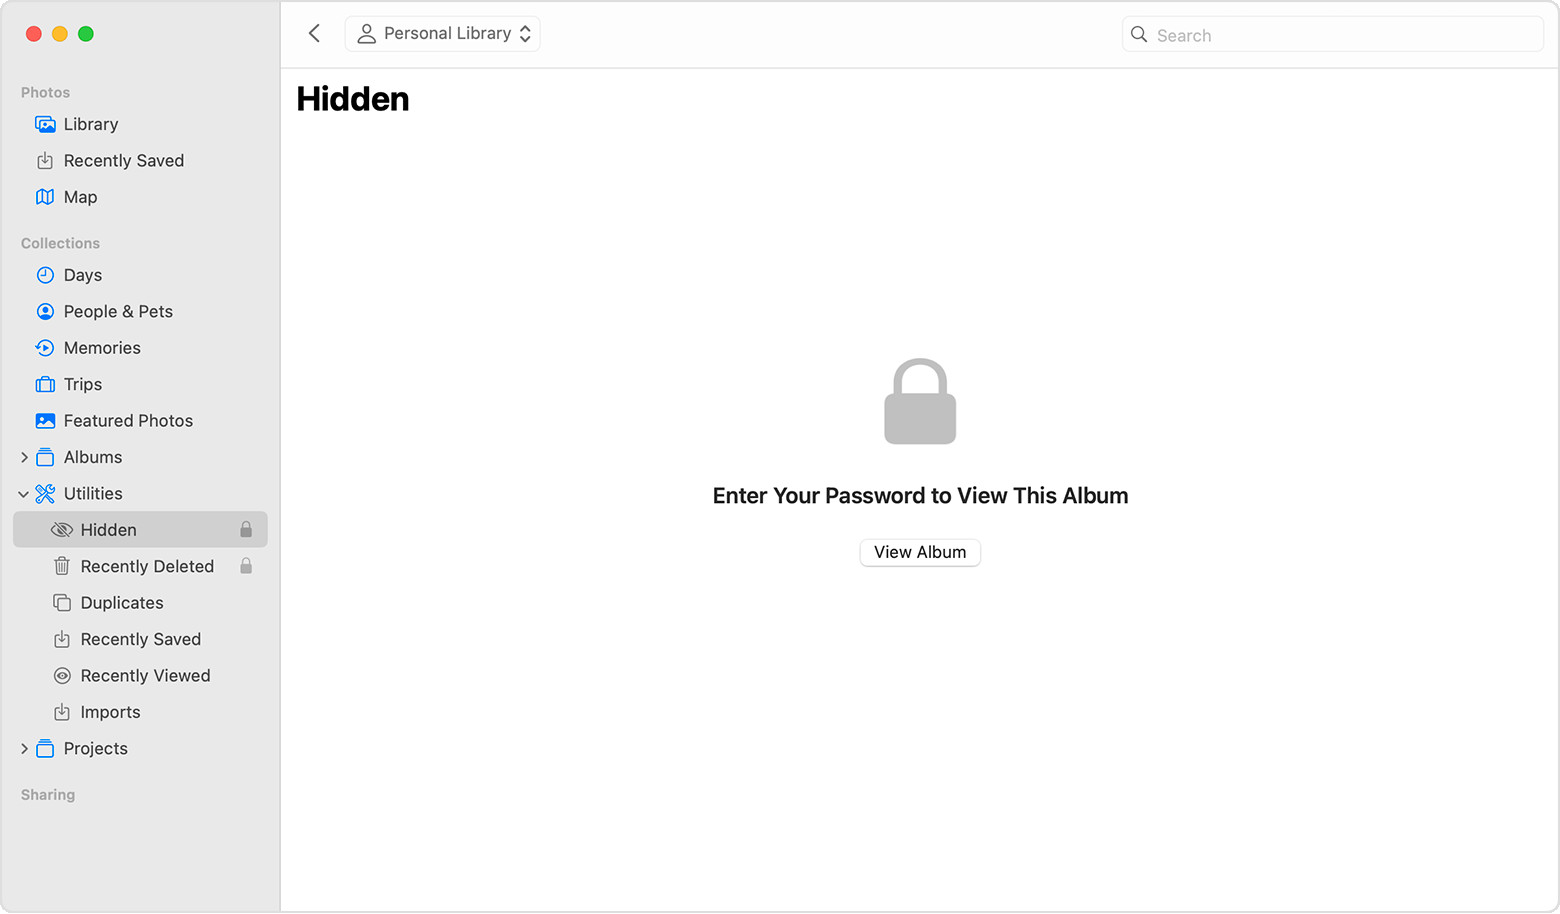 Hidden album highlighted in MacOS Photos app.
 -
Access the Hidden Album in the Sidebar: After selecting “Show Hidden Photo Album”, a ‘Hidden’ album will appear in the sidebar of the Photos app, usually located under the ‘Photos’ section.
-
Unlock the Hidden Album: Click on the ‘Hidden’ album. You might be prompted to unlock it using Touch ID or your Mac login password. This security feature ensures that only authorized users can access hidden photos on Mac.
-
View Your Hidden Photos: Once unlocked, you will be able to see all the photos and videos you have previously hidden.
How to Hide Photos on Your Mac: A Quick Recap
Before accessing hidden photos, you might need to hide some first! Here’s how to hide photos on your Mac:
- Open Photos: Launch the Photos app.
- Select Photo(s): Choose the photo or video you want to hide.
- Control-Click or Use Menu Bar: Control-click on the selected photo, then choose “Hide Photo”. Alternatively, you can go to the menu bar, click “Image”, and then “Hide Photo”. You can also use the keyboard shortcut Command-L.
- Confirm Hiding: Confirm that you want to hide the selected photo or video when prompted.
How to Unhide Photos on Your Mac
If you’ve accessed your hidden photos and decided you want to make some of them visible again in your main library, here’s how to unhide them:
- Access the Hidden Album: Follow the steps above to access hidden photos on your Mac and open the ‘Hidden’ album.
- Select Photo(s) to Unhide: Choose the photo or video you want to unhide.
- Control-Click or Use Menu Bar: Control-click on the selected photo and choose “Unhide Photo”. Alternatively, go to the menu bar, click “Image”, and then “Unhide Photo”. The keyboard shortcut Command-L also works for unhiding.
Understanding the Hidden Album on Mac
The Hidden album on Mac is designed to give you control over the visibility of your photos. Here are a few key things to understand:
- Default Off: Unlike on iPhone and iPad, the Hidden album is off by default on Mac. This means you need to actively choose to show it to view your hidden photos.
- Security: In newer macOS versions, the Hidden album is locked by default, providing an extra layer of security for your private images.
- iCloud Sync: If you use iCloud Photos, hiding photos on your Mac will also hide them on your other Apple devices connected to the same iCloud account, and vice versa.
By following these steps, you can easily manage your photo privacy on your Mac. Knowing how to access hidden photos on Mac ensures you have full control over your digital memories and personal images.
Bonus Tip: Hiding Photos on iPhone and iPad
While the main focus is on Mac, if you also use an iPhone or iPad, here’s a quick guide to hiding and accessing hidden photos on these devices:
Hiding Photos on iPhone or iPad:
-
Open Photos App.
-
Tap and hold the photo or video.
-
Tap Hide, then confirm.
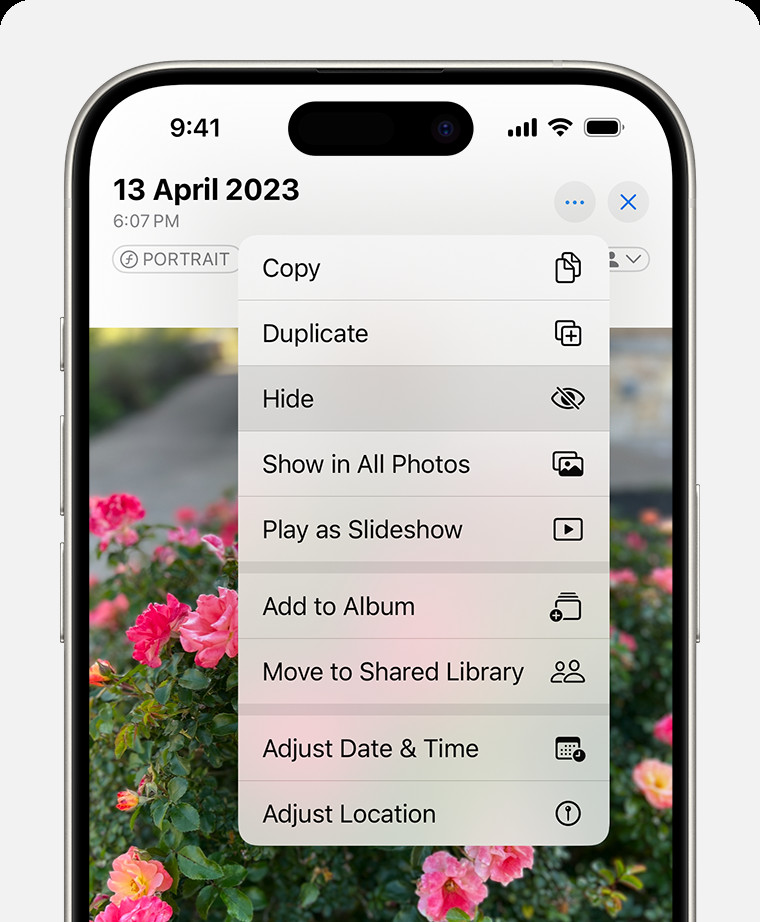 Dropdown menu highlighting the Hide feature feature for a photo.
Accessing Hidden Album on iPhone or iPad:
-
Open Photos App.
-
Scroll down to Utilities and tap Hidden.
-
Use Face ID or Touch ID to unlock.
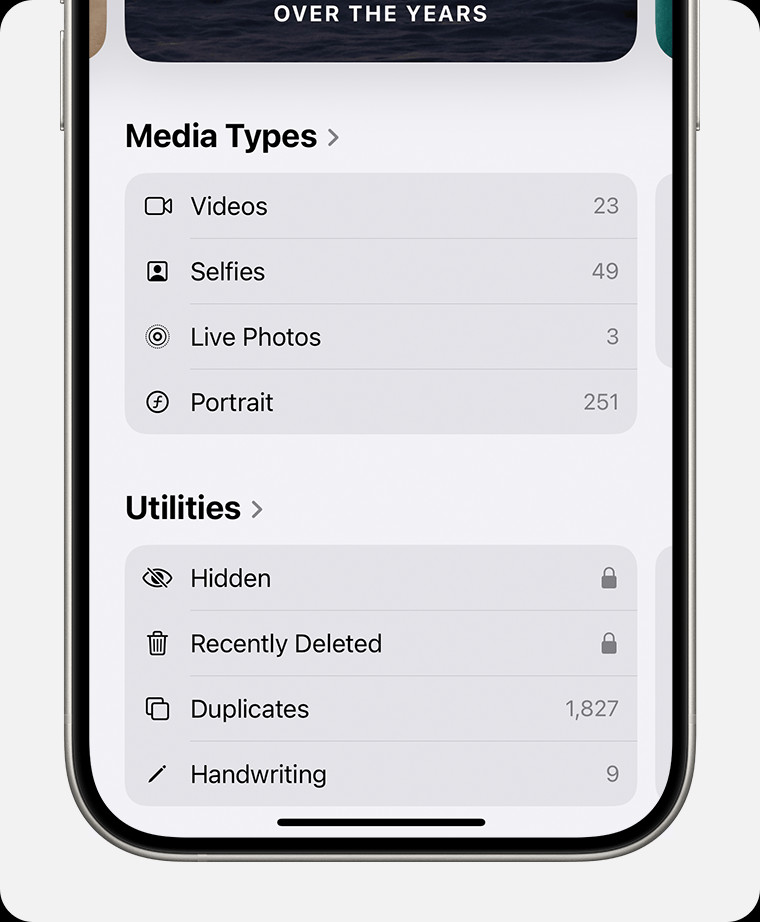 Hidden album highlighted under Utilities.
Understanding how to access hidden photos on Mac and across your Apple devices helps you maintain privacy and organize your photo library effectively. Whether for personal reasons or professional needs, these features provide valuable control over your visual content.
