Chromebooks are known for their simplicity and speed, making them perfect for everyday tasks, including browsing the web and finding great images. Whether you’ve stumbled upon the ideal GIF for your next online chat or want to save a stunning photo to personalize your desktop, Chromebooks make it easy to download and store these images.
Using the built-in storage of your Chromebook, saving images for later use is a straightforward process. This guide will walk you through the simple steps on How To Download A Photo On A Chromebook and keep it for offline access or any creative project you have in mind. Let’s get started!
Step-by-Step Guide to Saving Images
-
Open Chrome Browser
First things first, you need to launch the Chrome browser on your Chromebook. It’s usually pinned to your shelf at the bottom of the screen, marked by the distinctive Chrome icon. Click on it to open a new Chrome window. This is your gateway to the internet and all the images you can find online.
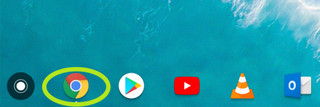 Google Chrome browser icon on a Chromebook
 -
Find Your Desired Image Online
Navigate to the website or web page that contains the image you wish to download. This could be anything from a social media post, a blog article, or an online image gallery. For this example, we’ll imagine you’ve found a captivating photo on a blog that you want to save.
 Example image to download from a webpage
 -
Right-Click on the Image and Select “Save Image As…”
Once you’ve located the image, the next step is to right-click on it. On a Chromebook touchpad, you can easily right-click by tapping or clicking with two fingers simultaneously. After right-clicking, a context menu will appear. From this menu, select the option that says “Save image as…” This action will prompt your Chromebook to prepare for downloading the image.
 Right-click menu showing 'Save image as…' option on Chromebook
 -
Rename Your Image (Optional)
A small window will pop up, allowing you to choose where to save the image and to rename the file if you wish. The default file name is often a string of numbers and letters, but you can give your image a more descriptive name at this stage. Renaming your image can make it easier to find and organize later, especially if you plan to download many photos.
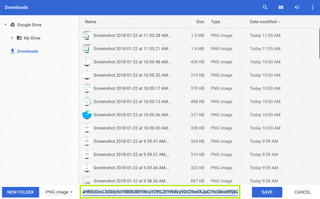 File name input field in the 'Save image as' dialog box on Chromebook
 -
Click the “Save” Button
After renaming (or deciding to keep the default name), simply click the “Save” button in the bottom right corner of the window. By default, your Chromebook saves downloaded images to the “Downloads” folder within your Files app. The download should be almost instantaneous, and you’ll see a confirmation at the bottom of your Chrome browser window.
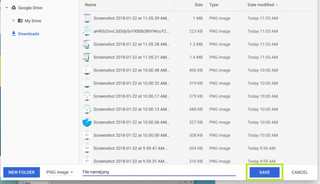 Save button in the 'Save image as' dialog on Chromebook
Accessing Your Downloaded Photos
-
Click “Show In Folder” for Quick Access
Once the image is downloaded, a “Download complete” bar will appear at the bottom of your Chrome window. On this bar, you’ll find a “Show in folder” button. Clicking this button is the quickest way to see the image you just saved. It will automatically open the Files app and highlight your newly downloaded photo within the Downloads folder.
-
Find Your Image in the Files App
Alternatively, you can access all your downloaded images at any time through the Files app. Look for the Files app icon in your app launcher (it resembles a folder). Open it, and on the left sidebar, you’ll see “Downloads.” Click on “Downloads” to view all the files you’ve downloaded, including your newly saved image. From here, you can manage your image – view it, rename it, move it to Google Drive, copy it to a USB drive or SD card, and much more. Simply right-click on the image file within the Files app to see the available options.
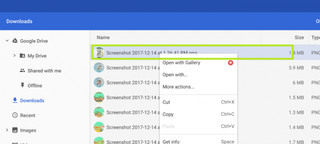 Downloaded image highlighted in the Files app on Chromebook
Downloading photos on a Chromebook is a fundamental skill that unlocks a lot of potential for personalizing your device and saving important visuals. With these easy steps, you can effortlessly save any image you find online and manage them directly from your Chromebook.