Have you ever wanted to personalize your home décor or create a truly unique gift? Mod Podge photo transfer to wood is a fantastic technique that lets you infuse your favorite images into rustic wood surfaces. While you might have encountered tutorials before, or even tried this craft with mixed results, this guide unveils a foolproof method to ensure your photo transfers are not only beautiful but also effortlessly achieved. Forget frustrating paper rubbing and smudged images – discover the secret to seamless photo to wood projects.
For those who love to customize and create, transferring photos onto various surfaces is incredibly appealing. Through experimentation and a bit of crafting magic, we’ve perfected a mod podge photo transfer technique that is faster, simpler, and virtually mistake-proof. Get ready to transform ordinary wood into cherished keepsakes!
The Secret to a Stress-Free Photo Transfer
The concept is straightforward: begin with a color laser print of your chosen photo and a piece of wood – be it a plank or pallet. Apply a layer of Mod Podge to the wood, position the photo face-down, and allow it to dry. The magic happens when you dampen the paper and gently rub it away, revealing the transferred image beautifully embedded onto the wood, with the natural grain subtly showing through. It’s a truly captivating effect!
However, the traditional method often comes with a catch: the delicate process of removing the paper. Rubbing too vigorously can easily smudge or remove the transferred ink, leading to frustration and potentially ruining your hard work. Many crafters have experienced the heartache of accidentally erasing a crucial part of their image while trying to remove the paper. But don’t worry, we have a simple yet game-changing trick to eliminate this common problem.
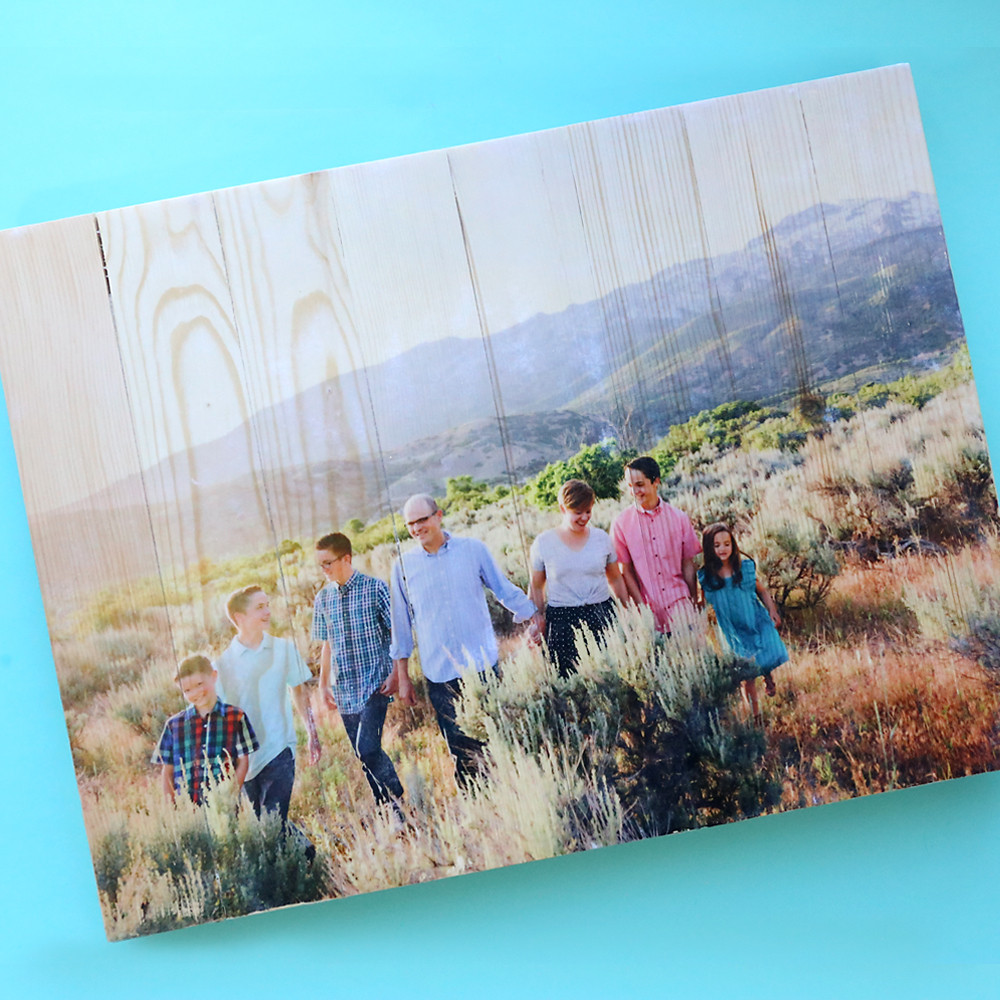 Photo transferred to a wood pallet, showcasing a clear image with wood grain visible underneath.
The 72-Hour Trick: Your Key to Success
Most tutorials advise a drying time of approximately 8 hours before you start removing the paper. However, our breakthrough lies in extending this drying period significantly. By allowing the Mod Podge to dry for a full 72 hours, the ink from your photo bonds much more permanently to the wood. This extended drying time dramatically changes the paper removal process. When you begin to rub away the paper fibers, you can work with greater speed and confidence, minimizing the risk of damaging your transferred image.
This simple adjustment makes the entire project significantly easier and faster. For example, removing all the paper from a large 12×16 inch wood pallet took only about 45 minutes – the length of a single episode of your favorite TV show! This is a small time investment for a personalized piece of art you can proudly display.
Gather Your Supplies: What You’ll Need
Before you begin, gather these essential supplies to ensure a smooth and successful mod podge photo transfer project:
- Wood Surface: Choose your preferred wood piece. Options include a plain wood plank, a rustic wood slice, or pallet-style wood for a trendy look. This technique is also versatile enough to work on canvas. A 12×16 inch wood pallet, readily available at craft stores or retailers like Walmart, is a great starting size. Remember to sand the wood until smooth and wipe away any dust for optimal adhesion.
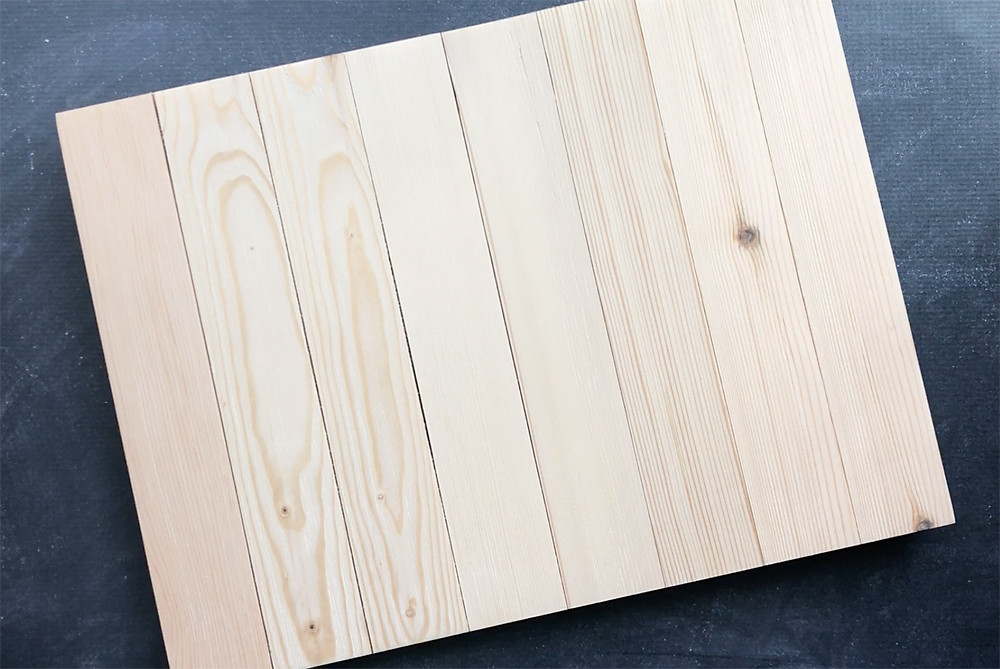 An unfinished wood pallet sign, ready to be used for photo transfer.
-
Laser Print of Your Photo: This is crucial! You’ll need a laser print of your image on regular printer paper, not photo paper. The image must also be reversed before printing (mirror image). Most local copy shops (like Kinko’s or Office Max) offer color laser printing on standard paper in sizes up to 13×19 inches. Check their capabilities to match your wood piece size. Crop your photo to fit your wood dimensions before sending it to print. Important Laser Print Specifications:
- Laser printer or laser color photocopy only.
- Regular printer paper (essential for paper removal).
- Reversed image (mirror image).
- Size matched to your wood piece.
- Note: Inkjet prints or actual photographs will not work with this method.
-
Mod Podge Matte: While some wood photo transfer methods suggest gesso or gel mediums, standard Mod Podge Matte is perfect for this technique. It’s easily accessible at craft stores and most large retailers.
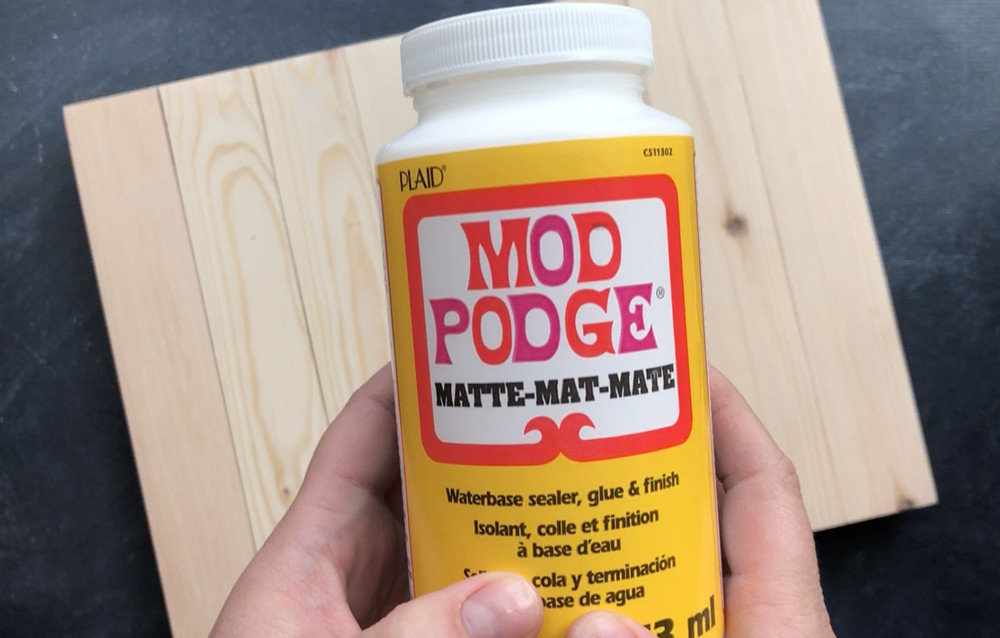 A bottle of matte Mod Podge, the essential medium for photo transfer.
* **Important Note on Mod Podge:** While a specific Mod Podge Photo Transfer medium exists, we recommend using regular Mod Podge Matte. Photo Transfer Mod Podge transfers the whites in your photo as opaque white, whereas regular Mod Podge allows the white areas of your photo to become clear, letting the wood grain show through beautifully in the lighter parts of your image. This creates a more integrated and rustic look.- Foam Brush: For applying Mod Podge smoothly and evenly.
- Credit Card or Brayer: To smooth the photo onto the wood and eliminate air bubbles.
- Spray Bottle or Sponge: To dampen the paper during the removal process.
- Water: For paper removal.
- Protective Surface Cover: Newspaper or a plastic tablecloth to protect your work area.
Step-by-Step Tutorial: Mod Podge Photo Transfer to Wood – The Foolproof Method
Follow these detailed steps to create your own stunning mod podge photo transfer artwork:
Step 1: Prepare Your Wood Surface
Ensure your wood surface is smooth by sanding it lightly. Wipe away all dust with a clean cloth to ensure proper Mod Podge adhesion.
Step 2: Apply Mod Podge
Protect your workspace. Apply a generous, even layer of Mod Podge Matte to the wood surface using a foam brush. Ensure the entire area where the photo will be placed is fully covered. Don’t be skimpy – use enough Mod Podge to create a good bond.
Step 3: Adhere Your Photo
Immediately place your laser-printed photo face down onto the Mod Podge-covered wood. Carefully align it as desired. Use a credit card or brayer to smooth the photo firmly, working from the center outwards to eliminate any air bubbles and ensure complete contact with the Mod Podge. Wipe away any excess Mod Podge that squeezes out from the edges with a damp cloth.
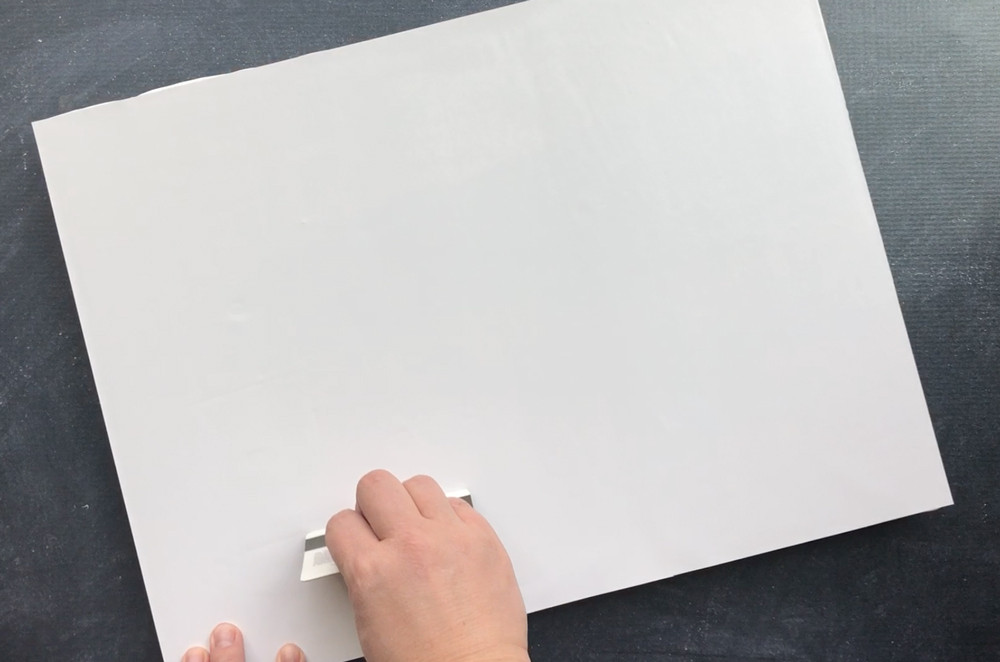 A hand using a credit card to smooth a photo onto a wood surface coated with Mod Podge.
Step 4: The 72-Hour Wait – The Secret to Success
This is the most critical step for a frustration-free transfer: Allow the Mod Podge to dry completely for 72 hours. This extended drying time ensures the ink is permanently transferred to the wood, making the paper removal process significantly easier and less risky. Set a timer or reminder to ensure you wait the full 72 hours.
Step 5: Reveal Your Image – Paper Removal
After the 72-hour drying period, it’s time to reveal your transferred image. Begin by lightly spraying the back of the paper with water or gently dampening it with a wet sponge. As the paper absorbs the water, you’ll start to see your photo image faintly appearing through the paper.
Start gently rubbing the paper with your fingertip or a soft, damp cloth. The paper fibers will begin to pill and roll away. Continue rubbing gently to peel away the top layers of paper.
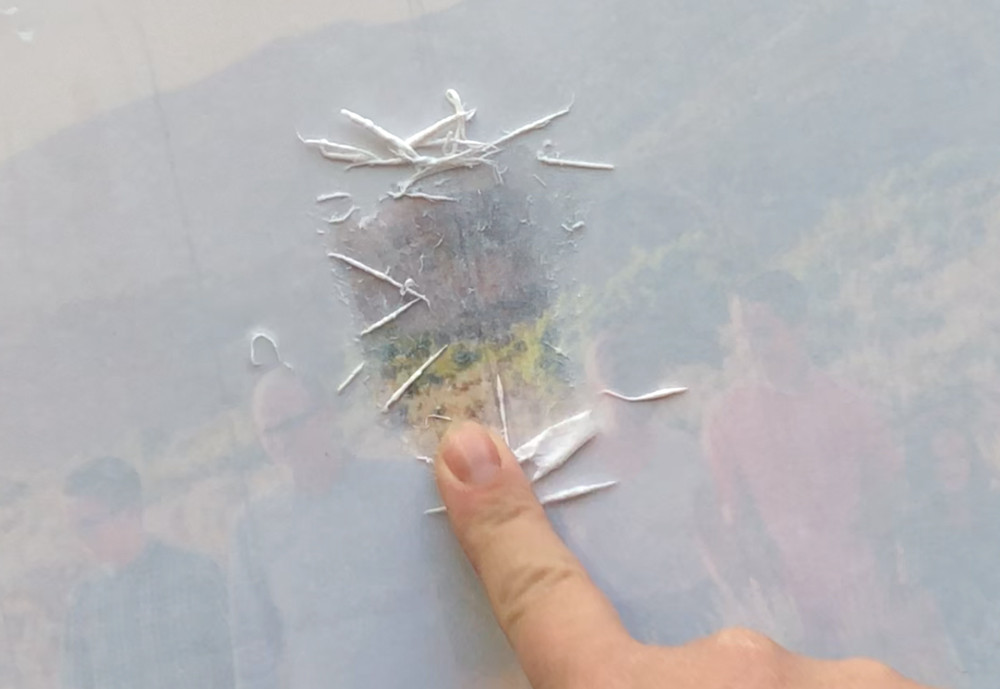 A finger gently rubbing wet paper fibers to reveal the photo image underneath during the transfer process.
As the paper dries, it will become opaque again, indicating areas where paper fibers still remain. Re-wet these hazy areas and continue rubbing gently. Repeat this wetting and rubbing process in sections, 3-4 times, until all the paper fibers are removed and your photo is clearly visible. Be patient and gentle during this stage. If you rub too hard, you might risk removing some of the transferred ink, even with the 72-hour drying time.
Step 6: Seal and Protect
Once all paper fibers are removed and your transferred photo is clear and dry, the final step is to seal and protect your artwork. Apply a thin, even coat of Mod Podge Matte over the entire image and the surrounding wood surface. This seals the transfer, enhances the image clarity, and provides a protective finish. Allow this final coat of Mod Podge to dry completely.
Your personalized mod podge photo transfer to wood is now complete and ready to display or gift!
Tips for Perfect Photo Transfers Every Time
- Laser Print is Key: Always use a laser print for successful ink transfer. Inkjet prints will smudge and not transfer properly.
- The 72-Hour Wait is Worth It: Don’t rush the drying time. The 72-hour wait is crucial for a stress-free paper removal process and a durable transfer.
- Gentle Rubbing: Be gentle when removing paper fibers. Patience and light rubbing are more effective than aggressive scrubbing.
- Matte Mod Podge for Wood Grain: Choose Mod Podge Matte to allow the natural wood grain to show through the lighter areas of your photo for a rustic effect.
- Smooth Wood Surface: Sanding your wood beforehand ensures better Mod Podge adhesion and a smoother final image.
- Reverse Your Image: Remember to reverse your photo before printing to ensure it appears correctly after transferring.
Creative Ideas: Beyond Basic Photo Wood Transfer
Once you’ve mastered the basic technique, explore these creative ways to use mod podge photo transfers on wood:
- Personalized Gifts: Create unique and heartfelt gifts for family and friends.
- Custom Home Décor: Design personalized wall art, coasters, or decorative trays.
- Photo Coasters: Transfer favorite snapshots onto wood slices to create personalized coasters.
- Holiday Ornaments: Make custom photo ornaments for Christmas or other holidays.
- Rustic Wedding Décor: Craft charming and personalized decorations for a rustic-themed wedding.
- Kids’ Room Art: Decorate wooden plaques with children’s artwork or photos for a personal touch in their rooms.
Conclusion
Transforming photos onto wood with Mod Podge is a rewarding and accessible craft. By following our foolproof method, especially embracing the 72-hour drying trick, you can achieve beautiful and lasting results without the common frustrations. So gather your supplies, choose your favorite photos, and start creating personalized wood art pieces that you’ll treasure for years to come! Share your creations with us – we’d love to see your mod podge photo transfer projects!
Related Projects You Might Love
- 40 of the best photo crafts
- 20 DIY photo gifts
- Easy photo transfer with tattoo paper
- Heart family photo display