Managing your photo library on your Macbook often involves a degree of personal curation. Apple’s Photos app provides a handy feature to hide photos, keeping sensitive or less relevant images out of your main view. This is a great way to maintain privacy and keep your photo library organized. If you’ve been utilizing this feature, you might be wondering how to access those hidden gems again. This guide will walk you through the simple steps to view hidden photos on your Macbook, ensuring you can always access all your memories when you need them.
Finding the Hidden Photo Album on Your Macbook
The first step to viewing your hidden photos is to reveal the Hidden album within the Photos application. By default, this album is tucked away, but making it visible is a straightforward process. Here’s how you can bring your Hidden album into view:
Step-by-step Guide to Show Hidden Album
-
Open Photos Application: Launch the Photos app on your Macbook. It’s usually found in your Applications folder or on your Dock.
-
Navigate to the View Menu: Once Photos is open, look at the menu bar at the top of your screen. Click on “View”.
-
Select “Show Hidden Photo Album”: In the dropdown menu, you will find an option that says “Show Hidden Photo Album”. Click on this option.
 Hidden album highlighted in MacOS Photos app.
Once you select this, the Hidden album will become visible in the sidebar of your Photos app, usually under the “Photos” or “Albums” section.
Accessing and Viewing Your Hidden Photos
With the Hidden album now visible, you’re just a couple of steps away from viewing your concealed photos. Accessing the album itself is secured, adding an extra layer of privacy to your hidden collection.
Step-by-step Guide to Access Hidden Photos
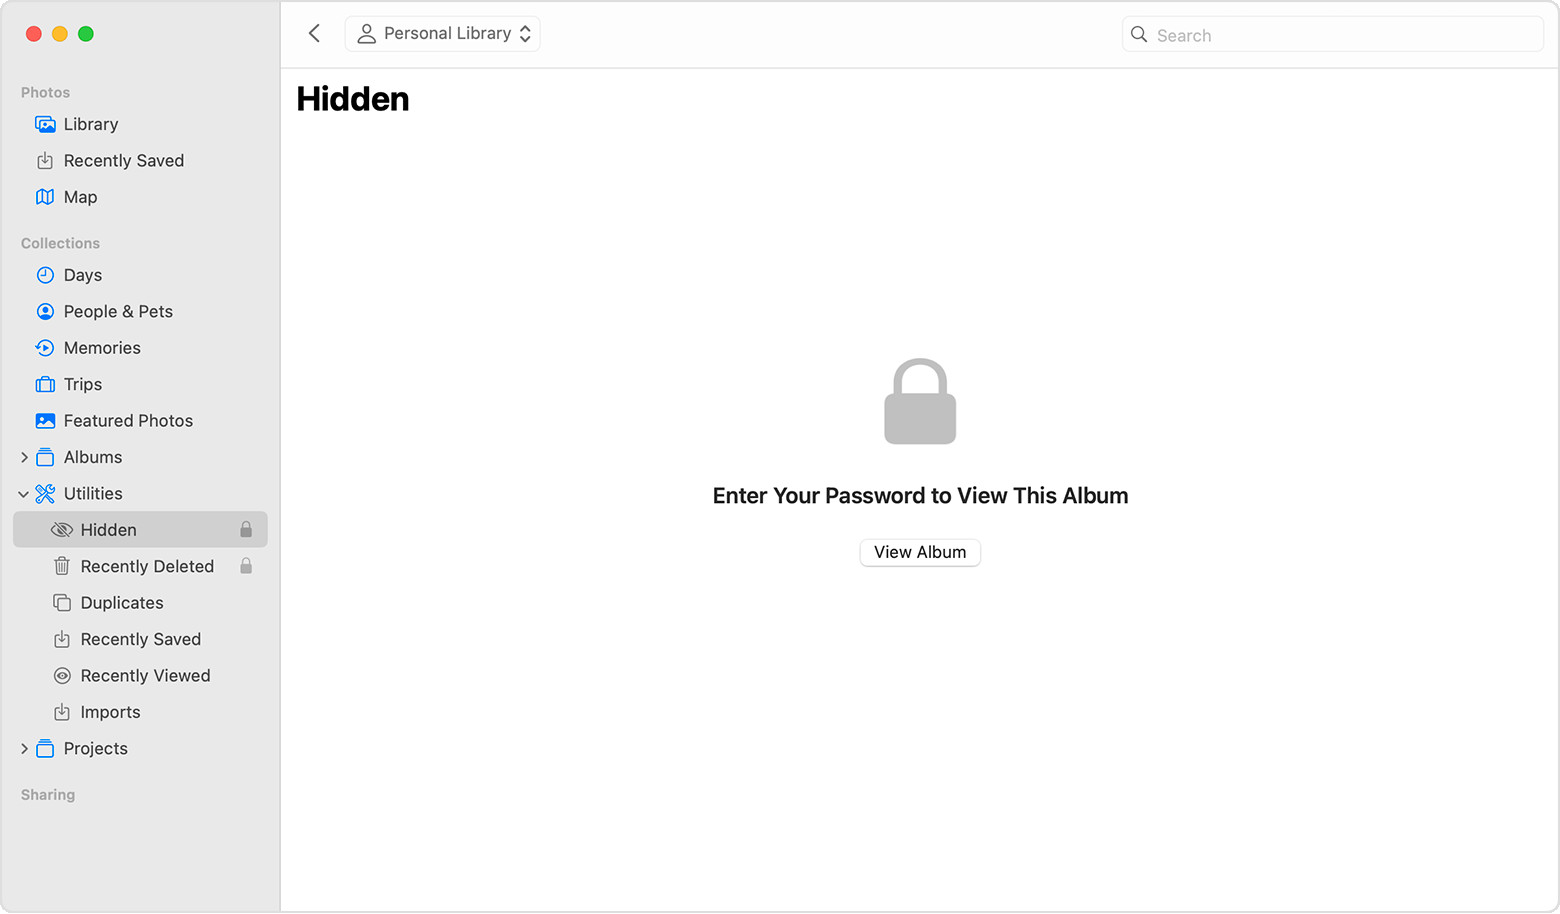
- Locate the Hidden Album: In the Photos app sidebar, find the “Hidden” album, it’s typically listed under “Utilities”.
- Select the Hidden Album: Click on the “Hidden” album to open it.
- Unlock the Album: For security, the Hidden album is locked by default. You will be prompted to unlock it using Touch ID or your Mac login password. Use your preferred method to gain access.
After unlocking, you will be able to see all the photos and videos you have previously hidden. You can browse through them, view them in detail, or even decide to unhide them if you wish.
Unhiding Photos on Your Macbook
Viewing your hidden photos is just one part of managing your privacy. If you decide that you no longer need certain photos to be hidden, unhiding them is just as simple as hiding them in the first place.
Step-by-step Guide to Unhide Photos
- Open the Hidden Album: Follow the steps above to view your hidden photos and access the Hidden album.
- Select Photos to Unhide: Browse through the album and select the photo or video you want to unhide. You can select multiple items by holding the Command key while clicking.
- Control-Click or Right-Click: Once you’ve selected the photo(s), control-click (or right-click) on one of the selected images.
- Choose “Unhide Photo”: In the context menu that appears, select “Unhide Photo”. Alternatively, you can also navigate to the menu bar, click on “Image”, and choose “Unhide Photo”, or simply press
Command-L.
After unhiding, the photos will be moved back to your main Photos library and will no longer be in the Hidden album. They will reappear in your regular albums and moments based on their dates.
Why Use the Hidden Album?
The Hidden album feature is more than just a novelty; it’s a practical tool for managing your photo library and privacy. Here are a few reasons why you might find it useful:
- Privacy: Hide personal or sensitive photos that you don’t want easily visible to others who might use your Macbook.
- Organization: Temporarily remove photos that are not currently relevant but you don’t want to delete permanently. This helps keep your main photo library cleaner and easier to navigate.
- Decluttering: Hide duplicate photos or less favored shots while deciding whether to permanently delete them, streamlining your photo browsing experience.
By understanding how to both hide and view hidden photos on your Macbook, you gain better control over your digital memories and ensure your photo library remains exactly as you want it. Whether it’s for privacy, organization, or simply decluttering, the Hidden album is a valuable feature within the Apple Photos ecosystem.